3
Controls & Displays
13
English
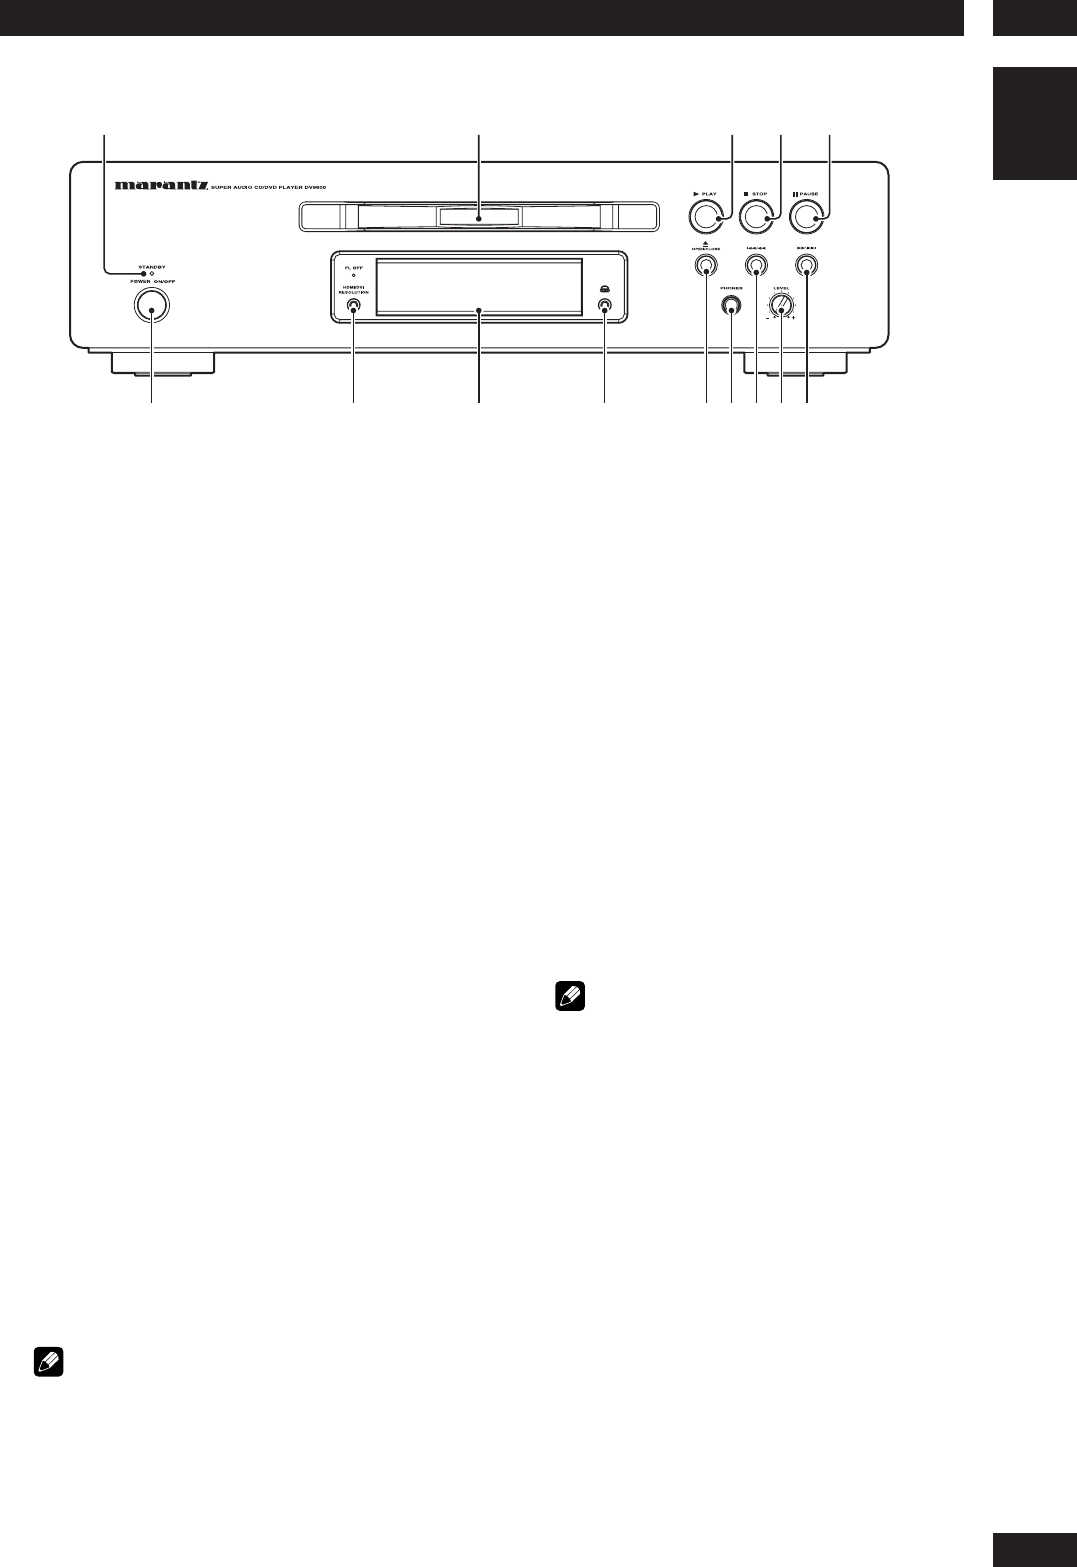
Front panel
1
2
345
6
789
!=~-
0
1STANDBY indicator
• Lights when the unit is in standby.
2Disc tray
• Place the disc here.
3 3 (PLAY)
• Begin the disc play.
4 7 (STOP)
•Stops the disc play.
5 8 (PAUSE)
•Pausing the disc play.
6POWER ON/OFF
•Press to turn the power on, and press it again
to turn the power off.
7 HDMI/DVI RESOLUTION
• The HDMI on/off state toggles when pressed
for three seconds or more. When on, the
display indicates HDMI ON; when off, it
indicates HDMI OFF.
•Pressing this button while HDMI is enabled
displays the current resolution. Pressing this
button again while the resolution is displayed
allows you to select the resolution in the
sequence below:
480i/576i 480p/576p 720p 1080i
1080p 480i/576i
An asterisk (*) precedes resolutions supported
by the connected TV. For example: *720p
See page 52 for more details.
Note
• HDMI ON is set when the unit is shipped from
the factory.
•Set HDMI under the Setup menu to use HDMI
functions (see page 52).
8Display – page 14
• Operation indications are displayed here.
9Dolby Head Phone Mode
• Each time it is pushed, the operation changes as
shown below.
DH 1: Reproduces a room that is small with little
reverberation.
DH 2: Reproduces a room with more
reverberation than DH1.
DH 3: Reproduces a larger room than DH1.
Bypass: It outputs normal Audio Sound without
Dolby effect.
10 0 (OPEN/CLOSE)
•Press to open and close the disc tray.
11 Head Phone Jack
• Connect the head phone.
Note
• Audio is not output from the analog audio jacks
or the HDMI jack when headphones are being
used.
• Audio is not output from the headphone jack
when i.LINK is in use.
12 4 /1
•Press to skip reverse title/group, chapter, or
track. You can also press and hold this button to
scan the above.
13 Head Phone Level
•Adjust the output of the head phone.
•When using the Head Phone, Analog audio
output and HDMI audio output cannot be
output.
14 ¡/¢
•Press to skip forward title/group, chapter, or
track. You can also press and hold this button to
scan the above.


