C695M-B (11/03) 9
CHANNELS AND MONITOR
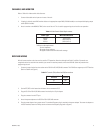
Refer to Table A for video coaxial cable distances.
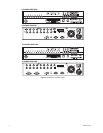
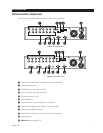
1. Connect video cables to the inputs on the rear of the unit.
2. If looping is desired, attach BNC monitor cables to the appropriate output BNCs (DX3108 models) or use the provided looping output
cables (DX3116 models).
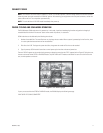
3. Attach a monitor to the MON OUT BNC on the rear of the unit. This is used for programming the unit and for user operation.
Cable Type* Maximum Distance
RG59/U 750 ft (229 m)
RG6/U 1,000 ft (305 m)
RG11/U 1,500 ft (457 m)
*Minimum cable requirements:
75 ohms impedance
All-copper center conductor
All-copper braided shield with 95% braid coverage
RECEIVER WIRING
Wire all camera receiver units that are to be used for PTZ operations. Note that although both Pelco P and Pelco D protocols are
recognized and can be used with the controller, you cannot mix receiver protocols on the same DX3100. Select the protocol when
programming the unit.
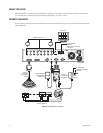
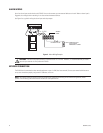
1. Connect the control wires from the receiver to the RS-232 to RS-422/RS-485 converter. The DX3100 can support up to 16 PTZ devices.
(Refer to Table B and Figure 4.)
Table A. Video Coaxial Cable Requirements
Table B. Transmit (TX) to Receive (RX) Connections
RS-232 to RS-422/RS-485
Converter Receiver
TX+ RX+
TX- RX-
2. Set the DTE/DCE switch located on the bottom of the converter to DCE.
3. Plug the RS-232 to RS-422/RS-485 converter into the 9-pin to 25-pin adapter.
4. Plug the converter into the PTZ port.
5. Attach the power adapter to the RS-232 to RS-422/RS-485 converter.
6. Plug the power adapter into a power source. The standard European plug is attached to the power adapter. To convert the adapter to
the USA standard, loosen the Phillips screw and remove the European plug (refer to Figure 4).


