


43
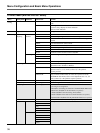
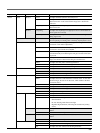
Menu 2ndary menu Submenu Control item Function
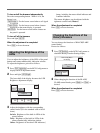
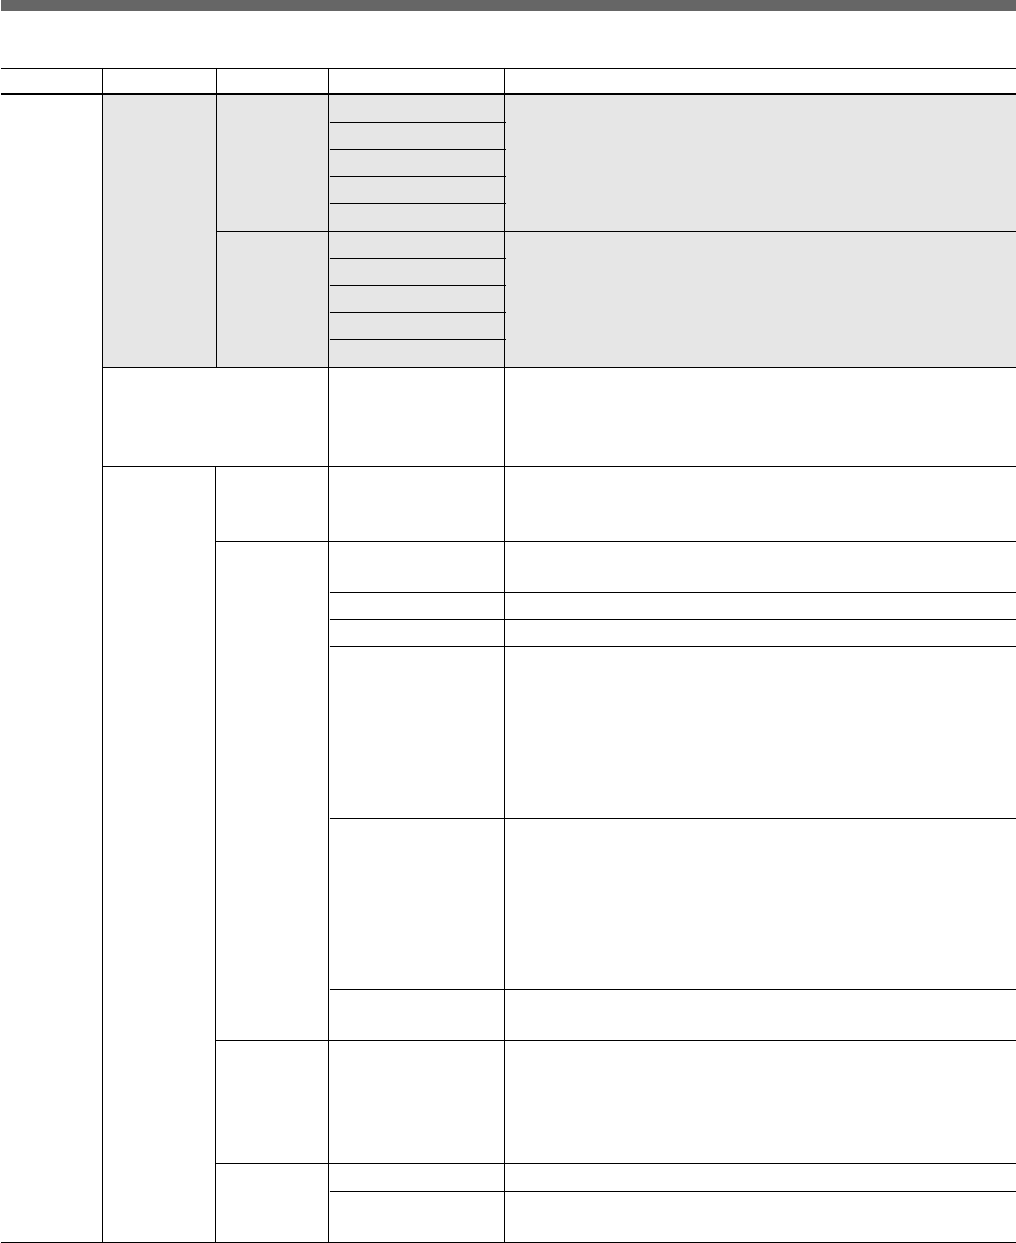
RCP Config Date/Time Date • Year Date adjustment of the clock built into the unit
Set • Month
• Day
Set
Cancel
Time • Hour Time adjustment of the clock built into the unit
• Minute
• Second
Set
Cancel
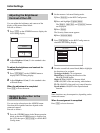
Comm Type Protocol Type
a)
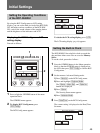
To set the connection mode
P Type 2: When connected to DXC-D35, DXC-D50, CCU-TX7,
CCU-D50, DSR-300/370/390/500/570
P Type 7: When connected to CCU-TX50
Security
Engineer Mode
To set whether to display “Status”, “Menu Set”, and “Code No.” or
not (With Engineer Mode ON, all operative menu items are
displayed regardless of the Advance Mode setting.)
Status
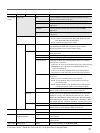
b)
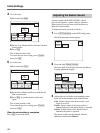
Advance Mode To switch between the Normal Setting mode and Advanced Setting
mode of the menu
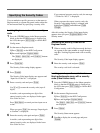
Screen Md Enable To set whether switching between 4:3 and 16:9 is enabled or not
Pan/Tilt Enable To set whether panning/tilting adjustment is enabled or not
Power On Active To specify the Panel Active and Iris/Master Black Active statuses
when the unit is started up
Full Active: To set the unit to the Panel Active status when started up
IRIS/M.Black: To set the unit to the Iris/Master Black Active
status when started up
Lock: To set the unit to the Panel Lock status when started up
Keep state: To set the unit to the previous state when started up
Panel Active Lock To set whether to use the Panel Active Lock function with a security
code or not.
Disable: Not to use the Panel Active Lock function
Enable: To use the Panel Active Lock function by specifying a
new security code
Enable (Engineer Code): To use the Panel Active Lock function
with the same security code as that for Engineer Mode
Code Change To change the security code for Panel Active Lock (displayed only
when a security code for Panel Active Lock has been set)
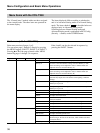
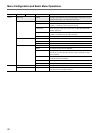
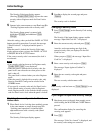
Menu Set
b)
To select an item to be displayed on the function menu. Select the
number (1-7) using • Cur, and select the item with • Sel: White,
Black, Flare, Gamma/Knee, Detail, Cross Color, Skin Detail, Black
STR, Black Gamma, Knee/DL, Gamma, Matrix, Skin Matrix, White
Clip, TLCS, Auto Iris, CLS/EVS, Auto Knee, Low Key Sat, no jump
Code No.
b)
Code No. To enable/disable the security code setting for Engineer Mode
Code Change To change the security code for Engineer Mode (displayed only
when a security code for Engineer Mode has been set)
(cont.)
a) Be sure to power off the camera system and then power it on again after changing the “Protocol Type” setting.
b) The items “Status,” “Menu Set,” and “Code No.” are displayed only in Engineer Mode.