


4 − Basic operations
26 TASCAM DV-RA1000HD
The check screen
The check screen enables you to view the
DV-RA1000HD firmware version, the level of the inter-
nal battery, and the status of the loaded DVD disc.
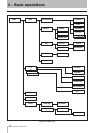
1 From the home screen, press the MENU key.
The main menu appears.
2 Select SYSTEM SETUP, then press ENTER.
3 Select CHECK, then press ENTER.
The check screen appears.
4 Press a function key to which the information
screen you wish to view is assigned.
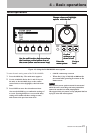
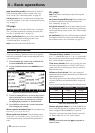
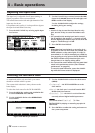
Press the F1 (VERSION) key to view the firm-
ware version numbers.
The screen lists (from the top) the
DV-RA1000HD firmware version number,
firmware build number, and the internal
drive firmware version number.
Figure 4.14: Firmware version numbers
•
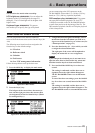
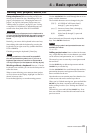
Press the F2 (BATTERY) key to view the battery
level.
The battery should last for several years
from the date of purchase. Contact your
TASCAM distributor if the battery check
screen indicates “NEED TO CHANGE”
or “EMPTY.”
Figure 4.15: Battery level
Press the F3 (MEDIUM) key to display the media
information.
The screen indicates the support information
regarding the currently-loaded DVD disc
and the number of rewriting operations car-
ried out on the disc.
Figure 4.16: Media information
•
•
Clock/calendar
The DV-RA1000HD contains a battery-powered clock/
calendar which timestamps all files recorded on a
DVD/HD disc. These timestamps are not visible from
the DV-RA1000HD, but may be viewed as part of the
file metadata when the unit is connected to a computer.
(See “Use with a computer” on page 59.)
Setting the clock follow these steps:
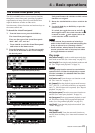
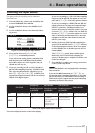
1 From the home screen, press the MENU key and
select SYSTEM SETUP. Press ENTER.
2 Select CALENDAR and press ENTER.
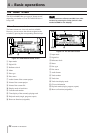
Figure 4.13: Editing the clock settings
The currently-set date is shown in “military”
(year/month/day) format, as above or in US/Jap-
anese format (month/day/year) format.
You can change this with the preferences. (See
“Calendar display” on page 24.) Also note the
time zone setting in the preferences, which allows
you to compensate for time differences if your
project crosses to another time zone for master-
ing, etc. (See “Time zone” on page 24.)
3 Use the cursor keys to navigate around the elds,
and the JOG/DATA dial to change values.