


6 − DVD±RW/HD playback & recording
TASCAM DV-RA1000HD 43
Close operation
You must perform the “close” operation when using a
DVD-RW disc on the DV-RA1000HD to enable your
computer to read data from the disc.
If you perform the full format operation with a
DVD-RW disc, the DV-RA1000HD will automatically
carry out the close operation.
If you perform the quick format operation, follow the
steps below to perform the close operation. However,
when the background format on a quick-formatted disc
is complete, the DV-RA1000HD will automatically car-
ries out the close operation.
After a quick-formatted disc is “closed,” you can use
only the formatted area on the disc.
1
From the main menu, select the
DISC
sub-menu,
then press the
ENTER
key.
The DV-RA1000HD opens a disc menu.
2
Select
CLOSE
, then press the
ENTER
key.
A popup message asks whether you wish to ex
-
ecute the close operation.
3
Press the
ENTER
key.
The close operation starts. When it is complete,
the unit displays the home screen.
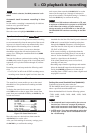
When a DVD-RW disc is “closed,” the disc
status indicator on the home screen changes
from OPEN to CLOSE.
Open operation
If you “open” a DVD-RW disc that was “closed” after
the quick format operation, you will be able to write
data in the unformatted area. However, such an “open”
disc cannot be read or written on a computer.
1
From the main menu, select the
DISC
menu, then
press the
ENTER
key.
The DV-RA1000HD displays a disc sub-menu.
2
Select
OPEN
, then press the
ENTER
key.
A popup message asks whether you wish to ex
-
ecute the open operation.
3
Press the
ENTER
key.
The open operation starts. When it is complete,
the unit displays the home screen.
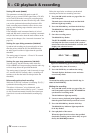
When a DVD-RW disc is “opened,” the disc
status indicator on the home screen changes
from CLOSE to OPEN.
Full-formatted DVD-RW discs cannot be
opened.
•
•
•
Close and open operations for DVD-RW discs
As a disc can contain more than one project, you can
also use the menu system to create a project on a disc
that has already been formatted, and contains a project.
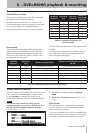
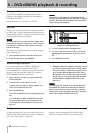
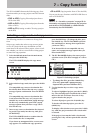
1
Select the
PROJECT
sub-menu from the main menu.
2
Highlight
CREATE
and press
ENTER
.
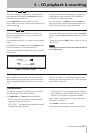
This brings up the screen allowing you to enter
the name and properties of a project, as de-
scribed in the previous section.
Figure 6.4: Creating a new project
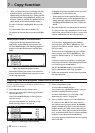
Adding a new project
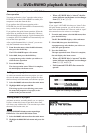
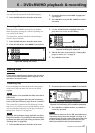
Add notes on artists, recording details, etc. to a project.
Unlike a written disc insert or tape label, these notes
will always stay with the disc. You can enter up to 1000
characters for session notes, etc.
NOTE
The DV-RA1000HD displays notes regarding a
DVD±R disc. You cannot edit these notes.
1
Select the
PROJECT
sub-menu from the main menu.
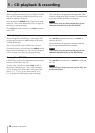
2
Highlight the
PROJECT TEXT
sub-menu and press
EN-
TER
.
Figure 6.5: Adding notes to a project
Adding notes to a project