


53
1.4 Change the Record & Timer Properties Via the network
Follow the instructions below to reconfigure the record and schedule recording settings via the network.
A.
Set the regular record settings
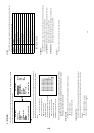
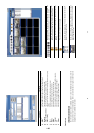
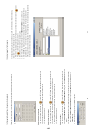
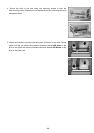
1. When in the single –device mode, click to enter SETUP page. (See the sample screen as above A)
2. Select a desired recording rate and Quality from the respective drop-down list
3. Click the OK tag to proceed.
Set the Alarm record settings
1. When in the single –device mode, click to enter SETUP page. (See the sample screen as above A)
2. Set the ALRM SETTING to ON to enable the drop-down list in the ALARM SETTING area.
3. Select a desired recording rate and Quality from the respective drop-down list.
4. Click the OK tag to proceed.
Set the record timer
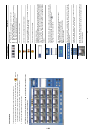
1. When in the single –device mode, click to enter SETUP page. (See the sample screen as above A)
2. Set the RECORD TIMER to ON to enable the RECORD TIMER setting area. All of the MODIFY buttons will
appear.
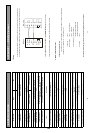
3. Click the MODIFY button to set the schedule for recording for each day. (See the sample screen below)
Enter in both the START TIME & END TIME boxes a specific Hour: Minute and click OK to return to
the SETUP page.
4. When all required settings are done, click OK to proceed.
54
1.5 Archive Images To The Computer
A viewing playback images can be stored into a local PC in the JPEG format. Follow the following
instructions to save the viewed images to your PC.
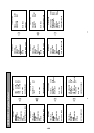
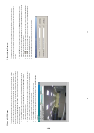
1. Whenever in the playback mode press the Pause button to freeze the screen and enable the . button.
2. Press to enter the following sample screen.
3. Select a folder on the computer for copying images to.
4. Enter the number of subsequent images into the NUMBER OF SAVING box you wish to save.
5. Click the SAVE tag; the program will automatically copy the displayed images starting with the most
updated image ( with ﹡in the tile bar ) into the designated folder,. The images are saved in the
DVRxxx.jpg file name, which are displayed in the on lower-right box. To view a saved image, please follow
the instructions in the next section to proceed.
1-27