


29
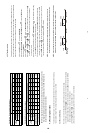
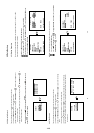
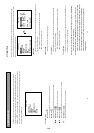
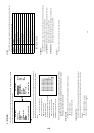
5. MAIN MENU
There are 7 submenus to the MAIN MENU to guide you through the setup of the DVR. The following
sections will instruct you step by step now to configure the operation setting and options. Press the
SETUP button
to access the MAIN MENU. Once inside the menu system, the on-screen menu allows
you to set up the key features of the unit. The functions of various buttons within the Main Menu mode are
described in the paragraphs below.
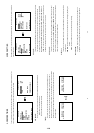
KEY FUNCTIONS
SETUP button
:
Press to enter the main menu. Press again to exit the setup mode.
RETURN button
:
Press to exit the current setup page and return to the previous page.
Right/Left
buttons :
Press to select the desired item or entry for the setting.
Up/Down buttons :
Press to highlight the desired option or to select the context for the setting.
ENTER
/
SAVE
ENTER/SAVE
button :
Press to enter the selected item and to save the settings.
MAIN MENU
TIME/ TITLE
RECORD TIMER
RECORD
ALARM
COMMUNICATION
DISK
SYSTEM
30
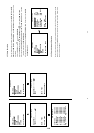
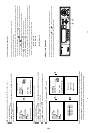
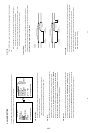
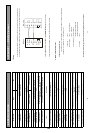
5.1 TIME/ TITLE
This device is able to print inerasable system time and title information directly onto images during
recording. This page allows users to set the time and desired title, and to decide if the function is to be
activated. The entries are listed as follows.
TIME STAMP :
The Time Stamp option is used to stamp the system time onto images during recording process.
The Time Stamp is inerasable.
ON : Enables the device to stamp the time onto images during recording.
OFF : Disables the stamping function.
TIME SETTING :
This option is used to set the system time and date.
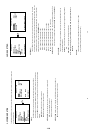
TITLE STAMP :
The Title Stamp option is used to stamp the system title onto images during the recording
process. The Title Stamp is inerasable.
ON : Enables the device to stamp programmed title onto images while recording.
OFF : Disables the stamping function.
TITLE SETTING :
This option is used to set the system title. The Title can consist of up to twelve characters with
the letters A-Z, numbers 0-9 or blank spaces.
NOTE: If you wish to have system-time on an archived image in a floppy, the “TIME STAMP”
option must be set to “ON” for recording.
NOTE: No matter whether the “TIME STAMP” option is set to “ON” or “OFF”, the unit will
always encode the system time into the video while recording. So you can always have
system time to be displayed on the screen by pressing the “DISPLAY” button. However,
if two time messages have overlapped on the screen, please press the “DISPLAY”
button to stop decoding time from the video so that the unit will only display the
stamped time only.
MAIN MENU
TIME/ TITLE
RECORD TIMER
RECORD
ALARM
COMMUNICATION
DISK
SYSTEM
GO TO TIME/ TITLE PAGE
TIME/TITLE
TIME STAMP : OFF
TIME SETTING : SET
TITLE STAMP : OFF
TITLE SETTING : SET
MAIN PAGE
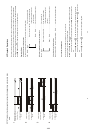
REC TIME STAMP
1-15