198
Using the Timeline and Viewing Events
Extracting video to save to another location
A portion of video can be saved to another location if required. Files are automatically
saved as QuickTime .mov format and can be viewed in a QuickTime player or any other
player that supports .mov files. A maximum of one hour of video can be extracted at a
time. If you do not have a QuickTime player installed, visit http://www.quicktime.com for a
free download.
●
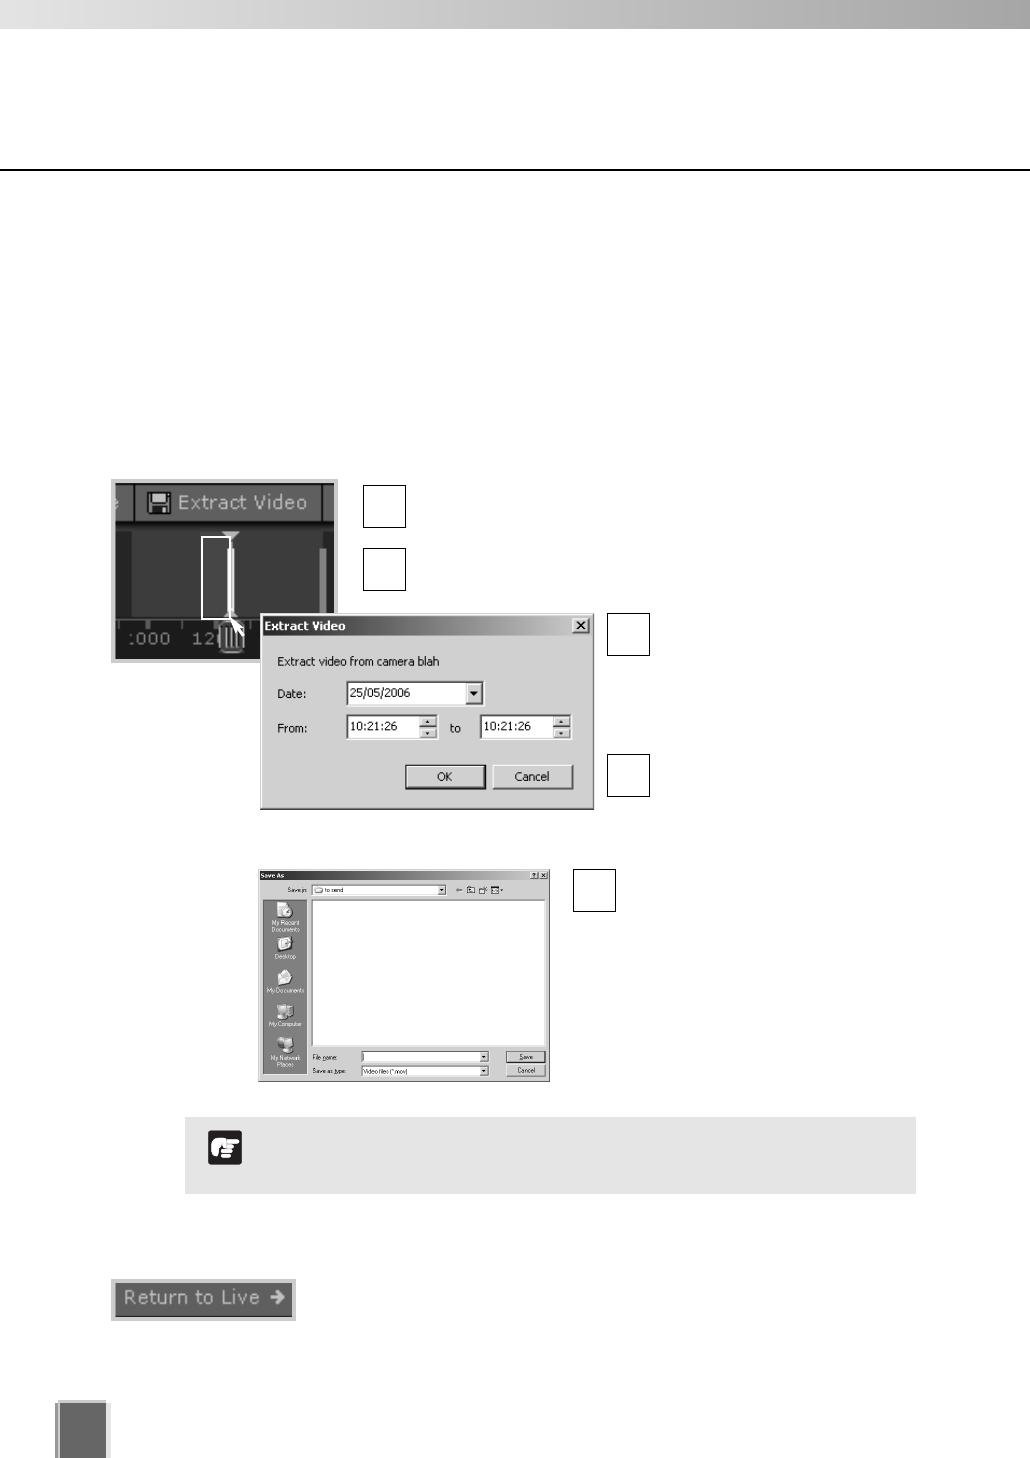
Select a Video Window and time period then click Extract Video.
Click a Video Window to highlight it, then click and drag
a time period for it in the Timeline.
Click Extract Video. The Extract Video dialog opens.
In the Date: field, click each
segment and overwrite with
desired date. Alternatively
click the down arrow to use
the calendar.
Click up/down arrows to
select a time or click each
time segment and overwrite
existing value.
Click OK to display the Save
As... dialog. The Save As dialog
opens. Browse to a suitable
folder in which to save the
extracted video, and click Save.
5
4
3
2
1
●
Returning to Live Video
To return to the live video, click Return to Live ➞. The Playhead
returns to the live position in the Timeline.
You must select only one Video Window to extract video.
QuickTime player version 6.5.1 or later is recommended.
N
o
t
e


