


ENGLISH
81
4 Select »Automatically« or »Manually« and press »OK« to con-
firm.
5 Press »OK« to confirm the function.
6 Press »SETUP« to quit the menu.
Deleting data in the HDD archive
This function deletes all the data in the HDD archive.
Caution:
Even the protected recordings in the »HDD archive« are
deleted.
1 Press »SETUP« to open the setup menu.
2 Select »SETUP-MENU – Archive settings« ( ) with »
S
« or
»
A
« and press »OK« to confirm.
3 Select »Erase hard disc« with »
S
« or »
A
« and activate with
»OK«.
4 Enter the password »3 3 0 8« (or your personal password)
with the numerical buttons »1…0« and confirm with »OK«.
5 Select »OK« with »
a
« or »
s
« and press »OK« to confirm.
– Display: »The contents of the hard drive are deleted«.
»Empty« appears in the index screen in the HDD archive.
Note:
We recommend that you pull out the plug and then plug it in
again after you have deleted something.
Setting the display of the index picture
This function allows you to select whether the index picture for the
track is shown as a freeze-frame (static) or as a series of scenes
(dynamic) in the HDD archive.
1 Press »SETUP« to open the setup menu.
2 Select »SETUP MENU – Archive settings« ( ) with »
S
« or
»
A
« and press »OK« to activate.
3 Select »Preview Type« with »
S
« or »
A
« and press »OK« to
activate.
4 Select »Static« or » Dynamic« with »
S
« or »
A
« and press
»OK« to confirm.
5 Press »SETUP« to close the menu.
EDITING DATA ON THE HDD ARCHIVE
___
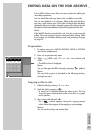
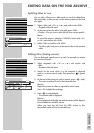
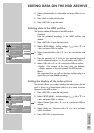
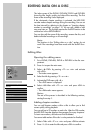
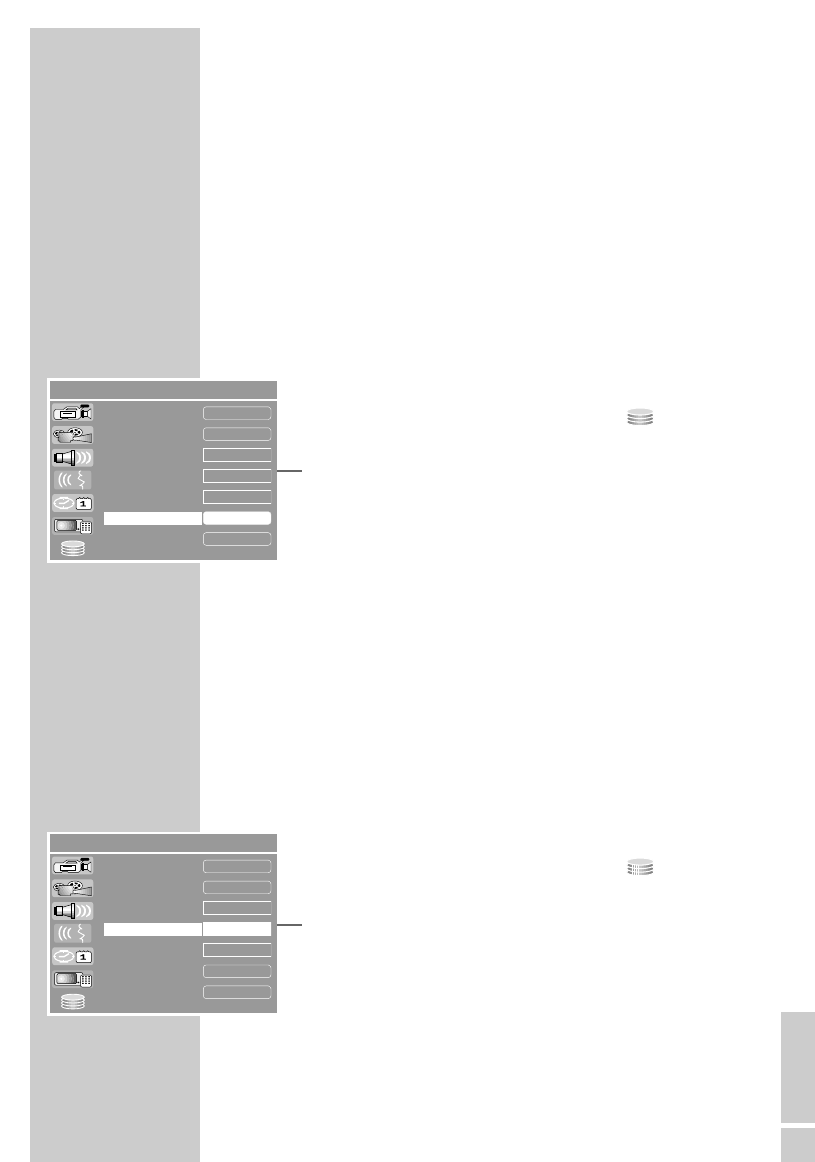
SETUP MENU – Archive settings
a
360 minutes
Go!
OK
Show
TimeShift buffer length
Hard disc Info
Harddisc Space Managemant
Preview Type
HDD/Disc Copy Option
Erase hard disc
Erase disc
High Speed
Dynamic
Manually
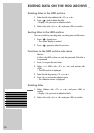
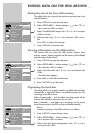
SETUP MENU – Archive settings
a
360 minutes
Go!
OK
Show
TimeShift buffer length
Hard disc Info
Harddisc Space Managemant
Preview Type
HDD/Disc Copy Option
Erase hard disc
Erase disc
High Speed
Dynamic
Manually