


21
ENGLISH
••••••••••••••••••••••••••••••••••••••••••••••••••••••••••••••••••••••••••••••••••••••••••••••••••••••••••••••••••••••
Basic Operations
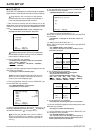
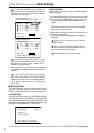
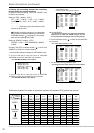
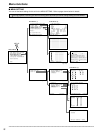
<TIME DATE ADJUST>
DAYLIGHT SAVING OFF
>>
DAY 28
MONTH 01
YEAR 2004
TIME 00:00:00
6. Turn the JOG dial clockwise to move the cursor (>>) to
“MONTH”.
When turning the JOG dial clockwise, the cursor
(>>) moves down. When turning counterclockwise,
the cursor (>>) moves up.
7. Repeat steps 4 ~ 6 to set “MONTH” and “YEAR”.
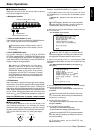
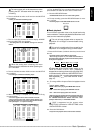
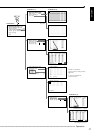
8. Turn the JOG dial to move the cursor (>>) to “TIME” and
turn the SHUTTLE ring clockwise twice.
• The “TIME” display reverses in color when the SHUTTLE
ring is turned the first time. When the ring is turned for the
second time, the display turns red and flashes.
<TIME DATE ADJUST>
DAYLIGHT SAVING OFF
DAY 28
MONTH 10
YEAR 2004
TIME 00:00:00
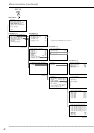
9. Turn the JOG dial to display “18” and turn the SHUTTLE
ring clockwise.
• The setting is confirmed and flashing stops.
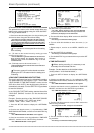
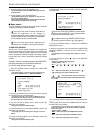
<TIME DATE ADJUST>
DAYLIGHT SAVING OFF
DAY 28
MONTH 10
YEAR 2004
TIME 18:00:00
The time is indicated using the 24-hour system.
10. Repeat steps 8 and 9 to set “MINUTE” and “SECOND”.
11. Turn the SHUTTLE ring clockwise.
• The setting is confirmed and flashing stops.
<TIME DATE ADJUST>
DAYLIGHT SAVING OFF
DAY 28
MONTH 10
YEAR 2004
TIME 18:30:00
12. Turn the SHUTTLE ring counterclockwise.
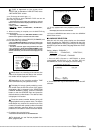
♦ Present time display
When turning on the unit power, the time/date display shown
to the right appears (in the case of DISPLAY MODE 3).
For setting other display modes, see
“DISPLAY MODE” page 32.
INFORMATION
This unit uses 4 digits to display the year. The
allowed display range is 99 years between 1/1/
2001 ~ 31/12/2099. The unit is also equipped with
a function to automatically calculate leap years.
The date returns to the year 2001 after 31/12/
2099.
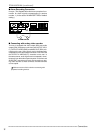
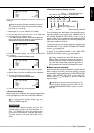
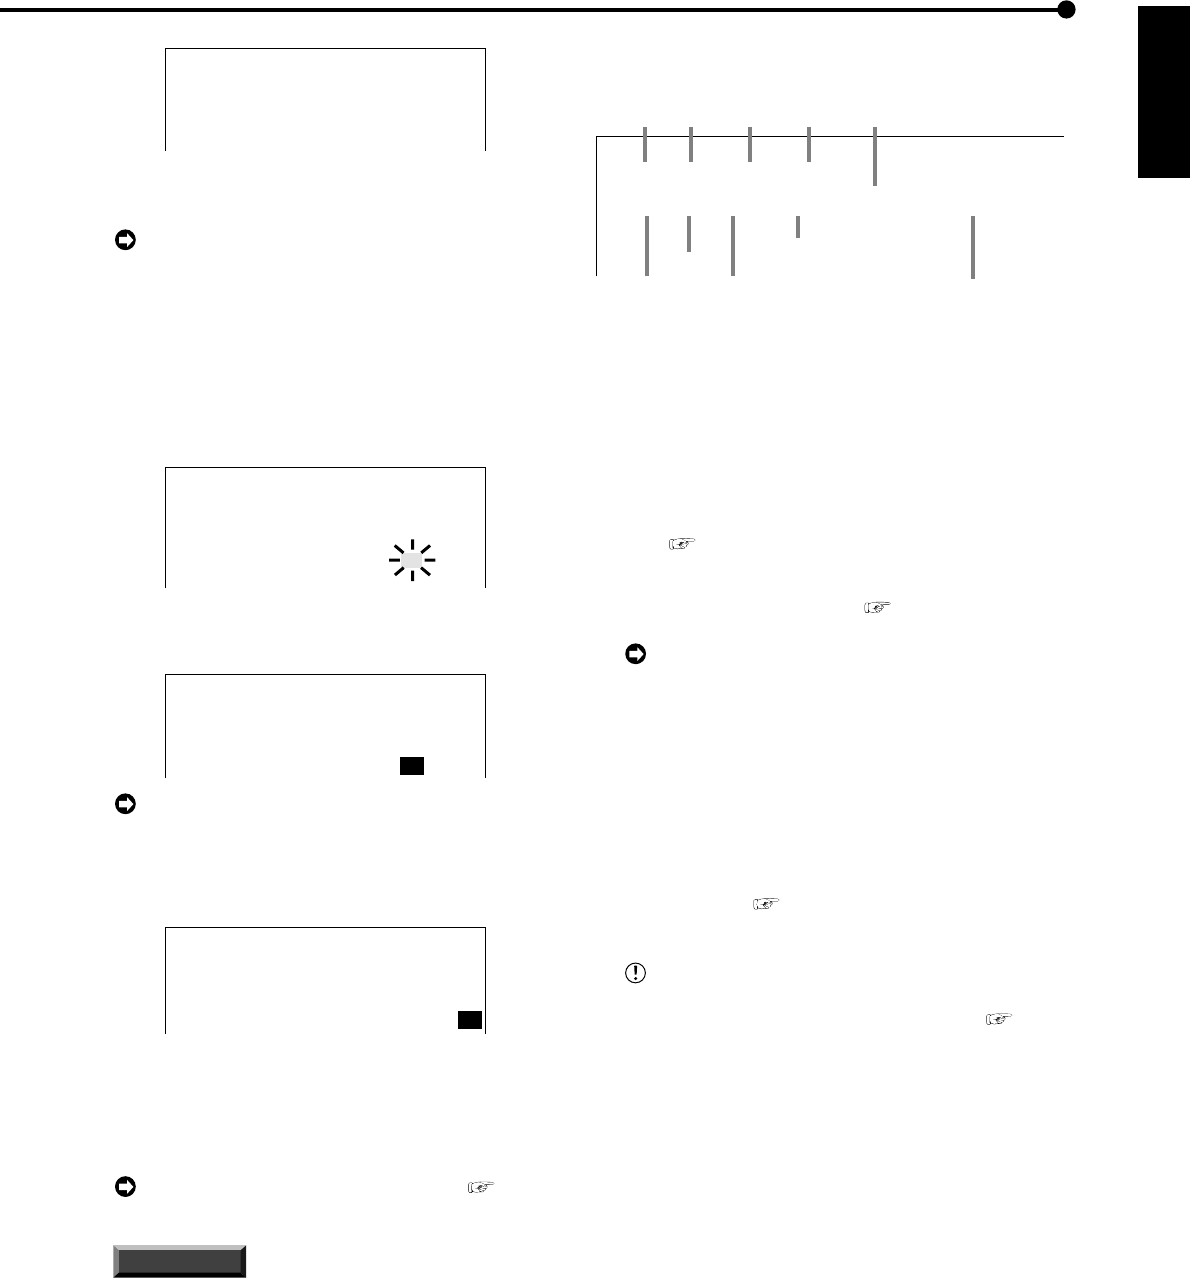
♦ Recorded capacity display function
01 - 01 - 2004
THU
00 : 00 : 00 12.5P 99% A00001
Year
Month
Day
Day of
the week
Alarm recording number
Minute
Second
Hour
Playback interval
(Single screen playback only)
Recorded capacity of
the Hard Disk
This unit displays the used space of the specified record-
ing device (HDD) on the screen when “REMAIN HDD” of
the <REAR TERMINAL SETTINGS> screen is set to
“MAIN”, “SUB”. The “%” indicates the ratio detected as HDD
against the total HDD capacity. The following settings are
required to enable this function.
1) Select the device and set the remaining capacity using
“REMAIN HDD” of the <REAR TERMINAL SETTINGS>
screen (
see page 50).
2) Select “3” for “DISPLAY MODE” in the <TIME DATE/
DISPLAY SETTINGS> screen (
see page 32).
During recording, the used HDD space is dis-
played. When recording is stopped, the display is
cleared (with the exception of when pausing record-
ing). The HDD usage display appears again after a
few moments when recording is started once more.
■ Basic manual recording
Normal recording using manual operation is explained here.
Before starting recording, recording settings must be
checked. After checking the settings of “HDD REPEAT REC
MAIN”, “HDD REPEAT REC SUB” in the <HDD SET-
TINGS> screen ( see page 47), the REC mode set-
tings are made.
Settings here are for normal recording only. For
timer recording, settings must be made on the
<TIMER PROGRAM SETTINGS> screen (
see
page 46).