


55
ENGLISH
••••••••••••••••••••••••••••••••••••••••••••••••••••••••••••••••••••••••••••••••••••••••••••••••••••••••••••••••••••••••••••
Operations
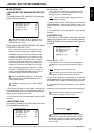
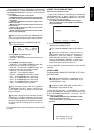
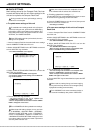
1. Press the SET UP button
}
<SETTINGS>
}
<INITIAL SET
UP/INFORMATION>
}
Select “WARNING LOG LIST” in the
<INFORMATION/SERVICE> (1/2) screen. Turn the SHUTTLE
ring clockwise.
• The <WARNING LOG LIST> screen appears.
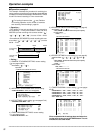
• The WARNING LOG LIST can display up to 1000 items. When
the number of items exceed this limit, the latest 1000 items
are displayed.
• button/turn JOG dial counterclockwise : Selection moves
to the next number.
• button/turn JOG dial clockwise : Selection moves to the
previous number.
• button : Displays the page with date prior to the date of
the currently opened page.
• button : Displays the page with date newer than the date
of the currently opened page.
When a failure occurs while the <WARNING LOG
LIST> is being displayed, exit the screen and display
the screen again. A new item will be added to the list.
Failures displayed in the WARNING LOG LIST
(
see pages 87,88).
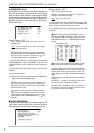
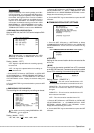
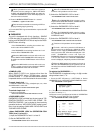
<WARNING LOG LIST>
NO DATE TIME WARNING
>>
0001 02-02-04 10:00:00 ALM ON
<The “WARNING” are displayed in red.>
• “P-LOSS” : Power failure.
• “SYS RST” : Reset button was pressed and the unit
was reset.
<The “WARNING” are displayed in green.>
• “ALM OFF” : The ALARM INTERRUPT button was
pressed and the unit was put on interruption.
• “ALM ON” : The ALARM INTERRUPT button was
pressed and the alarm interrupt was cancelled.
• “REC ON” : The record was started.
• “REC OFF” : The record was stopped.
• “PS-OFF” : PASSWORD LOCK was unlocked.
• “PS-1” : The PASSWORD level 1 was locked.
• “PS-2” : The PASSWORD level 2 was locked.
• “PS-3” : The PASSWORD level 3 was locked.
• “PS-4” : The PASSWORD level 4 was locked.
• “PS-E” : The SIMPLE LOCK was locked.
When recording is started, “REC ON” is registered
in <WARNING LOG LIST>. However, “REC ON” will
not be registered when recording is resumed after
power is restored.
For power outages that occur while timer recording
is standing by, “P-LOSS” that indicates a power outage
is not displayed. In addition, power outages that overlap
with timer recording start times and those where power
is restored after the recording end time are also not
recorded.
2. Turn the SHUTTLE ring counterclockwise or press the SET
UP button.
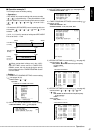
♦ RESET TO FACTORY SETTINGS
Menu screen settings are reset.
1. Press the SET UP button
}
<SETTINGS>
}
<INITIAL SET
UP/INFORMATION>
}
Select “RESET TO FACTORY
SETTINGS” in the <INFORMATION/SERVICE> (1/2) screen.
Turn the SHUTTLE ring clockwise.
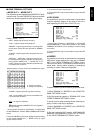
• The <RESET TO FACTORY SETTINGS> screen appears.
• When not resetting menu screen settings, turn the SHUTTLE
ring counterclockwise.
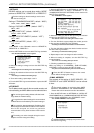
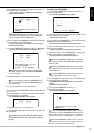
<RESET TO FACTORY SETTINGS>
>>
EXECUTE
SHUTTLE>>:EXECUTE,<<:CANCEL
2. Turn the SHUTTLE ring clockwise.
• The menu screen settings are reset.
The <TIMER PROGRAM> setting is not initialized.
When menu initialization is performed when a
setting change has been made for any one item of “IP
ADDRESS”, “SUB NET MASK”, “GATEWAY”,
“SERVICE PORT SETTING” on the <ETHERNET>
screen or “IP ADDRESS”, “TARGET” or “OWN” of the
<ALARM NOTIFICATION SETTING> settings, restart
is performed after the power has been cut.
3. Turn the SHUTTLE ring counterclockwise or press the SET
UP button.
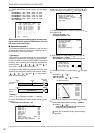
♦ DATA CLEAR
For deleting data in MAIN HDD, SUB HDD or CFC (Com-
pact Flash Card).
“SUB HDD DATA CLEAR” is appeared when the
“HDD SETTING” is selected on “PARTITION” of the
<INITIALIZATION> screen.
Performing “MAIN HDD DATA CLEAR” while in
“MIRRORING” mode deletes all data.
1. Press the SET UP button
}
<SETTINGS>
}
<INITIAL
SET UP/INFORMATION>
}
Select the desired item to clear
in the <INFORMATION/SERVICE> (1/2) screen. Turn the
SHUTTLE ring clockwise.
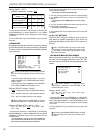
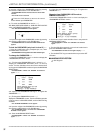
• “PUSH WARNING RESET KEY FOR 1 SECOND TO CLEAR”
appears on the bottom of the screen.
• To cancel the deletion, turn the SHUTTLE ring counter-
clockwise.
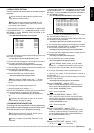
<MAIN HDD DATA CLEAR>
PUSH WARNING RESET KEY
FOR 1 SECOND TO CLEAR