


Chapter 3: NetCommand® Setup and Editing
37
NetCommand
®
Initial Setup
Setting up NetCommand gives you centralized control of
all A/V devices connected to the media center and allows
you to record TV shows using TV Guide On Screen®.
After you place IR emitters in front of connected A/V
devices, you will only need one remote control because
NetCommand can learn the IR codes used by the
remotes controls of A/V devices.
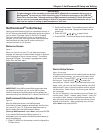
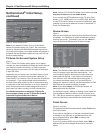
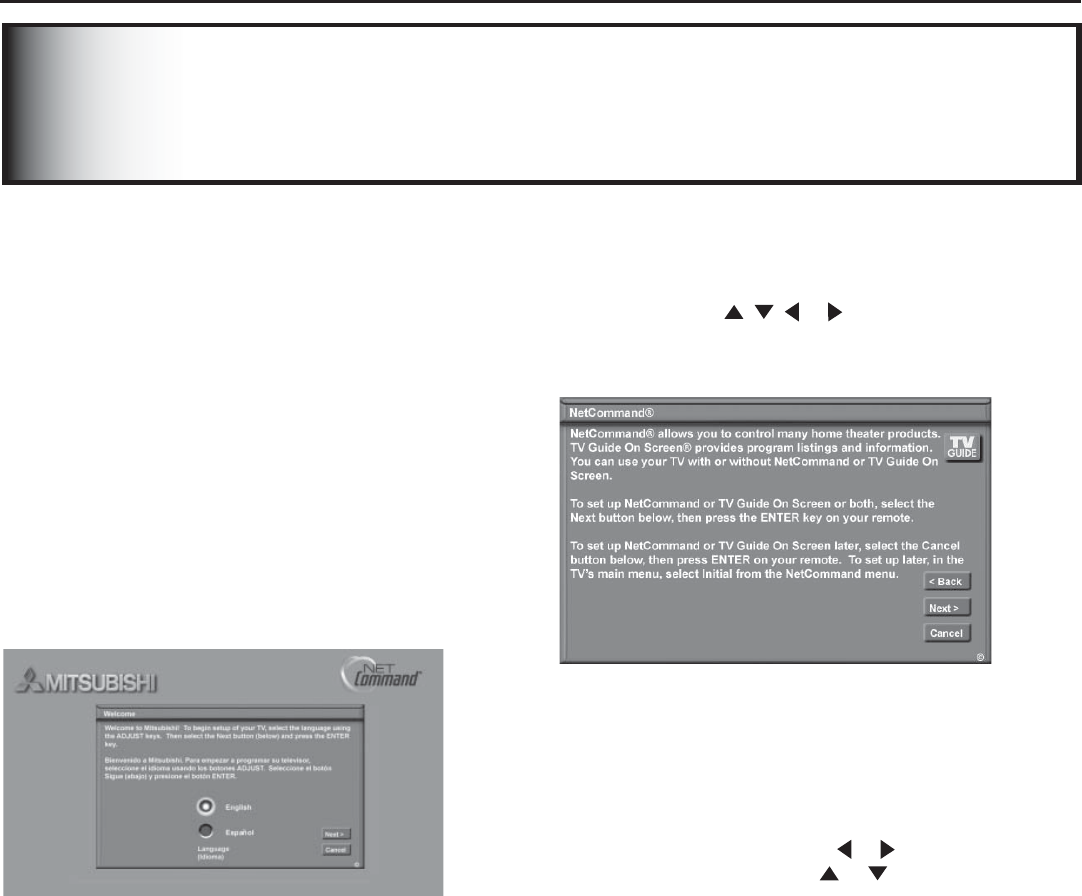
Welcome Screen
Figure 1
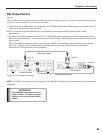
When you first turn on your TV, the Welcome screen
displays and asks you to select either English or Spanish
as the language for the on-screen menus. The default
language is English. To change Language later, select
Setup from the Main Menu.
Figure 1. Welcome screen
IMPORTANT: If the NetCommand Welcome screen does
not appear the first time you turn on the HDTV system,
check to make sure the media center and the display are
connected using both MonitorLink™ cables (Control & A/V).
NetCommand (Information) Screen
Figure 2
After the Welcome screen, the NetCommand
(Information) screen displays automatically the first time
you power On your TV. This screen describes how to
start or delay the initial NetCommand Setup.
T
o set up NetCommand: select Next> and press
ENTER.
If you cancel NetCommand Setup before it is
completed, you can restart the NetCommand setup by
doing the following:
1. Press TV MENU on the remote control to display the
TV Main menu.
IMPORTANT
To take advantage of the versatility of your new HDTV, Mitsubishi recommends that you set up
NetCommand
®
as soon as you finish connecting your A/V devices and power on the LCD Flat
Panel TV for the first time. Although setting up NetCommand is optional, TV Guide On Screen
®
can not control connected cable boxes or record TV programs unless NetCommand is set up. You
also have the option of setting up NetCommand at a later time.
Figure 2. Information screen
2. Select NetCommand. The available options will be:
Add, Review and Initial. Change and Delete will be
grayed out.
3. Press ADJUST , , or to select Initial.
4. Press ENTER. The Device Setup screen displays.
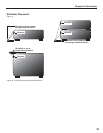
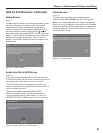
Device Setup Screen
Figure 3, next page
If the devices connected to the media center are already
in NetCommand memory, you can quickly select them
at this screen. Press ADJUST or to move to each
device type. Press ADJUST or to select the
manufacturer. Select “Other” if the manufacturer is not
listed. Later, you can use the Change setting in the Edit
NetCommand menu to learn the remote control signals
for this device. Select “None” for device types that are
not connected.
For the A/V Receiver, if the manufacturer is not listed, you
cannot select “Other”. Instead, select “None”. Later, you
can use the “Add” feature in the NetCommand menu to
have the media center add and learn the remote control
signals for this device. After completing your choices,
select Next> and press ENTER.