


18
RQT7394
Getting started
STEP
5
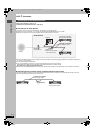
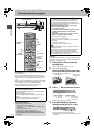
Setting up the Network
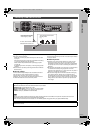
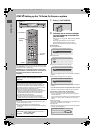
Refer to the control reference on page 16.
When connecting a computer via a router with its
DHCP enabled
Confirm “TCP/IP Settings” is set to “Automatic (DHCP)”
(➡ page 16, step 6).
The settings on page 18–19 are not required.
When connecting a computer via a router with its
DHCP disabled
Please confirm the following were carried out correctly.
1 Check the computer’s IP address (➡ right, step 4).
2 Enter the DVD recorder’s IP address manually (➡ page 19).
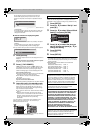
On the computer
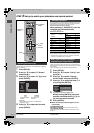
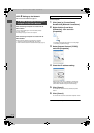
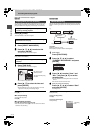
1 Click [start] ➡ [Control Panel].
Double-click [Network Connections].
2 Right-click the [Local Area
Connection]
§
icon and click
[Properties].
§
A message may appear below the icon such as [Bridge
Connections] or [Network Bridge].
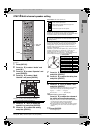
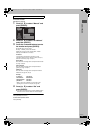
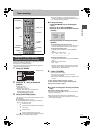
3 Select [Internet Protocol (TCP/IP)]
and click [Properties].
4 Check the IP address setting.
Please make a note of the “IP address”, “Subnet mask”,
“Default gateway” and “Preferred DNS server” settings
(These will be needed during DVD recorder setting).
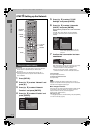
5 Click [Cancel].
You will exit the “Internet Protocol (TCP/IP) Properties”
window.
6 Click [Cancel].
You will exit the “Local Area Connection Properties” window.
≥Screen shots reprinted by permission from Microsoft Corporation.
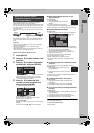
To be able to operate this unit from a
computer on the Home Network
To check the computer’s IP address
7394en.book 18 ページ 2004年7月20日 火曜日 午後7時26分