


65
RQT7394
Convenient functions
Channel/Clock settings when TV Guide On Screen
TM
system is not used
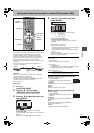
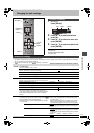
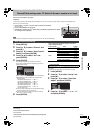
Refer to the control reference on page 61.
Preparation:
If the television program list has already been downloaded, return the unit to the factory preset condition using the steps indicated below.
When the unit is on and stopped
1 Press and hold [X CH] and [W CH] on the main unit for about five seconds.
The unit turns off.
2 Press [Í DVD POWER] to turn the unit on.
3 Complete the TV Guide On Screen
TM
system setup (until [ENTER] is pressed after the “Watch
TV” message screen is displayed).
[Note]
You can set timer recording only manually after you set the unit with “Auto Channel Setting”.
1 Press [SETUP].
2 Press [3, 4] to select “Channel” and
press [1].
3 Press [3, 4] to select “Auto Channel
Setting” and press [ENTER].
4 Press [2, 1] to select “Yes” and
press [ENTER].
5 Press [ENTER].
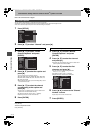
Auto Channel Setting starts. This takes a few minutes.
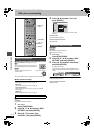
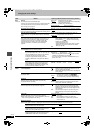
The unit then proceeds with Auto Clock Setting. The time is
displayed when finished.
≥DST, Daylight Saving Time, shows the summertime setting.
≥TIME ZONE shows the time difference from Greenwich
meantime (GMT).
EST (Eastern Standard Time) l GMT j5
CST (Central Standard Time) l GMT j6
MST (Mountain Standard Time)l GMT j7
PST (Pacific Standard Time) l GMT j8
AST (Alaska Standard Time) l GMT j9
HST (Hawaii Standard Time) l GMT j10
For other areas: xx hr
≥If the Auto Clock Setting does not start automatically, select
“Auto Clock Setting” from the “Set Up” tab.
≥If the time was not set correctly, use manual clock setting
(➡ page 13) or time zone adjust.
6 Press [ENTER].
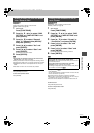
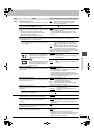
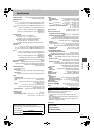
≥The unit configures channels according to the Antenna
System settings as follows.
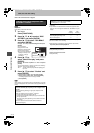
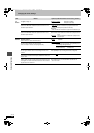
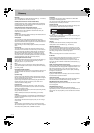
Adjust the time zone (j1 or i1) if it was not set correctly with auto
clock setting.
You cannot change this setting if you set the clock manually.
1 Press [SETUP].
2 Press [3, 4] to select “Set Up” and
press [1].
3 Press [3, 4] to select “Time Zone
Adjust” and press [ENTER].
4 Press [3, 4] to select “s1” or “r1”
and press [ENTER].
To exit the screen
Press [SETUP].
To return to the previous screen
Press [RETURN].
To cancel partway while Auto Channel/Clock Setting is taking place
Press [RETURN].
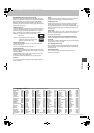
HDD DVD SD PC
D
TIME SLIP
DRIVE SELECT
/x
1. 3
OPEN/CLOSE
CH
REC
TIME SLIP
X CH W
Auto channel/clock settings
SETUP
Disc
Video
Audio
Display
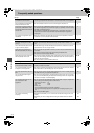
Auto Clock Setting
Auto Clock Setting is complete.
4/4/2002 12:15 AM
DST............. ON
TIME ZONE.... CST
Channel
Set Up
Antenna system Band Channel
TV
VHF 2–13
UHF 14–69
CATV
VHF 2–13
CATV LOW BAND 95–99
CATV MID/SUPER BAND 14–36
CATV HYPER BAND 37–65
ULTRA BAND
66–94
100–125
SPECIAL CATV CHANNEL 1
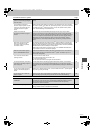
Time Zone Adjust
SETUP
Disc
Video
Audio
Set Up
Time Zone Adjust
j1
0
i1
Channel
7394en.book 65 ページ 2004年7月20日 火曜日 午後7時26分