


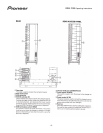

DRM-7000 Operating Instructions
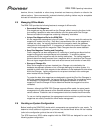
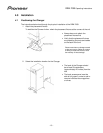
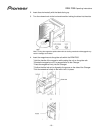
2. Loosen the shipping screws
With the front access panel open, loosen the two screws located in the base
• Screws are permanent to avoid
becoming lost but must be loosened
to operate the Changer
• Tighten these screws before moving
or transporting the Changer
• Closing the front and/or rear access
panels cause the Changer to return
to the initial default position thus
leave access panels open to
continue with the installation process
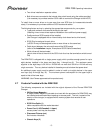
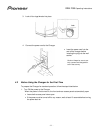
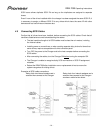
3. Install the drive units
No tools are required to install a drive. While drives may be installed in any of the rear
bays (bay 1 through bay 8), the connector board shipped with the Changer is configured
for drives to be installed into bay 1 and bay 2.
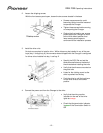
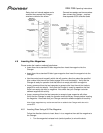
• Specify the SCSI IDs and set the
termination switches on the back of
the drives before installing the units
• Verify that the drives are mounted on
the guide rails
• Listen for the clicking sound as the
drive is pushed into the bay
• Push the drive in until the lock lever
on the drive shifts to the locked
position
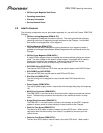
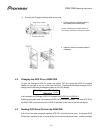
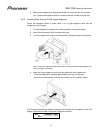
4. Connect the power cord from the Changer to the drive.
• Verify that the wiring monitor
indicator on the rear of the drive
lights as orange
• Check that the termination indicator
is green if the Termination Switch is
ON
- 12 -