43
SETTINGS
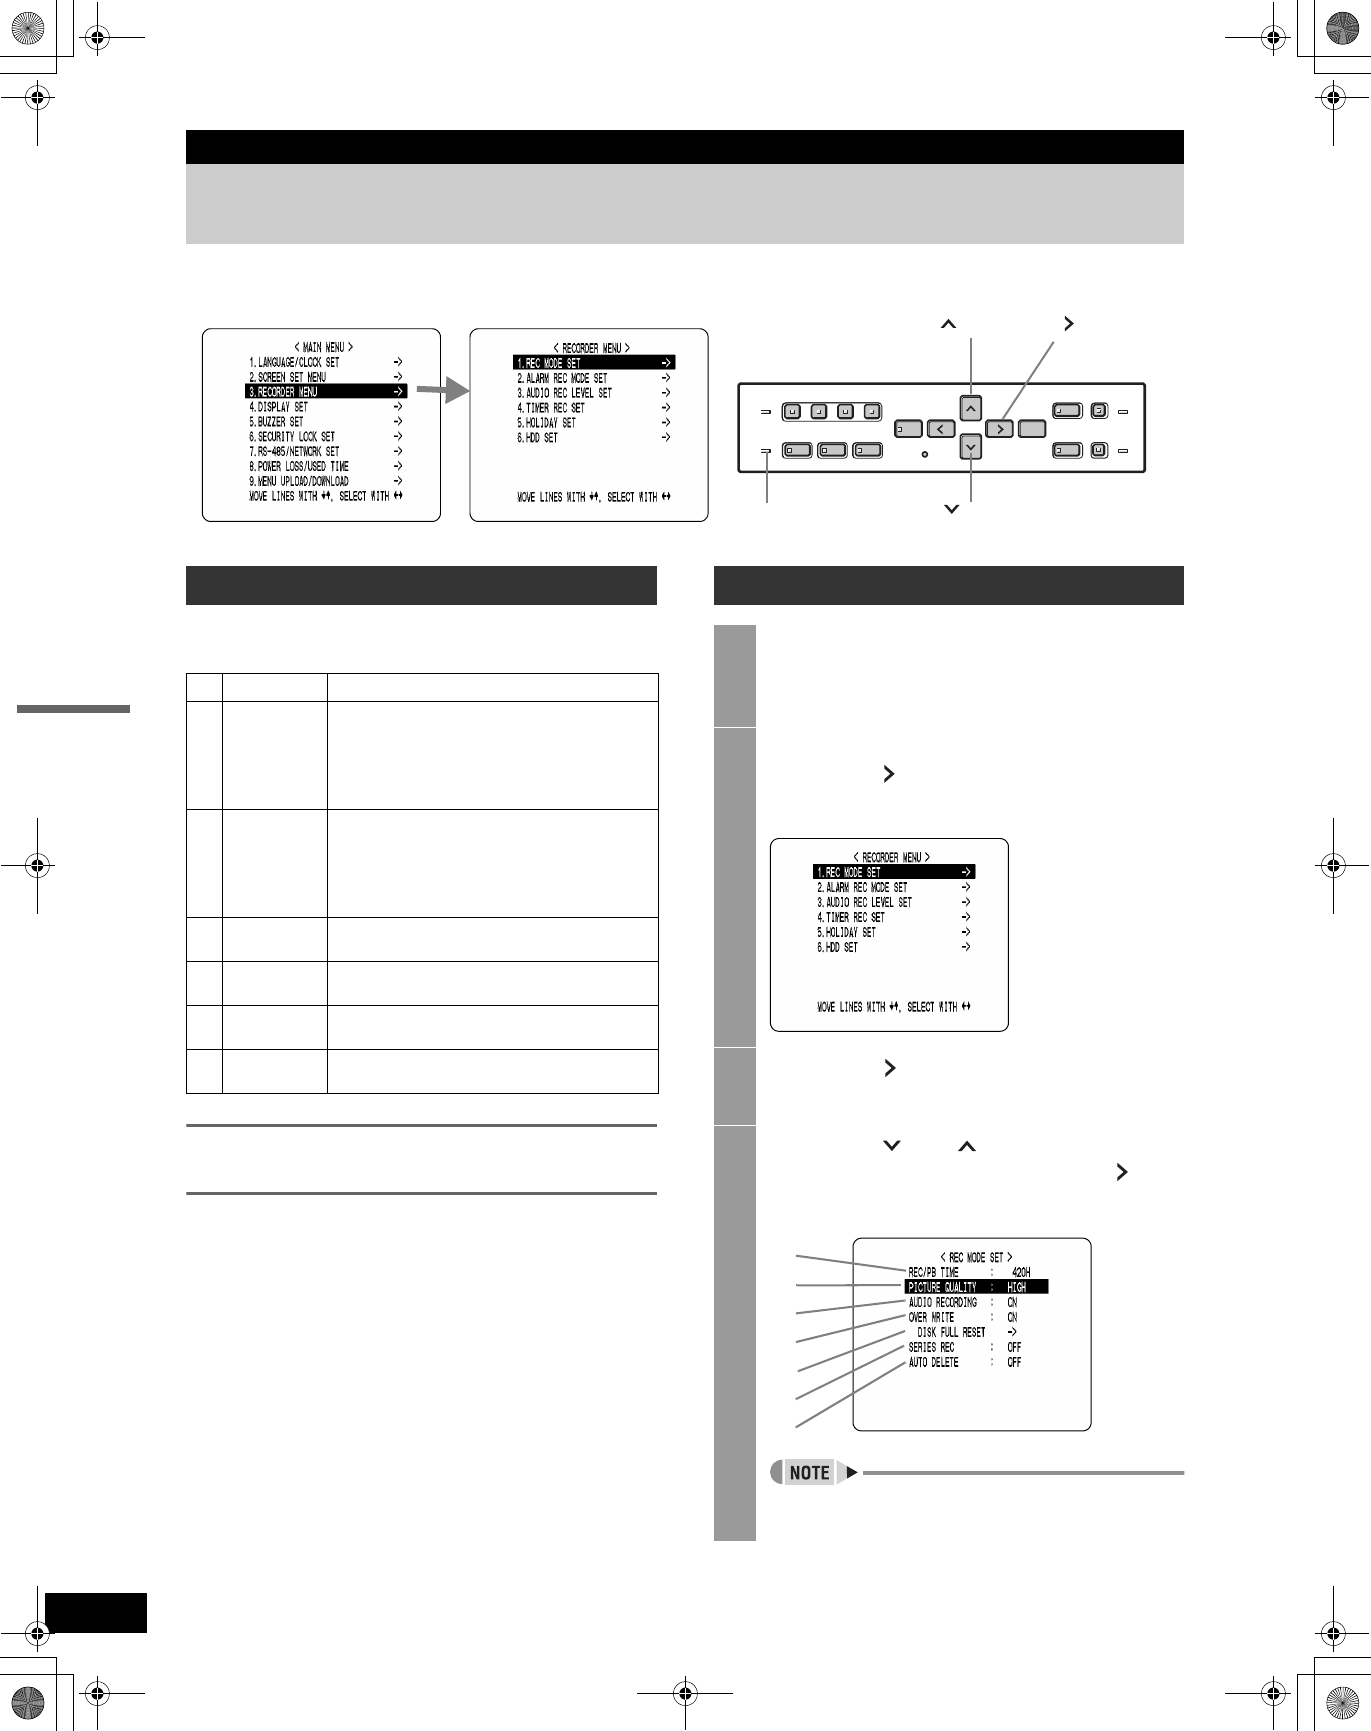
4. RECORDER MENU
The <RECORDER MENU> screen lets you make the
following recording-related settings:
To record in series when multiple digital
video recorders are connected
When multiple digital video recorders are connected, you
can automatically continue recording to the second and
subsequent digital video recorders when the first hard disk
becomes full.
Display the <REC MODE SET> screen, and set “OVER
WRITE” to “OFF”, and “SERIES REC” to “-1M”, “-2M”, or
“-3M”. (P.44)
<MAIN MENU> <SUB MENU>
[ ] button
[ ] button
FULL indicator
[ ] button
Recording settings
Item Description
1
REC MODE
SET
z Changes the recording image quality.
z Turns audio recording ON/OFF.
z Sets whether to stop recording or to record over
previously recorded videos, when the hard disk
becomes full.
z Sets the series recording settings.
2
ALARM REC
MODE SET
z Turns alarm recording ON/OFF.
z Sets the amount of time to record for when an
alarm is generated.
z Sets alarm trigger.
z Sets the operation to perform when the camera
image is interrupted.
3
AUDIO REC
LEVEL SET
Sets audio level for each channel.
4
TIMER REC
SET
Sets timer recording.
5 HOLIDAY SET
Lets you set specific days other than Sundays as
holidays.
6HDD SET
Initializes the hard disk, or sets the mirroring
settings when an additional hard disk is installed.
Basic recording settings
1
Press the [MENU] button.
The [MENU] button lights, and the <MAIN MENU>
screen is displayed.
2
Select “3. RECORDER MENU”, and
press the [ ] button.
The <RECORDER MENU> screen is displayed.
3
Press the [ ] button.
THE <REC MODE SET> screen is displayed.
4
Press the [ ] or [ ] buttons to select
the desired item, then press the [ ]
button.
“REC/PB TIME” changes automatically according to
the “PICTURE QUALITY” set.
(1)
(2)
(3)
(4)
(5)
(6)
(7)
e00_VDH_M814.book Page 43 Thursday, October 28, 2004 9:59 AM
