48
RECORDER MENU
SETTINGS
(3) STOP:
Enter the time at which to stop timer recording.
(4) SET:
Setting “ON” enables the entered timer recording
setting.
Setting “OFF” disables the entered timer recording
setting.
(5) SAT, DLY:
Use these lines for timer recording spanning more than
24 hours.
Recording every day, at the same time, with
the same image quality
Example:
Setting a timer recording for every day from 8:30 to
18:30 with the same image quality.
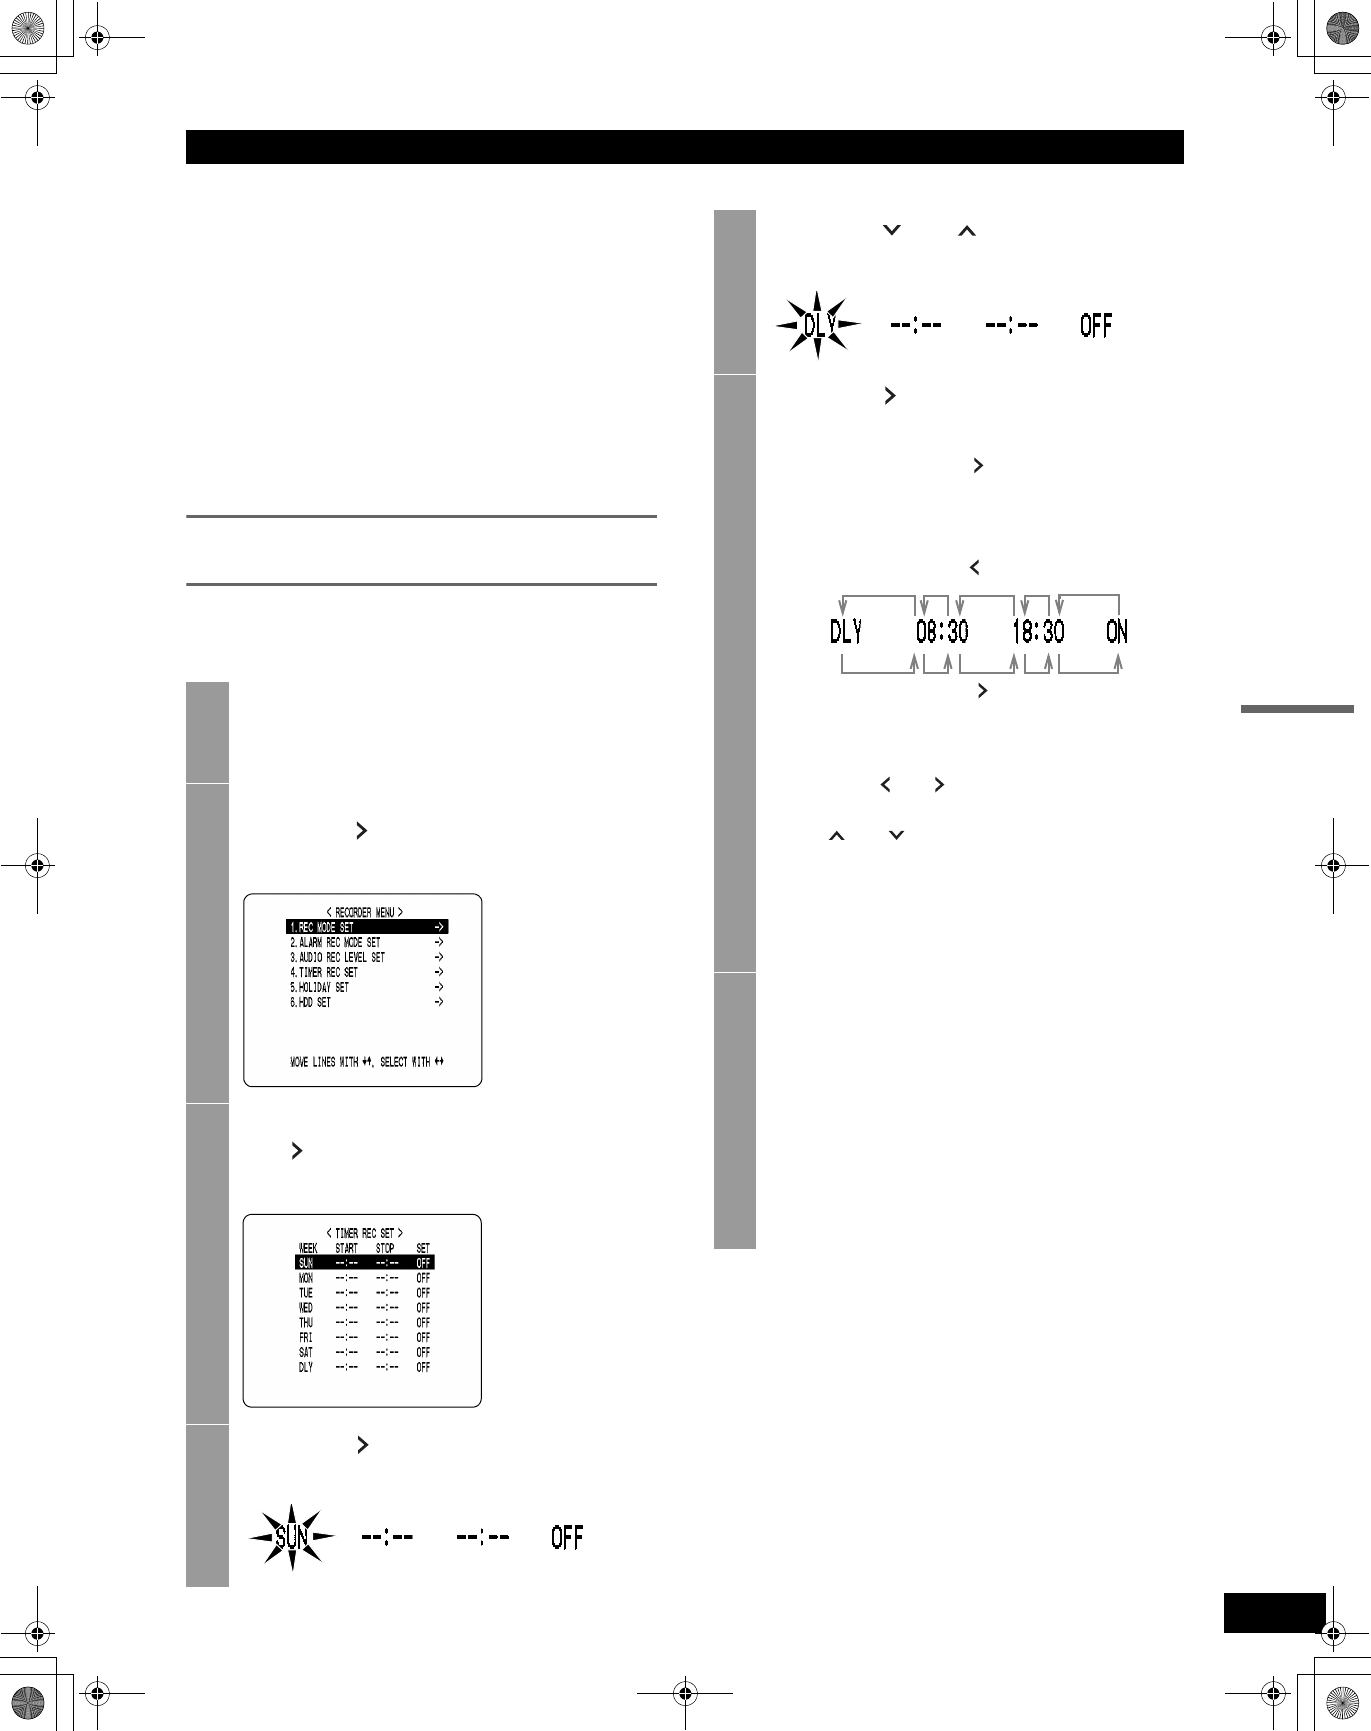
1
Press the [MENU] button.
The [MENU] button lights, and the <MAIN MENU>
screen is displayed.
2
Select “3. RECORDER MENU”, and
press the [ ] button.
The <RECORDER MENU> screen is displayed.
3
Select “4. TIMER REC SET” and press
the [ ] button.
The <TIMER REC SET> screen is displayed.
4
Press the [ ] button once.
“SUN” under “WEEK” flashes.
5
Press the [ ] or [ ] button to change
“SUN” to “DLY”.
6
Press the [ ] button to move the
cursor to the next item.
Each time you press the [ ] button, the cursor
moves to the following items:
Day “START” time (hours, minutes) “STOP”
time (hours, minutes) “ON”/“OFF”
To change a setting
Press the [ ] or [ ] button to move the flashing
area to the item you want to change, then press
the [ ] or [ ] button to change the setting.
Timer recording image quality
The image quality is determined by the
“PICTURE QUALITY” setting in the <REC MODE
SET> screen. (P.44)
7
When you have finished making the
settings, press the [EXIT/OSD] button.
The display returns to the normal screen.
To set different recording times for each
day of the week
Set the desired recording times for each day.
If timer setting days overlap
The timer setting that starts first will have priority.
[ ] button
[ ] button
e00_VDH_M814.book Page 48 Thursday, October 28, 2004 9:59 AM
