


29
10 TROUBLESHOOTING GUIDE
No power (LEDs always OFF)
• Check that the units’ power switches are set to “I”.
• Check that the power cables are correctly connected to the units’
power sockets.
• Check the condition of the fuse located on the power socket on
the rear of the screen.
• Replace the fuse located on the screen power socket with an
equivalent and identically rated fuse (T3,15A H).
• If the fuse blows repeatedly, seek technical assistance from your
nearest Dealer.
No picture
• Make sure the selected input is connected to a video or graphic
signal and that the relevant source is functioning correctly.
• Make sure the video or graphic signals supplied by the source are
compatible with the HTL40 LINK technical specifications and, in
particular, with the selected DigiOptic™ Image Processor input.
• Check the condition of the cables used to connect the DigiOpti-
cal™ Image Processor to the various sources.
• Check the state of the connection between the DigiOptical™
Image Processor and the screen.
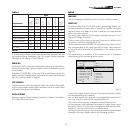
• Check the state of the connection by interpreting the code dis-
played by the system LEDs in accordance with Table 2.
• Make sure the cooling air vents on the units are not blocked and
that the ambient temperature is below 35°C.
Image is disturbed, unstable or noisy
• Make sure the video or graphic signals supplied by the source
are compatible with the system’s technical specifications and,
in particular, with those of the selected input.
• Check the condition of the cables used to connect the DigiOpti-
cal™ Image Processor to the various sources.
• If the problem occurs on a terrestrial broadcast source signal,
check that the receiver has been correctly tuned in and that the
aerial system is in good working order.
• If the problem occurs in a video signal from a videorecorder,
ensure that the videotape is an original “first generation” copy
and that
VCR
mode is active in the
PICTURE
menu.
• Adjust the Sharpness parameter in the
PICTURE
menu to optimise
the displayed image.
Incomplete image along borders (vertical and horizon
-
tal)
• Make sure the video or graphic signals supplied by the source
are compatible with the system’s technical specifications and,
in particular, with those of the selected input.
• Recall the automatic image adjustment function by pressing
the key “A” on the remote control or the
AUTO
key on the screen
keypad.
• Adjust the horizontal or vertical position of the displayed image
using the
IMAGE/POSITION
menu.
• Adjust the width and height of the image, selecting Aspect in the
IMAGE/ASPECT
menu.
• Adjust the overscan value applied to the image on the
IMAGE/
OVERSCAN
menu.
Image too dark, too pale or unnaturally coloured
• Make sure the video or graphic signals supplied by the source
are compatible with the system’s technical specifications and,
in particular, with those of the selected input.
• Adjust the
CONTRAST, BRIGHTNESS, COLOUR
and
TINT
parameters in
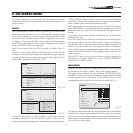
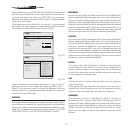
9 CLEANING AND MAINTENANCE
The screen and the DigiOptic™ Image Processor do not require in-
ternal adjustments and do not contain any user-serviceable parts.
For any service requirements seek qualified technical assistance
from your nearest Dealer.
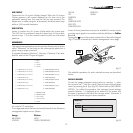
To clean the outer cover of the screen use a soft cloth and moisten
slightly if necessary with water and a small amount of neutral soap.
Do not rub hard on the printed captions on the rear panel of the
DigiOptic™ Image Processor.
The screen may be cleaned with a very soft non-abrasive brush in
order to remove dust particles. Alternatively, use a soft dry cleaning
cloth (of the type used to clean spectacles) to remove fingerprints
and grease marks.