


44 Chapter 2 Playback and Recording
Chapter 2 Playback and Recording
Playback
By using CUSTOM REPEAT, you can do the
following (example)
Repeat playback at 30 minute intervals:
1
Set [ON/OFF] of [REPEAT CYCLE] to [ON].
2
Set [CYCLE] of [REPEAT CYCLE] to [30 min].
3
Press the REW or PLAY button.
Repeat playback at 2 hour intervals, 5 times a day,
starting at 9 a.m.:
1
Set [ON/OFF] of [REPEAT CYCLE] to [ON].
2
Set [CYCLE] of [REPEAT CYCLE] to [120 min].
3
Set [ON/OFF] of [REPEAT TIMES] to [ON].
4
Set [TIMES] of [REPEAT TIMES] to [5].
5
Set [ON/OFF] of [START TIME] to [ON].
6
Set [TIME] of [START TIME] at [9:00].
7
Turn the unit on before 9 a.m.
• The unit cannot detect signals for an Index signal, a
signal other than the one set by [AUTO] in [HDV/DV
SEL], or an unrecorded portion within 20 seconds of
the beginning of the playback.
• When you intend to turn the unit off, press the STOP
button on the unit to stop the tape transport operation
beforehand. If you turn the unit off while a tape is
running, for example, by using an AC timer, the unit or
the tape may be damaged.
• The editing software used by a digital non-linear
editing system may mark index signals on a tape itself.
Therefore, if you use a tape on which signals
transmitted from a digital non-linear editing controller
are recorded or a copy tape made from one, using
digital dubbing, CUSTOM REPEAT may not be
performed correctly.
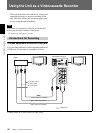
The unit allows you to adjust the edge crop position
when you output down converted HDV 16:9 wide
screen pictures to 4:3 standard TV mode pictures.
By displaying the edge crop marker on the monitor, you
can check the crop position on the LCD monitor
beforehand.
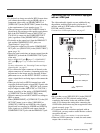
To set EDGE CROP MARKER
Before setting [CROP MARKER] in the [IN/OUT
REC] menu to [ON] (page 72), check that any one of the
following settings have been made:
– [DOWN CONVERT] of [VIDEO OUT] in the [IN/
OUT REC] menu is set to [EDGE CROP] (page 71).
– [DOWN CONVERT] of [i.LINK SET] in the [IN/
OUT REC] menu is set to [EDGE CROP] (page 72).
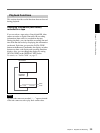
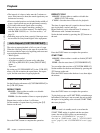
The EDGE CROP MARKER screen displays:
• Crop position of a 4:3 aspect screen
• Center marker
• 80% safety zone
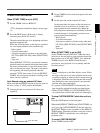
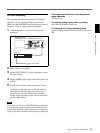
Select [CROP ADJUST] in the [IN/OUT REC] menu
(page 72) and press the EXEC button again after the
confirmation display appears. Then, the edge crop
marker will appear on the monitor. Press the K/k
buttons to move the marker to the left and right and
adjust the crop position. Press the EXEC button to
execute.
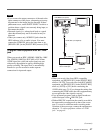
• When CROP MARKER is displayed on the LCD
monitor, the text data and crop marker displayed on the
LCD monitor are not output from the jacks on the rear
panel of the unit. To output a 4:3 screen marker, see
“MARKER BURN” (page 45).
• To output an edge cropped picture by down converting
the HDV-formatted picture to 4:3, see “VIDEO OUT”
(page 71) and “i.LINK SET” (page 72) in the “IN/
OUT REC” menu.
Notes
EDGE CROP MARKER
Notes
CROP ADJUST
CROP ADJUST
CROP ADJUST
[
MEN
MENU
]
: END
: END
[
MENU
]
: END
+2