50 Chapter 2 Playback and Recording
Chapter 2 Playback and Recording
Using the Unit as a Videocassette Recorder
9
If necessary, adjust the audio recording level by
turning the AUDIO REC LEVEL control knobs.
You can adjust the recording level with the AUDIO
REC LEVEL control knobs if you have selected
MANU in step 8. While looking at the STATUS
CHECK screen, turn the AUDIO REC LEVEL
control knobs to adjust the recording level. Adjust
the audio recording level so that it does not exceed
0 dB when the audio signals are at their maximum.
If the recording level exceeds 0 dB, the recorded
sound will be distorted.
• When the unit records in DVCAM (DV) format, it
supports two audio modes, with either 2-channels at
FS48K or 4-channels at FS32K. It is not possible to
select other modes (for example with 2-channels at
FS32K).
• During recording, you cannot change the audio mode.
• To dub audio after recording using the unit, set
[AUDIO MODE] in the [AUDIO SET] menu to
[FS32K] (4-channel mode) before recording.
For details on the [AUDIO SET] menu, see “AUDIO SET
menu” on page 76.
• The unit is able to dub audio on a tape recorded in
DVCAM format with 4-channel (FS32K) sound.
This section describes the procedures used to record
signals sent from another VCR to the unit.
For details on operation when the unit is connected to a
computer via the HDV/DV jack, refer to “Editing
(Connecting a Computer)” on page 65.
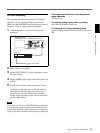
1
Insert a cassette and confirm that the q (cassette)
indicator lights up.
2
Press the playback button on the player.
The player starts playback.
3
On the unit, press the PLAY button while holding
the REC button down.
When the unit records HDV format images, it takes a
while until recording starts. This delay, however, is not
an error. ([STBY] is displayed on the screen and the
REC indicator blinks until recording starts.)
To stop recording
Press the STOP button on the unit.
To pause recording
Press the PAUSE button on the unit.
You cannot up convert NTSC or PAL signals in the
HDV format for recording.
Marking an index
By pressing the INDEX button on the unit or the
INDEX MARK button on the Remote Commander
during recording, you can mark an index signal at any
place on the tape. If you mark an index at a scene you
want to be able to search for, you can easily find the
scene later. When [AUTO INDEX] in the [VTR SET]
menu is set to [ON] (page 77), if you start recording
while the tape is stopped, the unit automatically marks
an index. While the index is being marked, the
indicator appears for about seven seconds on the
Data display screen (page 23).
• You cannot mark a new index while the indicator is
being displayed.
• If you record on a portion of the tape where an index
has been marked, the index will be erased. You cannot
delete just an index while keeping the image or sound.
• You cannot mark an index during playback or audio
dubbing operations. The INDEX button and the
INDEX MARK button are disabled in these
operations.
To use an index during playback
See “Searching using the search function” on page 41.
Notes
Recording Procedures
Note
Note
Recording Functions
Notes


