60 Chapter 4 Dubbing to Other Equipment Using the i.LINK Jack, Duplication, Audio Dubbing, and Connecting a Computer
Chapter 4 Dubbing to Other Equipment Using the i.LINK Jack, Duplication, Audio Dubbing, and Connecting a Computer
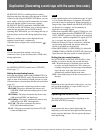
Duplication (Generating a work tape with the same time code)
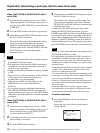
When [AUTO REW] in [DUPLICATE PLUS] is
set to [ON]:
1
Connect the unit and the player using an i.LINK
cable (not supplied). After turning on the power of
the unit, set the INPUT SELECT switch on the unit
to HDV/DV.
2
Press the STOP button on the unit to stop the tape.
3
While holding the DUPLICATE button down, press
the PLAY button on the unit.
The unit and the player will automatically rewind
the tape to the beginning. The unit enters the
duplicate-standby mode. The player enters the
playback pause mode. Then the DUPLICATE and
PLAY indicators on the unit light and the
duplication starts.
• Before you start duplication, make sure that the player
has finished loading the cassette.
• The duplication starts after the i.LINK connection is
established so that the first part of the source tape is
dropped on the copied tape.
• If the player has functions such as auto repeat, set them
to OFF.
• If the player has a still timer function, set the still timer
to the longest time to ensure enough time for
rewinding the tape to the beginning.
• When you use a DSR-45 as the player, set the
REMOTE/LOCAL switch of the DSR-45 to
[LOCAL].
• If you operate the player while duplicating and the
PLAYER UNCONTROLLABLE warning message
appears and duplication stops, press the EXEC button
on the unit to end duplication once, and then repeat the
procedures.
When [AUTO REW] in [DUPLICATE PLUS] is
set to [OFF]:
1
Connect the unit and the player using an i.LINK
cable (not supplied). After turning on the power of
the unit and the player, set the INPUT SELECT
switch on the unit to HDV/DV.
2
Locate the points where you want to start playback
and recording on each tape.
3
Press the STOP button on the unit.
4
While holding the DUPLICATE button down, press
the PLAY button on the unit.
The unit enters the duplicate-standby mode. The
player enters the playback pause mode. Then the
DUPLICATE and PLAY indicators on the unit light
and duplication starts.
To adjust the point where duplication starts, while
holding the DUPLICATE button down, press the
PAUSE button and PLAY button in step 4. The unit will
not start duplication until you press the PAUSE button
again. After confirming that the PLAYER display has
changed to [READY] (blinking) on the LCD monitor,
adjust the duplication start point using the player, then
press the PAUSE button on the unit to start duplication.
• Before you start duplication, make sure that the player
has finished loading the cassette.
• The duplication starts after the i.LINK connection is
established so that the first part of the source tape is
dropped on the copied tape. Play back the tape a few
frames before of the portion where you want to begin
the duplication.
• If the player has functions such as auto repeat, set them
to OFF. Also, when the player has an auto rewind
function, set the function to ON.
• You may not be able to duplicate the beginning of the
source tape. Locate the start of the recorded portion on
the source tape, and then start duplication.
• If there is a blank portion on the tape, the first part of
the recorded portion that follows may be dropped on
the copied tape.
• When the time code on a player operates either
discontinuously or incorrectly, a difference in frame
values between the numeric time codes may occur.
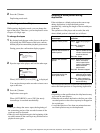
To cancel duplication
1
Press the STOP button on the unit, and pause
duplicating.
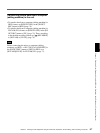
During the pause, the following confirmation
display appears.
Notes
Notes
[ X ] : RESTART
Can adjust start
position or change
cassette.
[ x ] : END
DUPLICATE PLUS
00:12:34:12


