8-25
Chapter 8 ISIS/TWAIN Driver Settings
The [Post Imprinter] tab sheet allows you to imprint/add any
character string or counter on scanned documents.
The [Imprinter] check box is enabled only if the optional pre-
imprinter unit is installed.
■ [Pre Imprinter] and [Post Imprinter] Tab Sheet
Settings
You can configure the following settings on the [Pre
Imprinter] and [Post Imprinter] tab sheets.
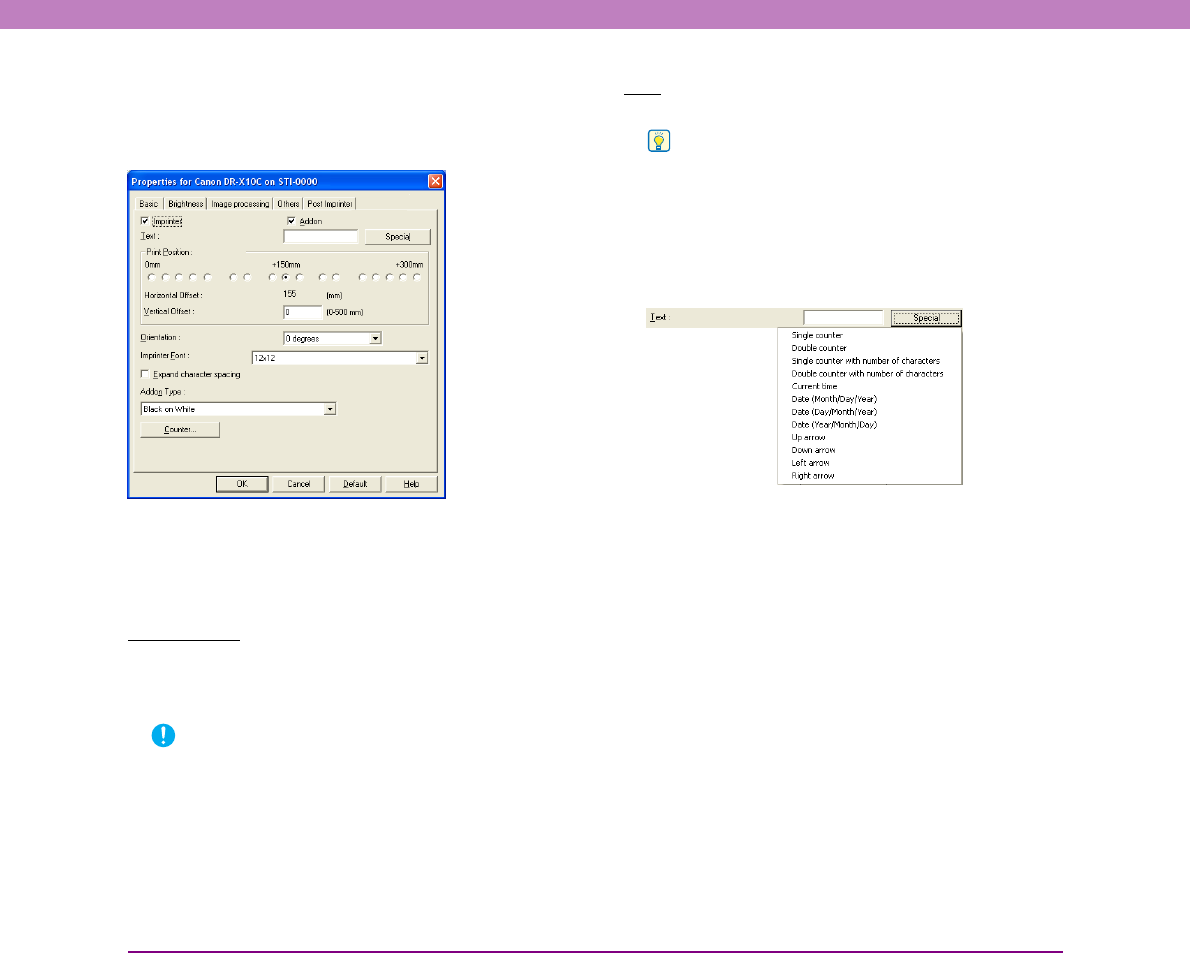
Check Boxes
[Imprinter] Check Box
Configure settings for imprinting any character string or
counter on scanned documents.
IMPORTANT
Confirm that an ink cartridge is installed in the scanner before
you use the imprinter function. “ImprinterError” is displayed on
the scanner LCD if scanning is performed without the ink
cartridge.
[Addon] Check Box ([Post Imprinter] tab sheet only)
Configure settings for adding any character string or
counter on scanned images.
Text
Enter any character string to be imprinted or added.
Hint
The following characters can be entered.
• Numerals: 0 to 9
• Alphabetic characters: A to Z and a to z
• Symbols: !" '# $ % &'( ) * + - . , / : ; < > =?@[ ] { } ~ ` \
Enter special text such as counters, dates and arrows from
the list that appears by clicking the [Special] button.
The selected abbreviation is inserted into the text string.
[Single counter] abbreviation: <C>
Print/add one 9-digit counter.
[Double counter] abbreviation: <CC>
Print/add two 9-digit counters.
[Single counter with number of characters]
abbreviation: <Cx>
A dialog box appears in which to specify the number of
characters of the single counter. A counter of the specified
number of characters will be imprinted or added on
scanned images.
[Double counter with number of characters]
abbreviation: <CxCx>
A dialog box appears in which to specify the number of
characters of the double counter. A counter of the specified
number of characters will be imprinted or added on
scanned images.
