


Installing Ink for the First Time in a New Printer 3-15
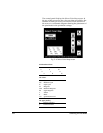
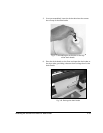
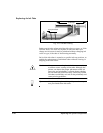
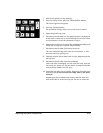
12. As soon as you see ink flowing into the drain tube, pinch the
drain tube and remove it from the nozzle end of the ink tube.
By pinching the drain tube, a vacuum is formed between the
pinched tube and the end of the needle, keeping any resid-
ual ink from draining from the needle as it is removed.
13. Wipe clean the needle end of the drain tube, and set it aside,
keeping the ink inside from spilling out.
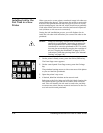
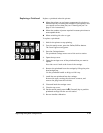
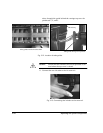
14. Remove the packaging from a printhead that contains the
same ink as the ink reservoir.
Remove the tape covering the electronic contacts, and
remove the plug from the ink inlet. Do not touch any of the
metallic electronic contacts.
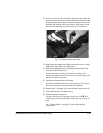
15. Install the printhead into the carriage.
Install the printhead into the correct position. You can use
the built-in handle to help position the printhead.
16. Repeat steps 7 through 15 for each ink tube you want to fill.
17. Close and latch the carriage cover(s).
18. Close the printer’s top cover.
On the control panel Front Page screen, press the B (Pro-
ceed) key to park the printhead carriage into the service sta-
tion.
See “Loading Media” on page 3-24 for media loading
instructions.
Fig. 3-10. Removing the drain tube