2
Preparation
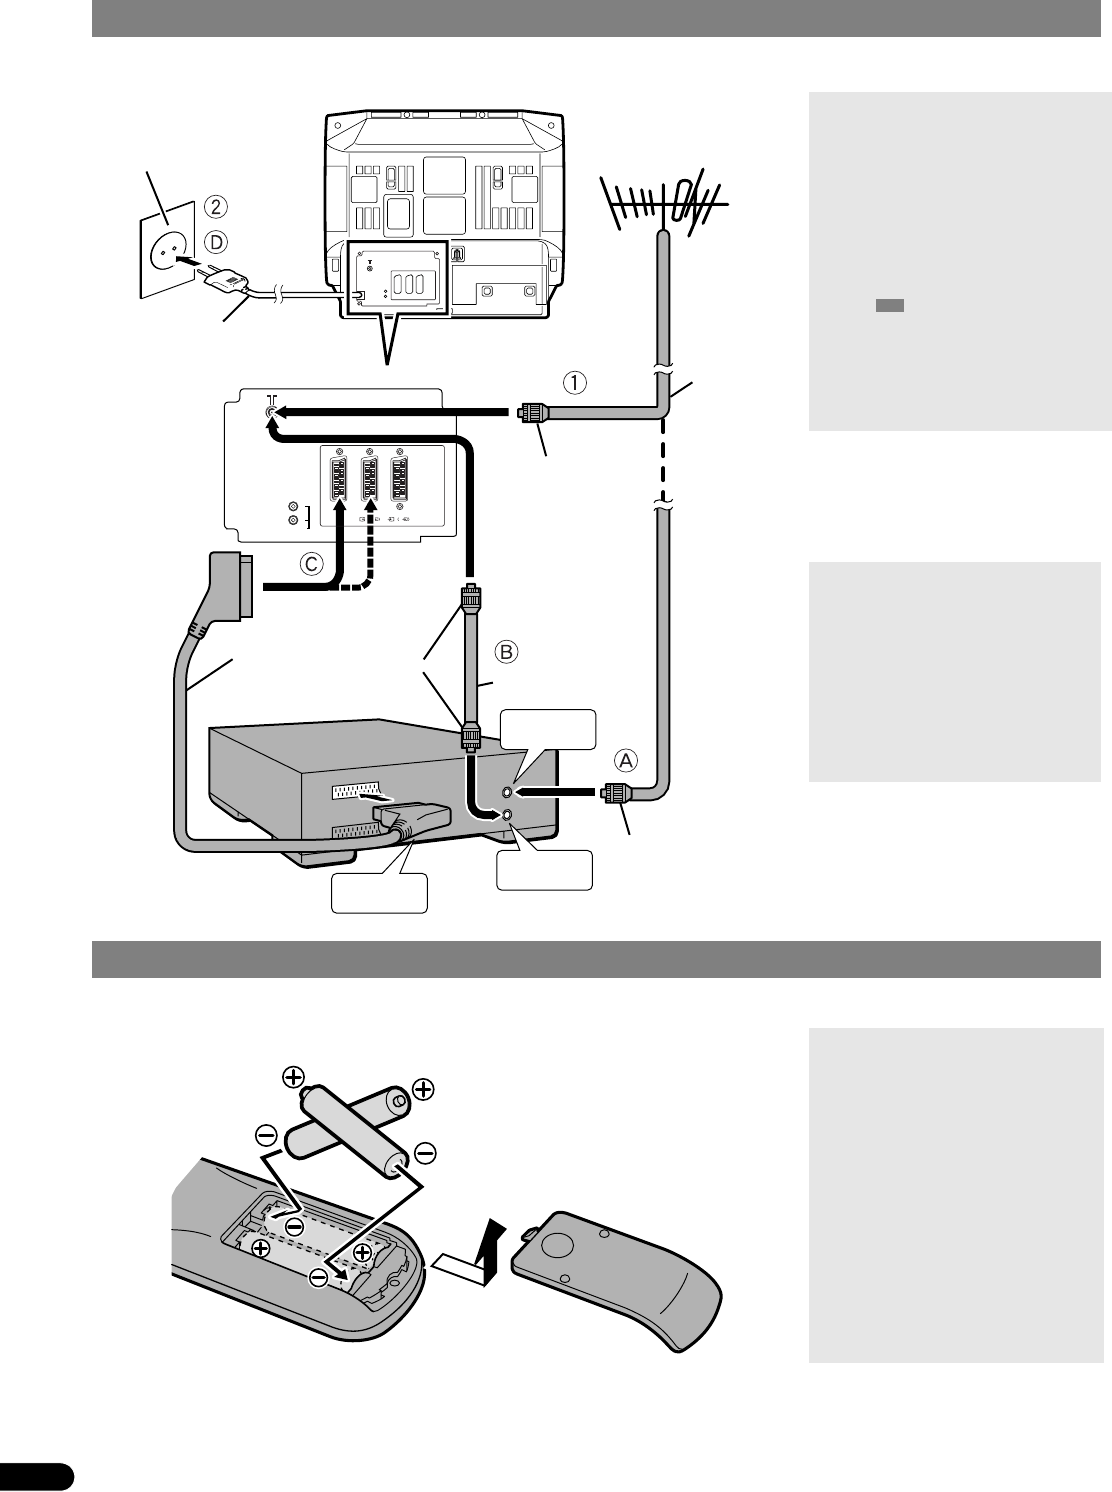
If connecting a VCR, follow A → B → C → D.
If not connecting a VCR, follow 1 → 2.
Use two AAA/R03 dry cell batteries.
Insert the batteries from the · end, making sure the ª and · polarities are correct.
1 Connecting the Aerial and VCR
2 Putting Batteries into the Remote Control
AUDIO OUT
L
R
EXT-2 EXT-3
S
EXT-1
*1
VHF/UHF Aerial
75-ohm
Coaxial Cable
Aerial Plug
Power Cord
AC Outlet
(AC 220 – 240 V, 50 Hz)
21-pin Scart Cable
Aerial Plug
75-ohm Coaxial Cable
Aerial Plug
AV IN/OUT
Terminal
To Aerial
Output
To Aerial
Input
VCR/S-VHS VCR
To open the battery compartment,
slide the door downwards and lift off,
replace by sliding the door upwards
until it is secure.
Notes:
• For further details, refer to the
manuals provided with the devic-
es to be connected.
• The connecting cables are not
provided.
• A video can be viewed from the
VCR without performing
C
. For
details, refer to the VCR manual.
• The shaded Items are not
provided.
• To connect additional external de-
vices, please refer to page 26.
• To connect an audio system,
please refer to page 27.
*1 This TV is T-V LINK compatible.
To operate T-V LINK, a T-V LINK
compatible VCR must be con-
nected to the EXT-2 Terminal on
the TV.
Notes:
• For details about T-V LINK, re-
fer to page 5.
• When a decoder is connected to
a T-V LINK compatible VCR, set
the Decoder (EXT-2) in the Fea-
tures menu to ON. (See “De-
coder (EXT-2)” on page 20.)
Otherwise, you will not be able
to view scrambled channels.
Notes:
• Follow the warnings printed on
the batteries.
• Battery life is about six months
to one year, depending on fre-
quency of use.
• If the remote control doesn’t
work properly, replace the bat-
teries.
• The batteries we supply are only
for setting up and testing your
TV, please replace them as
soon as necessary.
• Always use good quality batter-
ies.
eng_AVTX29_P1-11.fm Page 2 Friday, August 20, 1999 1:47 PM


