


15
RQT9431
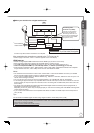
To check the signal condition
(➔ 96, Signal Condition)
To tune in other satellite channels
(➔ 16, Tuning in Other Satellite
Services)
To hide unwanted channels
(➔ 96, freesat Channel List)
To change PIN (➔ 104, Owner ID)
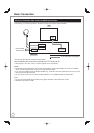
To correct the character
Press the “Red” button to delete character one by one.
You can delete all input characters by pressing the “Blue” button.
You can perform this operation in step , or .
To display the Owner ID information on TV
Press and hold [
g
] on the main unit for more than 5 seconds.
The PIN is not displayed.
After 30 seconds this menu automatically disappears.
You cannot change the Owner ID on this screen.
You can perform this operation after step .
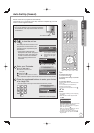
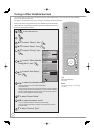
To set the clock manually
Normally this unit obtains time and date information from TV
channels to set its clock and automatically adjusts the time
several times a day.
If the clock is incorrect or cannot be automatically set, perhaps
due to bad signal reception, you will need to adjust the clock
manually.
In the case of a power failure, the clock setting remains in
memory for approximately 60 minutes.
1. Press [FUNCTION MENU].
2. Press [
e
,
r
] to select “Others”, then press [OK].
3. Press [
e
,
r
] to select “Setup”, then press [OK].
4. Press [
e
,
r
] to select “Others”, then press [OK].
5. Press [
e
,
r
] to select “Clock”, then press [OK].
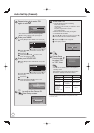
6. Press [
w
,
q
] to select “Off” of “Auto Clock
Setting”.
7. Press [
e
,
r
] to select “Manual Setting”, then
press [OK].
8. Press [
w
,
q
] to select the item you want to
change.
Hour Minute Second Day Month Year
9. Press [
e
,
r
] to change the setting.
10. Press [OK] to confirm new date and time and to
initiate the clock.
•
Tips
To return to the previous screen
Press [BACK/RETURN
].
To exit the screen
Press [EXIT].
Notes
If a TV station transmits a time setting signal, and when “Auto Clock
Setting” in the Clock setting menu is set to “On”, the automatic time
correction function checks the time and if necessary it is adjusted
several times every day.
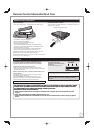
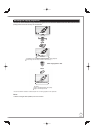
Quick Start Guide
STEP 3