


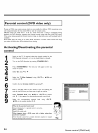


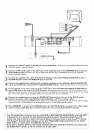
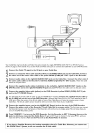
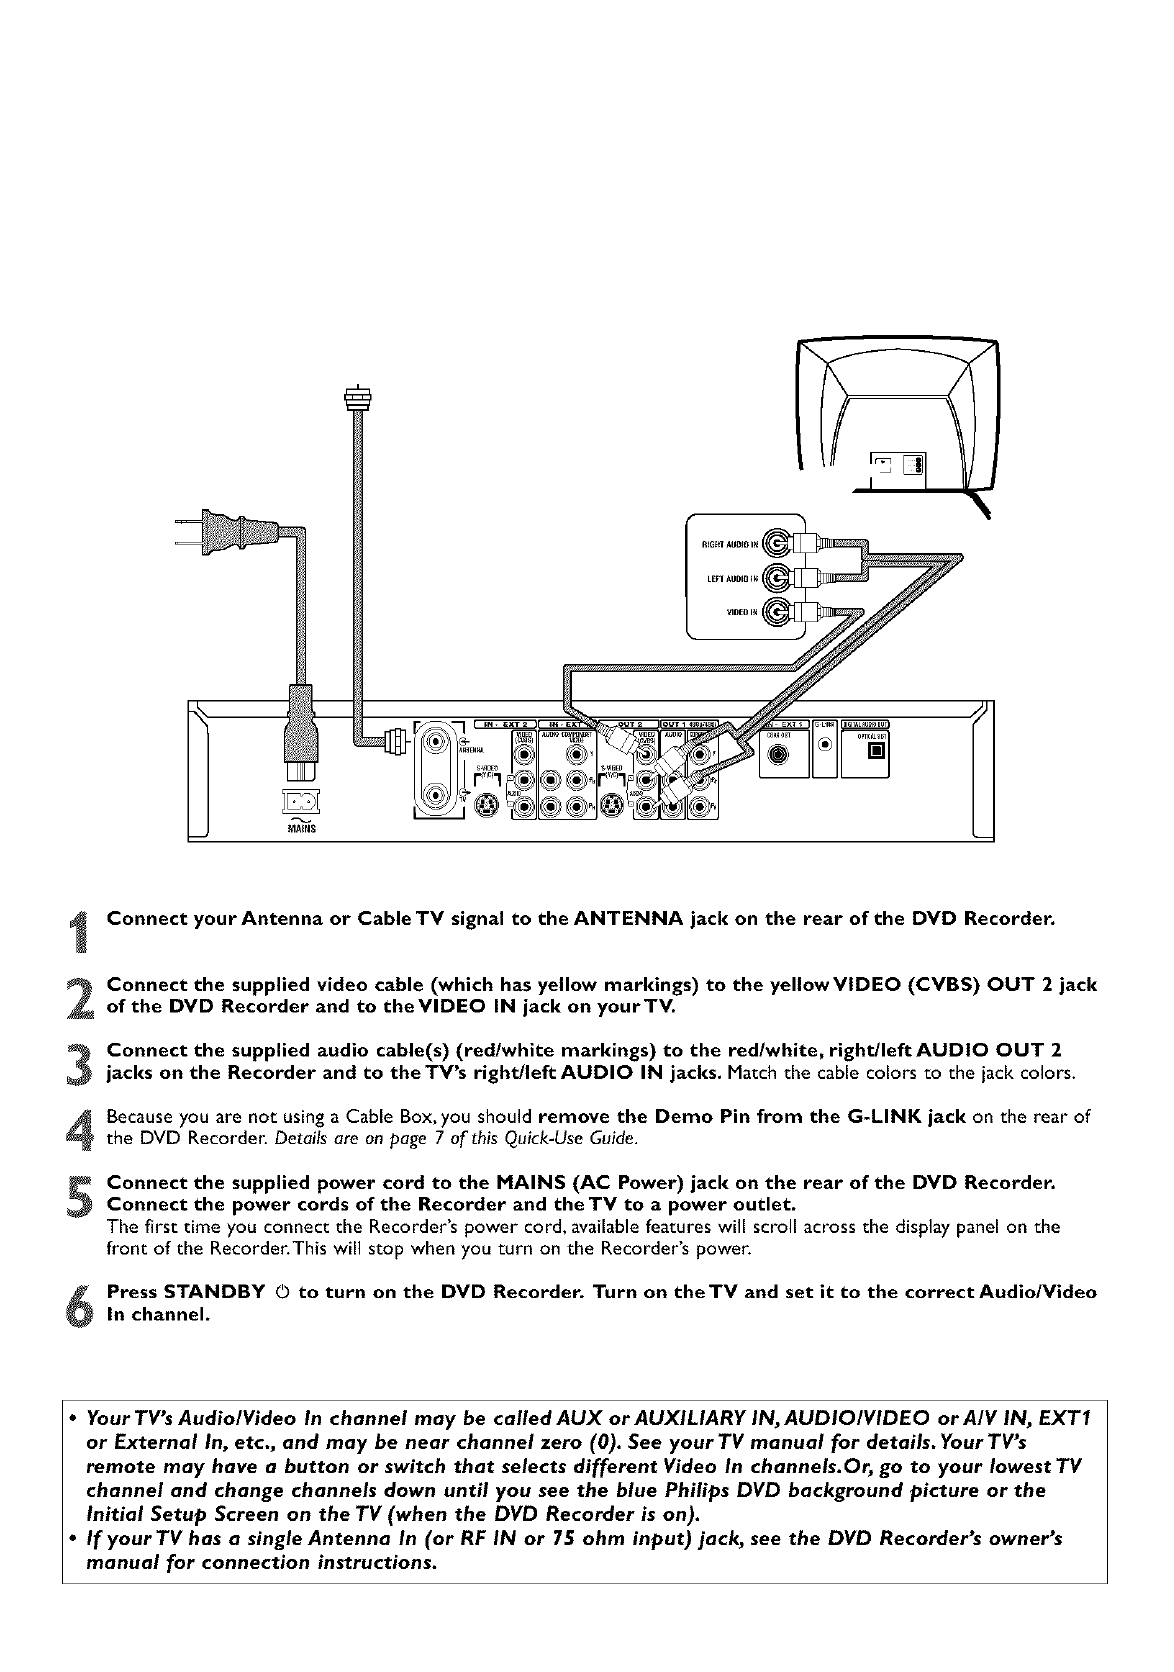
Connect your Antenna or Cable TV signal to the ANTENNA jack on the rear of the DVD Recorder.
Connect the supplied video cable (which has yellow markings) to the yellowVIDEO (CVBS) OUT 2 jack
of the DVD Recorder and to theVIDEO IN jack on yourTV.
Connect the supplied audio cable(s) (red/white markings) to the redlwhite, right/leftAUDIO OUT 2
jacks on the Recorder and to the TV's right/left AUDIO IN jacks. Match the cable colors to the jack colors.
Because you are not using a Cable Box, you should remove the Demo Pin from the G-LINK jack on the rear of
the DVD Recorder. Details are on page 7 of this Quick-Use Guide.
Connect the supplied power cord to the MAINS (AC Power) jack on the rear of the DVD Recorder.
Connect the power cords of the Recorder and the TV to a power outlet.
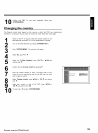
The first time you connect the Recorder's power cord, available features will scroll across the display panel on the
front of the Recorder.This will stop when you turn on the Recorder's power.
Press STANDBY O to turn on the DVD Recorder. Turn on theTV and set it to the correct Audio/Video
In channel.6
• Your TV's Audio/Video In channel may be called AUX or AUXILIARY IN, AUDIO/VIDEO or A/V IN, EXTI
or External In, etc., and may be near channel zero (0). See your TV manual for details. Your TV's
remote may have a button or switch that selects different Video In channels.Or, go to your lowest TV
channel and change channels down until you see the blue Philips DVD background picture or the
Initial Setup Screen on the TV (when the DVD Recorder is on).
• If your TV has a single Antenna In (or RF IN or 75 ohm input) jack, see the DVD Recorder's owner's
manual for connection instructions.