Digital Video Recorder User Guide
78
Digital Video Recorder User Guide
79
Chapter 8. Scheduling and Recording Video
Option Description
Index
1-50 different programs can be set. This allows you to set an variety of indexes for
various days, and portions of days, for each week.
Day The day of the week this Index is in affect.
Program
The Program you wish to use for the Index.
To see the definition of any particular Program, go to Program submenu on the
Record Setup menu of the OSD. Also refer to Defining Programs on page 69.
Time Time of day. (In the grid, 0 means Midnight, 12 means Noon, and so on.)
Delete Click the Delete button if you want to erase the Index entries from the grid.
How to Set up a Schedule
1.Inthedataeldsatthetopofthesubmenu,entertheIndex,theDayandtheProgram.
2.IntheTimedataeld,enterthehouratwhichyouwanttheprogramtobeginrecording,andthe
time at which you want data to cease recording.
-You’llseethegridautomaticallydisplaythehours,markedwiththeletterthatdesignatedthe
Program you chose.
Alternatively,youcansetdatainthegrid,andthedatawillappearalsointhedataelds.
A Brief Tutorial
1.OntheSchedulesubmenu,select1fortheIndex,SundayfortheDayandAfortheProgram.
2. For time, select 00:00 – 20:00.
-Noticethatthegriddisplaysan“A”onSundayfromMidnightuntil20:00
3.Nowselect2forIndex,TuesdayforDayandBfortheProgram.
4.DonotenteranythingintheTimesetting.
5.Usingyourmouseorthearrowsonthefrontpanel,navigatetotheTuesdayrow.Dragthemouse
alongtherow,orclickthearrowbuttons.TheTuesdayrowpopulateswith“B”program.
6.Nowhighlighta“B”intheTuesdayrow.
7.ClickanywhereintheMondayrow,andthe“B”willappearforthathour.NoticethattheIndex
dataelddisplaysanewIndexnumberforthatnewrow.
Deleting an Index Conguration
Ifyouwanttochangeanindex’scongurationafteryou’vesetitup,deletetheIndextoremoveits
current settings and erase it from the grid.
1.IntheIndexdataeld,selecttheIndex.
2.ClicktheDeletebuttontodeleteit.
3.TheIndexcongurationis erased.You cannowsetdifferent congurationsfor that Index
number.
※TIP:BecausetheIndexeldisneverempty,besuretodouble-checkthatyouaredeletingthe
appropriateindex.WhenyouclicktheDeletebutton,whateverIndexisdisplayedinthe
Indexeldwillbedeleted!
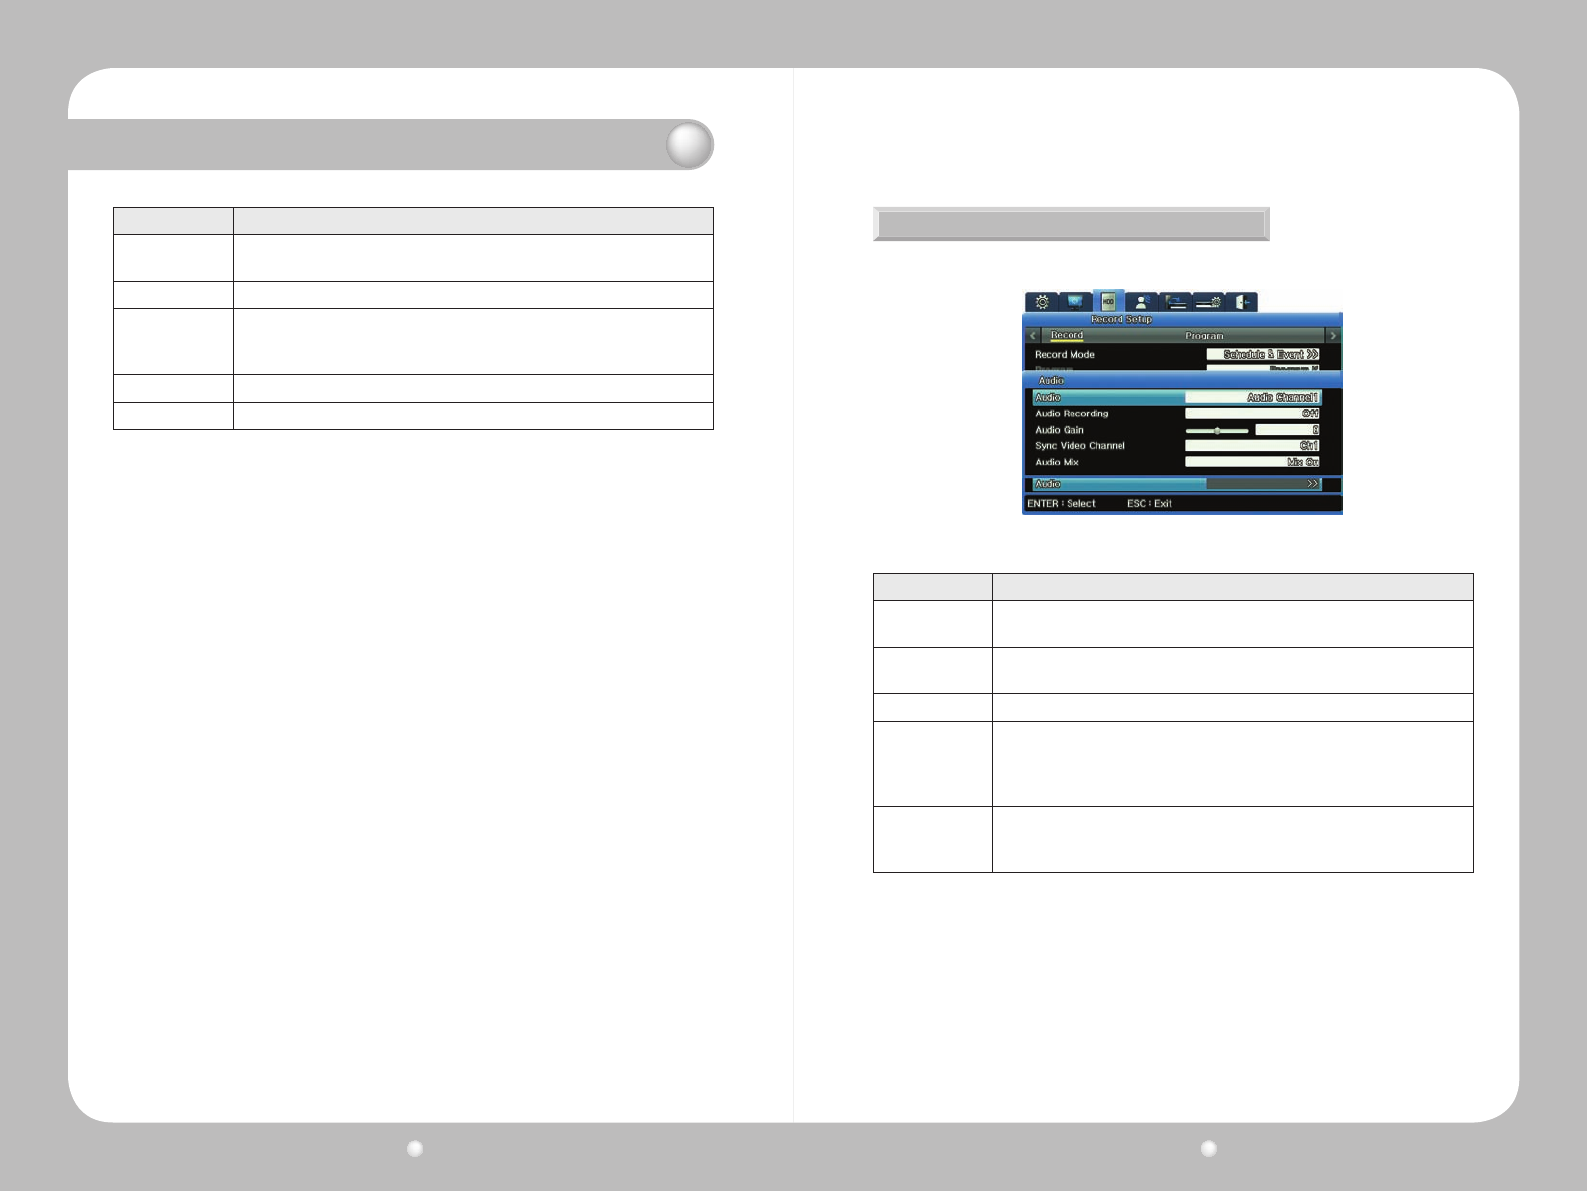
Audio Setup
YousetupAudiosettingfromtheAudiooptionontheRecordsubmenu.
Figure 8.7.3 Audio Channel submenu on the Record submenu
Option Description
Audio Channel
Select a channel for audio. (This is not the channel for video; set that under Sync
Video Channel.)
Audio Recording
Set Yes to have audio recorded for playback. (If you set it to Off, audio is still
available for live video.)
Audio Gain Adjust audio volume up or down.
Sync Video
Channel
Select the video channel for which you are setting audio.
By default, Channel 1 audio is outputted to Channel 1 video. But you can set, for
example, the Audio Channel to Ch1 and set the Sync Video Channel to Ch8. Then,
Channel 1 audio will be associated with Channel 8 video.
Audio Mix
On this submenu, set the audio for live feeds.
· Set to Mix On to have all audio available for output regardless of channel.
· Select a specific channel to mix audio for that channel only.


