


-E33-
5
a
4
Menu
Play/Edit Disc
Record Program
Setup Menu
Record Status
Record List
Press SETUP to exit
Menu
5
b
Play/Edit Disc
Record Program
Setup Menu
Record Status
Record List
Record Show
08:31
Tuner
10
SP
20040501
Start
09:31
2004/05/01
End
Verify the settings. Press ENTER to edit.
Done CancelPress SETUP to exit
Record Time
Record Day
Input Source
TV
Record Mode
Title
Record Show
08:31
Tuner
10
SP
20040501
Start
09:31
2004/05/01
End
Verify the settings. Press ENTER to edit.
Done CancelPress SETUP to exit
Record Time
Record Day
Input Source
TV
Record Mode
Title
5
4
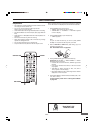
Record Show
08Start 31
Press or use the number keys on remote
to change settings. Use the International Time
for the hour(00-23).
: Done
Back
Press SETUP to exit
Hour Minute
09End 31:
Hour Minute
4
5
Record Show
21:30
Tuner
10
SP
20040501
Start
22:00
2004/05/01
End
Verify the settings. Press ENTER to edit.
Done CancelPress SETUP to exit
Record Time
Record Day
Input Source
TV
Record Mode
Title
The program timer switches the unit on and off to record a TV
program at a preset time.
You can program a total of 15 times slots to be recorded, during
the next one-year period.
These settings are retained in the program memory and will
repeat as long as a recordable disc is loaded in the unit.
Note:
The clock must be set before this setting. See “SETTING
THE CLOCK” on page E18.
Preparations
(Record Status ---> Record Time, Record Day, Input Source,
TV, Record Mode & Title)
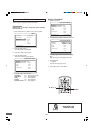
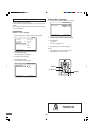
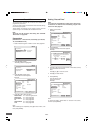
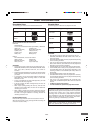
1. Select “Record Program” in “Menu” screen. See page E22.
Record Status
Setting “Record Time”
Note:
If you have set “Record Status” already, open “Record List”
to check the list. Remove the unnecessary program from
the list first. See page E37.
1. Select “Record Time”.
Example:
2. Press [ENTER] (or [a]).
“Recording Status” is highlighted.
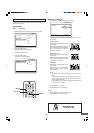
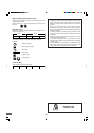
3. Press [ENTER] (or [a]) again.
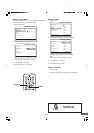
“Record Show” screen appears.
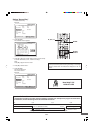
Example:
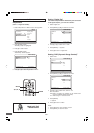
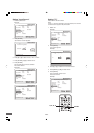
2. Press [ENTER].
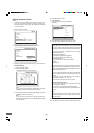
The start and end time screen appears.
Example:
4. Press [o] or [p] to select the item.
Record Time ===> See the right column.
Record Day ===> See page E34.
Input Source ===> See page E35.
TV ===> See page E35.
Record Mode ===> See page E36.
Title ===> See page E36.
Note:
After all settings are completed, press [p] to select “Done”, and
then press [ENTER].
3. Press [o] or [p] (or the number buttons on the remote control)
to set the start and end times.
Note:
Press [a] or [b] to move the cursor.
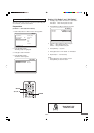
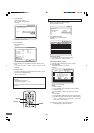
4. Press [a] to select “Done”.
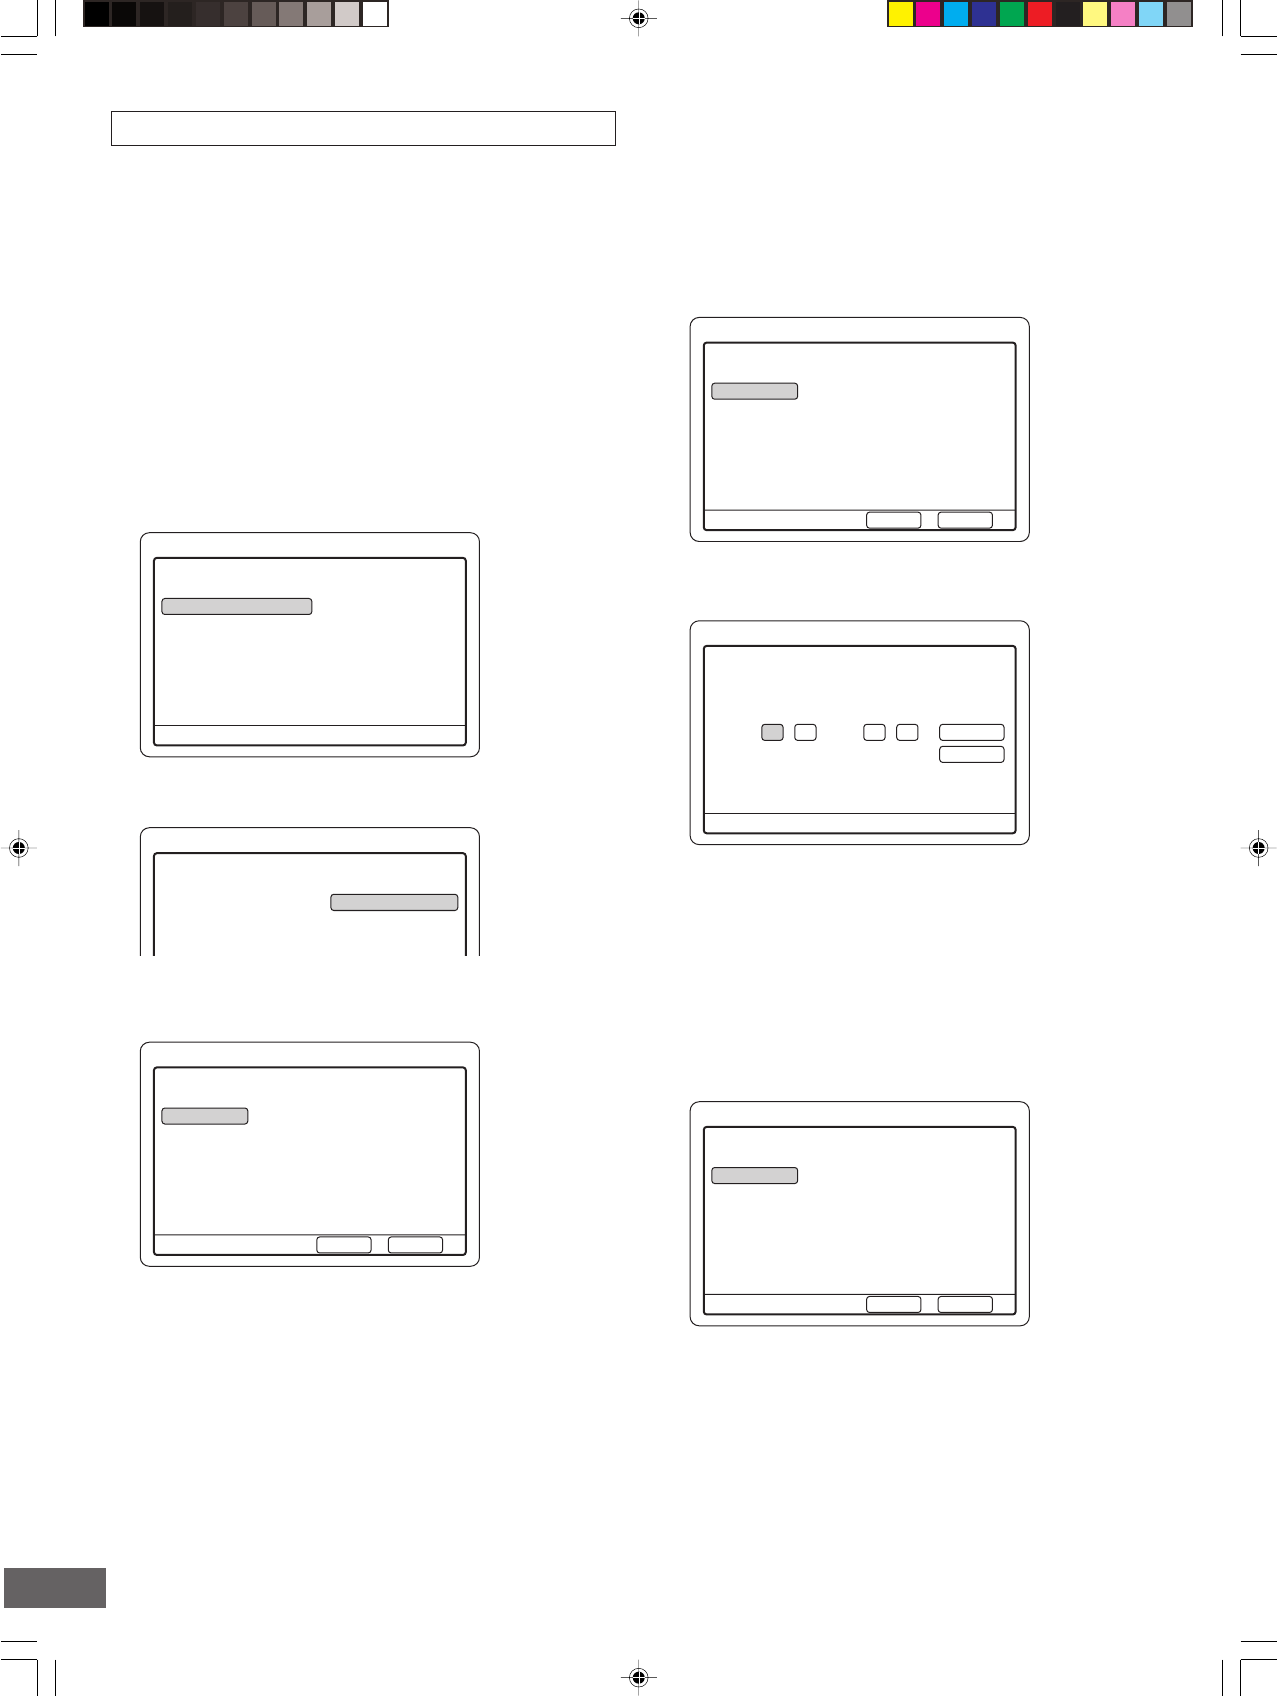
5. Press [ENTER].
The record time is set.
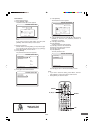
The screen returns.
Example:
Note:
To cancel the setting, select “Back” or “Cancel” in the screen,
and then press [ENTER].