


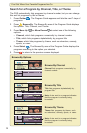
9
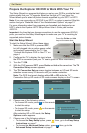
Get Started
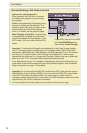
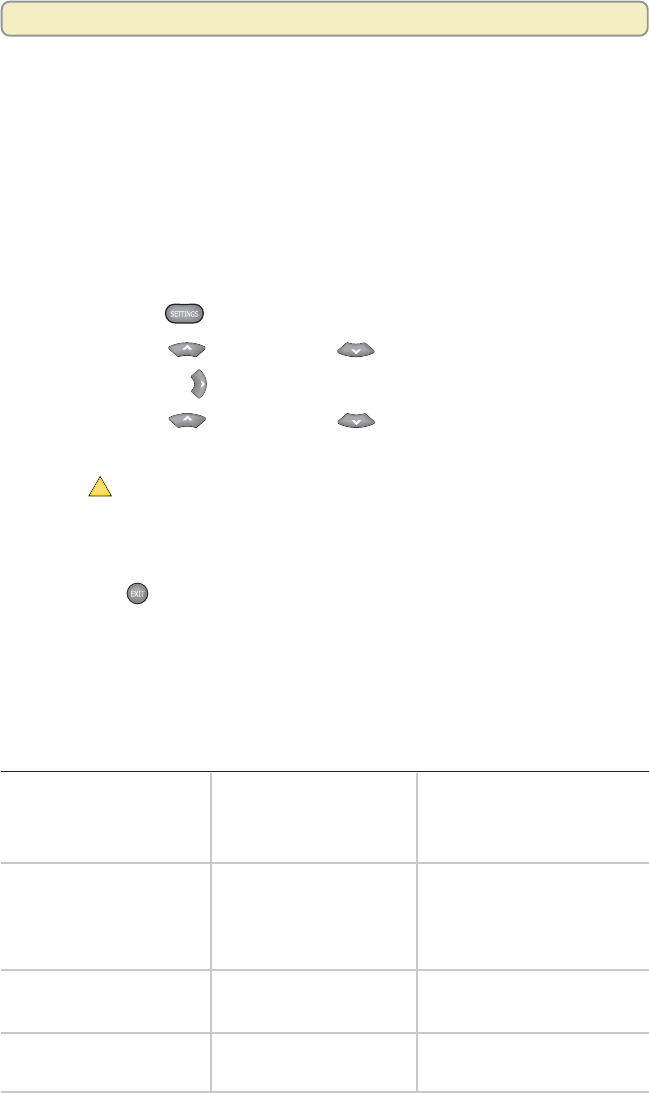
Adjust Your HD Picture Using General Settings
You can adjust how your DVR displays pictures using the Picture Format and TV
Borders General Settings menu options.
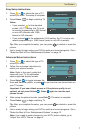
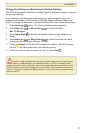
Set Your Default Picture Format
By automating picture adjustments, the DVR uses a method that you choose to
automatically select the picture format that provides the best display possible.
The methods that you can select from depend partly on the type of video
connection your HDTV uses. (See the box on the next page for more details.)
Follow these steps to select a method the DVR will use to display pictures.
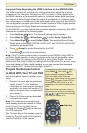
1. Press Settings
twice. The General Settings menu appears.
2. Press Move Up or Move Down to select Set: Picture Format.
3. Press Move Right
to select the picture format setting.
4. Press Move Up or Move Down to display each option.
Note: See the box on this page for an explanation of each option.
5. Press
A
Accept to accept the option for the DVR.
Note: The 8300 DVR front panel displays the selected option and scan rate.
For example, if you selected Pass-Through, the 8300 DVR front panel
displays AUTO and 1080i.
6. Press Exit
to return to normal viewing.
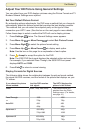
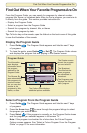
Display Formats for Digital Sources
The following table shows the relationship between the picture format method,
the signal the DVR receives, and the format of the picture that displays on your
TV screen.
The HDTV displays the
picture in this format:
The picture format you
selected from the Quick
Settings menu. (For details,
see page 10.)
If you chose this picture
format method:
And the DVR receives
this signal:
Fixed
Pass-Through
or
Auto-DVI
Upconvert 1
Upconvert 2
1080i, 720p, 480i, 480p
1080
720p
480i
480p
1080
720p
480i
480p
480i/480p
720p/1080i
480i/480p
720p/1080i
480p
1080i
480p
720p