64
Creating Clip Lists
Chapter 4 Scene Selection
8
Use the arrow buttons or jog dial to select the desired
clip.
You can also select clips with the following
operations.
Press the PREV or NEXT button: Moves to the
previous or next clip.
Press the PREV or NEXT button with the SHIFT
button held down: Moves to the first or last clip.
Press the M/MARK1 or m/MARK2 button with the
SHIFT button held down: Switches to the
previous or next page. Does not switch when
there is only one page.
Press the </IN button or ,/OUT button with the
SHIFT button held down: Selects continuous
multiple clips.
To display the total duration of the current clip list
after the addition of the selected clips
When you press the SHIFT button, the total duration
of the selected clips is displayed, along with the total
duration of the clip list after the addition of the selected
clips. This allows you to check the new total duration
before making the addition.
9
Press the SET button.
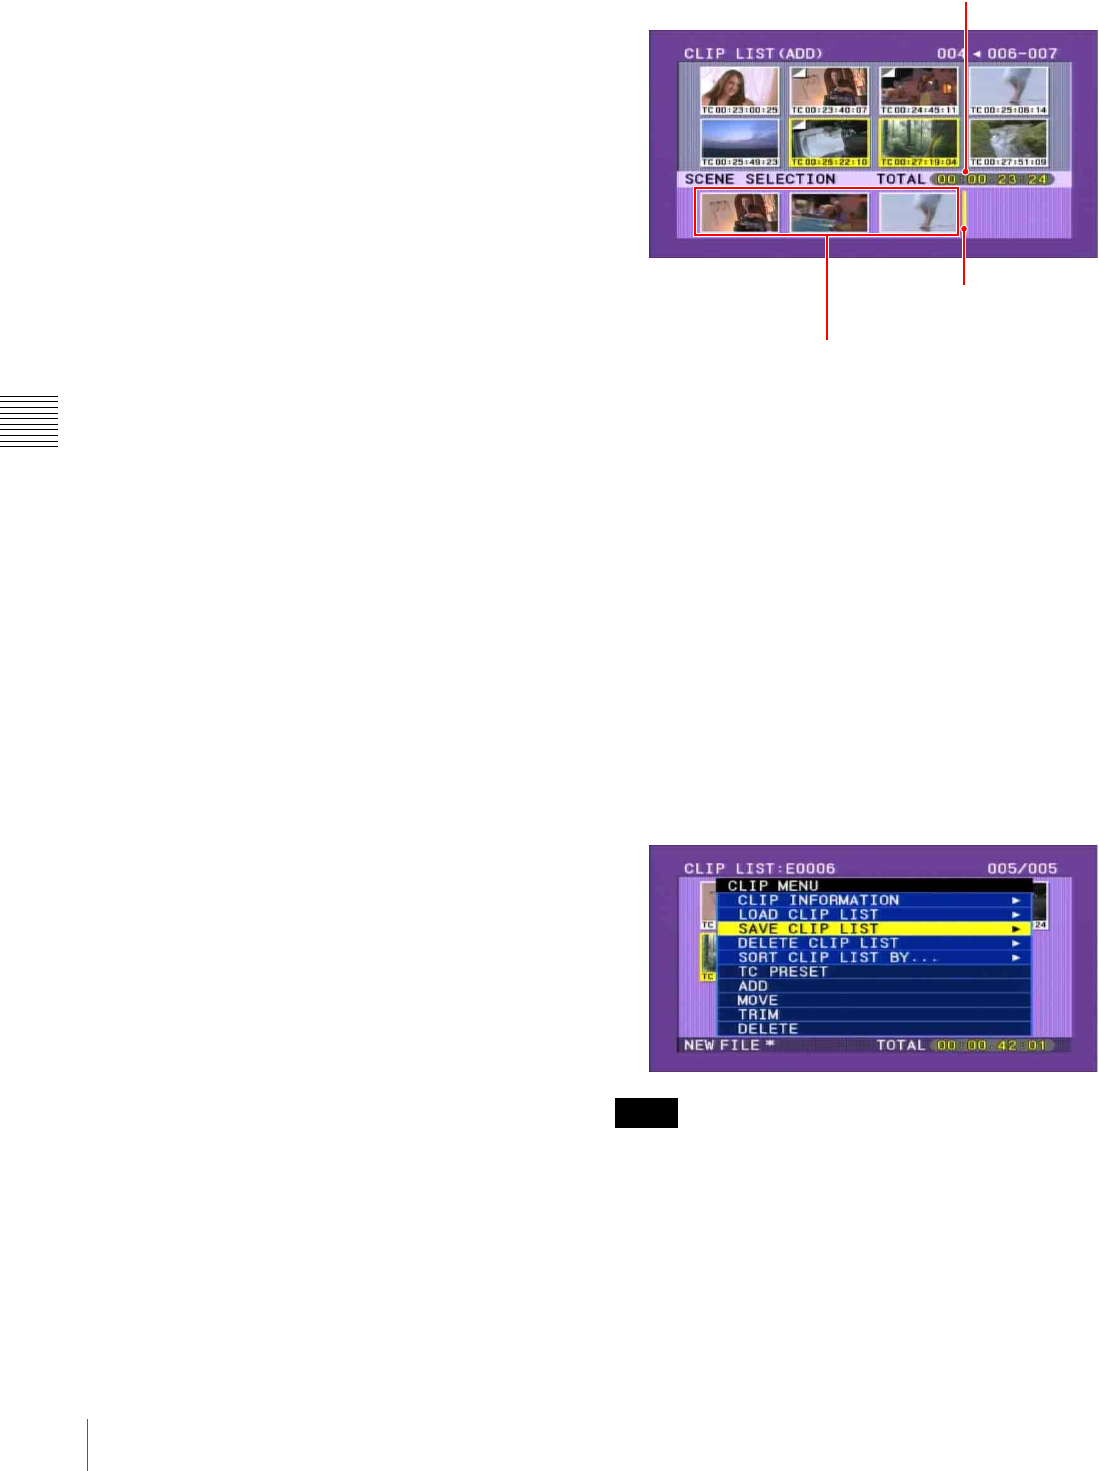
An I-shaped cursor appears in the lower part of the
scene selection window.
Press the RESET button to return to the state of step 8.
10
Use the arrow buttons or jog dial to move the I-shaped
cursor to the desired position.
You can also move the I-shaped cursor with the
following operations.
Press the PREV or NEXT button: Moves the cursor
to the previous or next sub clip.
Press the PREV or NEXT button with the SHIFT
button held down: Moves the cursor to the first
or last sub clip.
Press M/MARK1 or m/MARK2 button: Moves to
the 4th previous or 4th next sub clip.
11
With the SHIFT button held down, press the SET
button.
All the clips selected in step 8 are added to the current
clip list as sub clips and the scene selection window
shows thumbnails of registered sub clips.
At the same time, the cursor disappears and you can
select a new clip.
12
Repeat steps 8 to 11 until you have added all of the
desired clips to the current clip list.
You can add the same clip as a sub clip any number of
times.
13
When you have finished selecting all the clips you
want, press the SET button without pressing the
SHIFT button.
This closes the scene selection window, and the screen
returns to the CLIP menu.
To close the CLIP menu
Press the RESET button.
14
Save the current clip list to disc.
See “Saving the Current Clip List to Disc” (page 70).
• Unless the current clip list has been saved to disc, its
contents will be lost when the unit is powered off or the
disc is ejected. After creating a clip list, be sure to save it.
An asterisk (*) appears after the date and time of creation
when a clip list has not been saved to disc.
Notes
Total duration of sub clips in the current clip list
Cursor (shows insertion
position of next sub clip)
Thumbnails of the sub clips already added to the current clip list
