Teledyne API Model 200A NO
X
Analyzer Instruction Manual, 02246, Rev. G, DCN 5247
7.8 EPA Protocol Calibration
If the M200A is to be used for EPA compliance monitoring, it must be calibrated in accordance
with the instructions in this section.
In order to insure that high quality, accurate measurements are obtained at all times, the M200A
must be calibrated prior to use. A quality assurance program centered on this aspect and
including attention to the built-in warning features of the M200A, periodic inspection, regular
zero/span checks and routine maintenance is paramount to achieving this.
In order to have a better understanding of the factors involved in assuring continuous and
reliable information from the M200A, it is strongly recommended that Publication No. PB 273-
518 Quality Assurance Handbook for Air Pollution Measurement Systems
(abbreviated, Q.A.
Handbook) be purchased from the NTIS (phone 703-487-4650). Special attention should be paid
to Section 2.3 which deals with chemiluminescent-based NO
2
analyzers and upon which most of
this section is based. Specific regulations regarding the use and operation of ambient oxides of
nitrogen analyzers can be found in 40 CFR 50 and 40 CFR 58. Both publications are available
from the U.S. Government Printing Office (phone 202-783-3238).
7.8.1 Calibration of Equipment
In general, calibration is the process of adjusting the gain and offset of the M200A against some
recognized standard. The reliability and usefulness of all data derived from any analyzer depends
primarily upon its state of calibration. In this section the term dynamic calibration is used to
express a multipoint check against known standards and involves introducing gas samples of
known concentration into the instrument in order to adjust the instrument to a predetermined
sensitivity and to produce a calibration relationship. This relationship is derived from the
instrumental response to successive samples of different known concentrations. As a minimum,
three reference points and a zero point are recommended to define this relationship. The true
values of the calibration gas must be traceable to NIST-SRM's (Section 2.0.7, Q.A. Handbook).
All monitoring instrument systems are subject to some drift and variation in internal parameters
and cannot be expected to maintain accurate calibration over long periods of time. Therefore, it
is necessary to dynamically check the calibration relationship on a predetermined schedule. Zero
and span checks must be used to document that the data remains within control limits. These
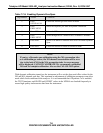
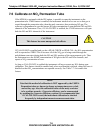
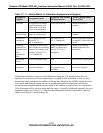
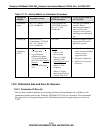
checks are also used in data reduction and validation. Table 7-7-11 summarizes the initial quality
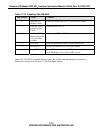
assurance activities for calibrating equipment. Table 7-7-12 is a matrix for the actual dynamic
calibration procedure.
7-12
PRINTED DOCUMENTS ARE UNCONTROLLED


