


Inspired Signage XPress Programming
27
Inspired XPress - Programming Guide
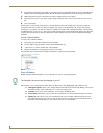
Security: You can also directly add user names and passwords for protected devices. If you do not enter a password
in this dialog, XPress will ask you to authenticate yourself when trying to publish content to a protected device.
4. The new device is added to the current folder.
5. Once added, you may change the name of the new device from the browsing panel at any time.
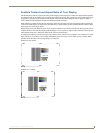
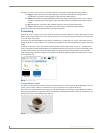
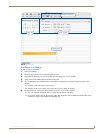
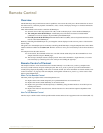
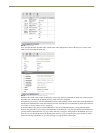
Check the Status of the Devices
XPress checks the status of the devices available in My Devices each time the refresh button is pressed. If the content
server is reachable, it displays a green check on top of the device icon. If the content server cannot be reached, a red cross
is displayed instead.
This check mechanism does not inform you on the status of the player. It only states whether or not the player can be
reached. To get more feedback about an IS-SPX Player, you should use the IS-SPX Player Web-Based Configuration
Page navigation bar section in the IS-SPX-1000 & IS-SPX-1300 Operation Reference Guide, available at
www.amx.com.
Right-click on an IS-SPX Player and select the Manage... command from the pop-up menu. This will directly open your
preferred web browser on the HTTP server of the selected device.
For the proper management of the status of multiple devices, a SNMP client should be used. The IS-SPX Player is given
a product OID of 1.3.6.1.4.1.8942.1.1
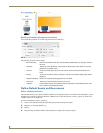
Open a Device
To view the content server of a device (access to all the files and folders that have been published on the device), double-
click on a device. This will open the content server in the browsing panel and the property page of the device in the
editing panel.
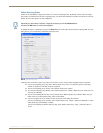
The property view shows you information about your device. Do not modify this information, as this might prevent
XPress from communicating properly with the device.
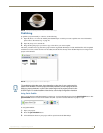
By pressing on the Preview icon (the camera) it is possible to get a snapshot of what is currently being displayed by the
device. The preview is automatically updated every 30 seconds.
You can use the content server to upload content to the device. You can also directly edit the content on the device using
XPress. However, it is recommended to use projects to edit the content and then upload the project to the device.
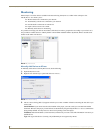
Scheduling
XPress offers an intuitive interface that allows the user to associate to any type of XPress content a schedule in the
iCalendar format. Using this feature, the user can plan in advance when the content shall be displayed on a specific IS-
SPX Player.
The scheduling interface implemented by XPress is very similar to the one implemented by electronic agendas such as
that in Microsoft Outlook: each event you add on the agenda (like when you add a meeting in your Outlook) is associated
to a starting date/time and a duration (or an end date/time). In addition, it is possible to associate to an event recurring
rules so as to schedule a media to be displayed twice per week on Monday and Friday between 9:00AM and 10:00AM.
Once the planning of the day, week, month or year is finalized, XPress exports the results into a standard iCalendar file.
This schedule file has the extension .ics and can be used as any other media to compose your content. The flexibility
obtained with such an approach allows the user to schedule full screen content, but also specific elements in the scene
(such as different backgrounds, logos, source of information, etc.)
Scheduling the Content Displayed by an IS-SPX Player
When you have created or imported a XPress project (for more information, please refer to the XPress Projects on
page 4) you have a master file index.svg in your project. The following steps explain how you can define when the
project will be displayed once you have published it to a specific IS-SPX Player.
1. Create a new schedule document in your project. Simply right-click the browsing area in your project and select
New Schedule from the pop-up menu. A new.ics file will be created in your project.
2. Open the new.ics file. XPress will display a calendar view in the Editing panel, where you can select the current
day, week, or month.
FIG. 36 Device availability