FUSION DVR Digital Recording and Transmission System
14–2
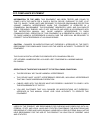
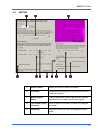
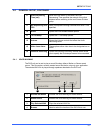
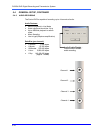
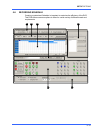
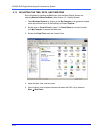
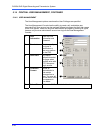
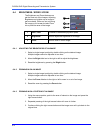
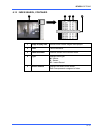
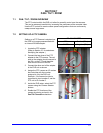
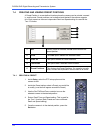
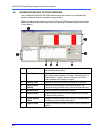
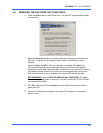
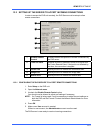
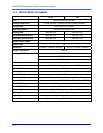
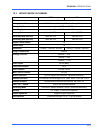
14.1 WEB VIEWER OVERVIEW, CONTINUED
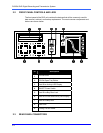
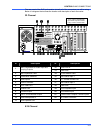
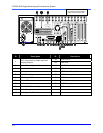
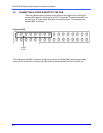
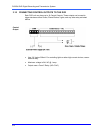
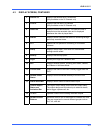
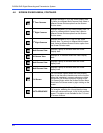
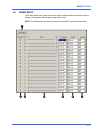
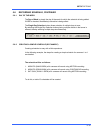
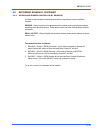
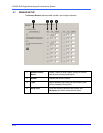
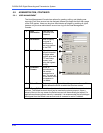
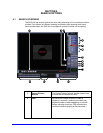
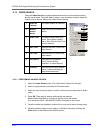
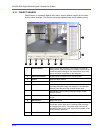
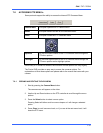
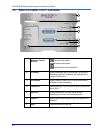
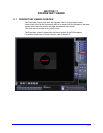
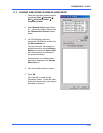
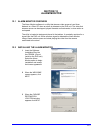
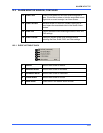
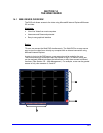
1 Screen Division
Buttons
Allows view of one or more sets of cameras at a time.
They are organized in several different groups such as
1x1, 4x4, and 8x8.
2 GO!
Activates the commands
3 Camera Buttons
Enable or disable selected cameras for use when
searching.
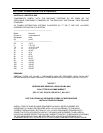
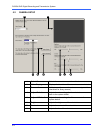
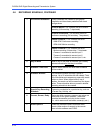
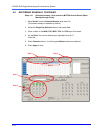
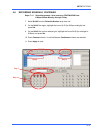
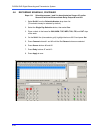
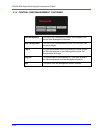
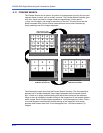
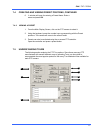
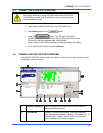
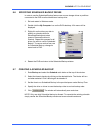
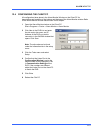
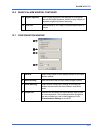
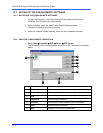
14.1.1 CONFIGURING THE DVR SERVER TO ACCEPT REMOTE CONNECTIONS
1. Enter Setup on the DVR unit.
2. Open the Network menu.
3. Uncheck the Disable Remote Control option.
Adjust port settings if necessary.
NOTE: If using a Firewall, it may be necessary to adjust the port settings on both the
DVR and the Firewall. Contact the Network Administrator for more
information.
4. Check the Enable Web Viewer option.
Again, adjust port settings if necessary
5. Press OK.
6. Make sure a User account is created.
Without a user account, the Administrator account must be used.
The DVR server is now ready to receive incoming connections.
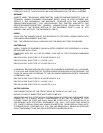
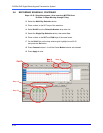
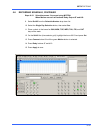
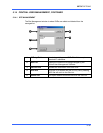
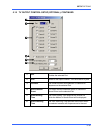
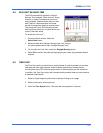
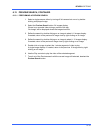
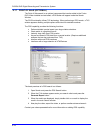
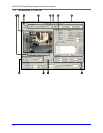
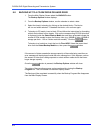
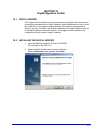
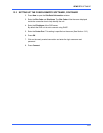
14.1.2 CONNECTING TO A DVR WITH THE WEB VIEWER
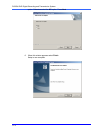
1. Open Microsoft® Internet Explorer® 5.5 or later.
2. Enter the IP address of the DVR into the Address Bar.
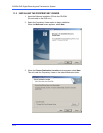
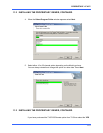
3. When attempting this for the first time a window will open and ask for approval to
accept an Active X installation. Select Yes to this.
NOTE: If a message is received saying your Internet Explorer® security settings do
not allow for downloading Active X components then adjust the browser
security settings. One way to do this is to add the IP address of the DVR to
your trusted sites list inside Internet Explorer® settings. Contact the System
administrator for additional help with adjusting Internet Explorer® settings.
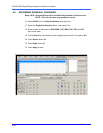
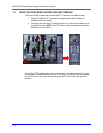
4. When the Web Viewer finishes loading select one or more cameras (or select a
screen division button).
5. Press GO!.