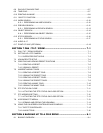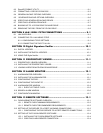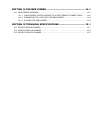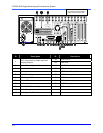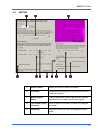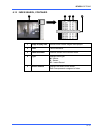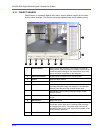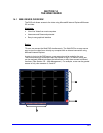
SETUP OPTIONS
5–9
5.4 GENERAL SETUP, CONTINUED
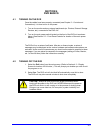
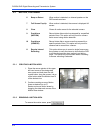
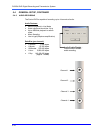
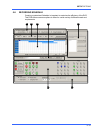
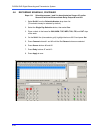
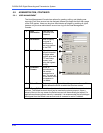
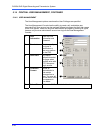
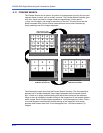
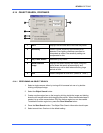
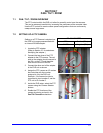
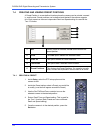
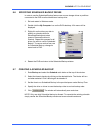
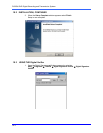
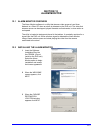
5.4.3 HOW TO USE INTENSIVE RECORDING
The Intensive Recording option is set up as an ‘All or Nothing’. This means that once
enabled (associated with sensors), all
cameras that are associated with sensors will
activate the Intensive Recording.
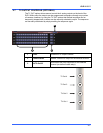
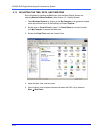
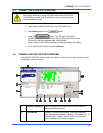
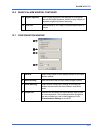
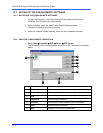
To activate the Intensive Recording option, follow these steps.
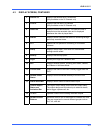
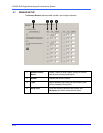
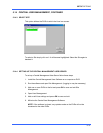
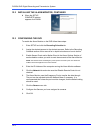
Activating
Intensive
Recording
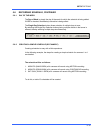
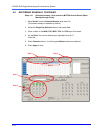
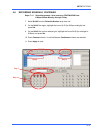
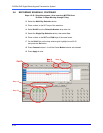
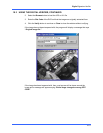
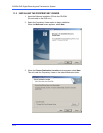
1. Inside Setup, select the desired camera to use and then enable the appropriate
sensor associated to it.
2. Open the Intensive Recording Options. Enable the Intensive-On-Sensor option
and then select the desired Pictures Per Second for both the Intensive and Non-
Intensive Channels. Resolution and holding duration may also be adjusted for the
Intensive Channel.
3. Close the Intensive Recording window by selecting the Apply button.
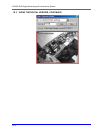
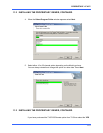
4. Open the Sensors and Outputs window and enable the sensor that was
associated with the Intensive Recording by placing a check in the box next to it
5. Press the Apply button and exit out of setup.
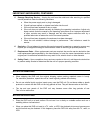
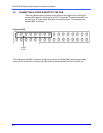
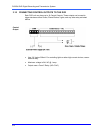
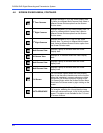
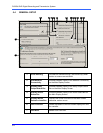
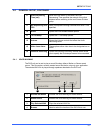
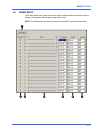
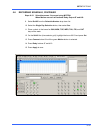
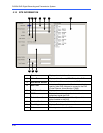
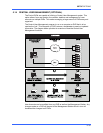
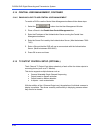
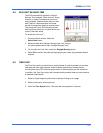
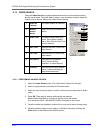
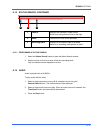
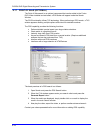
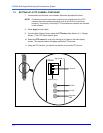
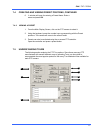
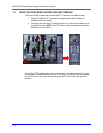
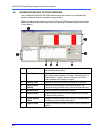
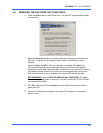
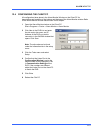
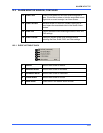
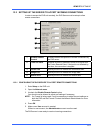
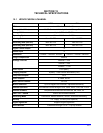
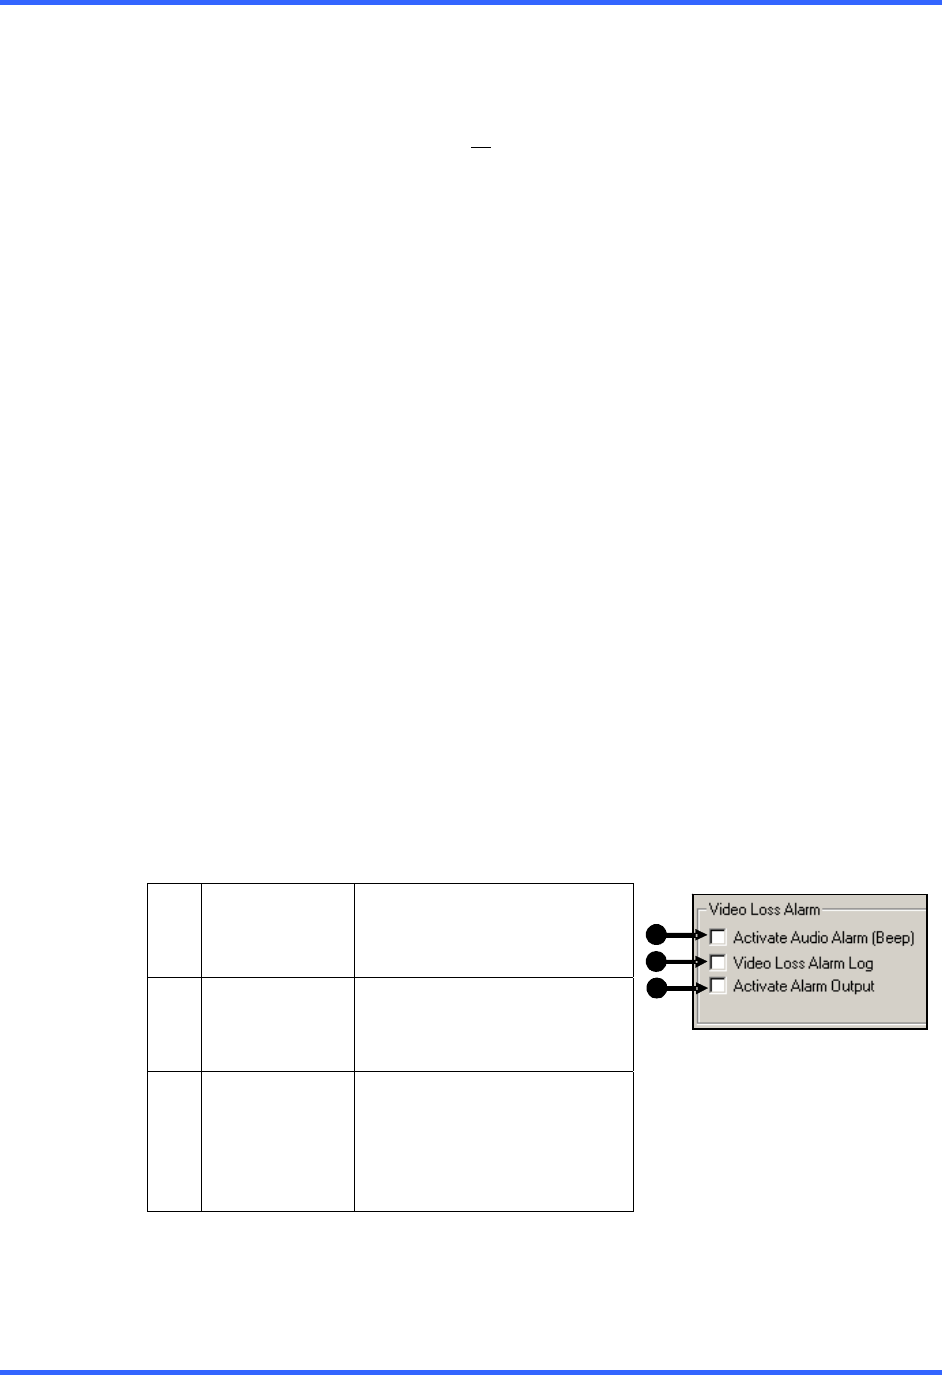
5.4.4 VIDEO LOSS ALARM
The DVR supports a Video Loss Alarm function which allows an Alarm Event to occur
when a camera loses its signal. The lost signal can be due to Power failure to the
camera, the camera cable being cut or unplugged, or the camera being damaged in
some way.
In order to use Video Signal Loss detection, cameras must either be turned ON or
OFF. This is because the DVR needs to know which cameras it should expect to
receive signals from. To turn camera(s) ON, open Frame Setup, and set the Frames
Per Second to anything above zero. By designating zero frames per second the
camera will not be used by the DVR.
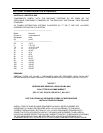
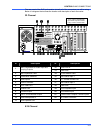
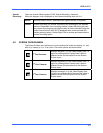
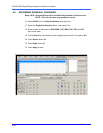
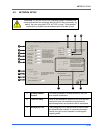
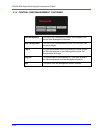
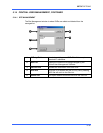
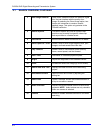
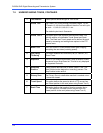
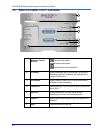
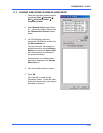
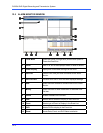
1 Activate
Audio Alarm
(BEEP)
When video loss occurs, an
internal speaker on the DVR
will sound an alarm.
2 Video Loss
Alarm Log
When video loss occurs, the
event is recorded in the DVR
log.
3 Activate
Alarm Output
Activates the last Relay
Output on the DVR when
camera loses signal. (This is
#16 for a 16/32 ch DVR and
#8 for an 8ch DVR)
2
1
3