


VR-N100U USERS MANUAL
Page 10 of 98 All Items Are Subject To Change Without Notice Feb. 2004 Rev 1.0
2. INSTALLING VR-N100U
This chapter covers all aspects for the VR-N100U installation, from the VR-N100U rackmount configuration to manually
acquiring an IP address. Some of the procedures described here may not be relevant to your specific installation. Simply skip
the section(s) that do not apply and move on to the next applicable section.
2.1. Before You Begin
WARNING
Disconnect the VR-N100U from its AC power source before you connect or disconnect cables, install or remove any
components. Failure to do so can result in personal injury or equipment damage that will NOT be covered under the
product’s warranty. Some circuitry on the VR-N100U can continue to operate even though the power switch is turned
off.
CAUTION
Electrostatic Discharge (ESD) can damage the VR-N100U components and devices. Configure the VR-N100U at an
ESD-controlled workstation. You must wear an anti-static wrist strap or equivalent accessories.
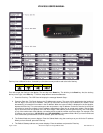
2.2. What’s in the Box
The VR-N100U Rackmount Solution includes the following items:
VR-N100U Rackmount System
¾ 19” 1U Rackmount Chassis
¾ Power Supply
¾ VR-N100U Industrial Server Board (VR-N100U OS & APP preinstalled)
¾ LED Display
¾ Multiple Hard Disk Drives (Configured as a RAID-5 set)
¾ Various Cables
VR-N100U Quick Installation Guide (Insert Sheet)
VR-N100U Companion CD (VDRView Application and Users Manual)
CAT5/CAT5e Ethernet Cable (Connecting the VR-N100U to the switch that is dedicated for the cameras)
Optional 24-port 10/100 Fast Ethernet Switch (Exclusively for camera backchannel and uses only 17 ports)