


VR-N100U USERS MANUAL
Page 81 of 98 All Items Are Subject To Change Without Notice Feb. 2004 Rev 1.0
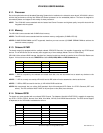
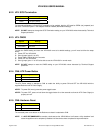
6.2.2. JP2: SCSI Termination
Options Settings
Disable 1-2: Short
Enable 1-2: Open (default)
For the onboard Adaptec LVD160 SCSI Termination to be enabled, both the JP2 must be OPEN (not jumpered) and
the SCSI Termination option in the Adaptec BIOS be enabled (both default settings).
NOTE: DO NOT attempt to change the SCSI Termination setting on your VR-N100U unless instructed by Technical
Support personnel.
6.2.3. JP3: CMOS
Options Settings
Normal 1-2: Short (default)
Clear CMOS 2-3: Short
To clear the CMOS setting and have the VR-N100U revert to its default settings, you will need to follow the steps
below:
a) Power OFF the VR-N100U
b) Short (jumper) pins 2-3 on JP3
c) Power ON the VR-N100U for 5 seconds
d) Power OFF the VR-N100U
e) Short (jumper) pins 1-2 on JP3 to be able to use the VR-N100U in normal mode
NOTE: DO NOT attempt to reset the CMOS setting on your VR-N100U unless instructed by Technical Support
personnel.
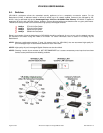
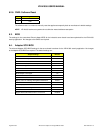
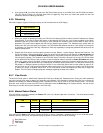
6.2.4. CN6: ATX Power Button
Pin Signal
1 PW_BN +
2 GND
The ATX Power switch is attached to CN6 to enable the ability to power ON and OFF the VR-N100U with the
supplied Rackmount ATX Power Supply.
NOTE1: To power ON, merely press the power toggle button.
NOTE2: To power OFF, press on hold down the toggle button for a few seconds to allow the ATX Power Supply to
properly turn off.
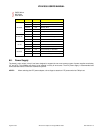
6.2.5. CN8: Hardware Reset
Pin Signal
1 Reset
2 GND
The recessed power reset button on the Rackmount chassis is attached to CN8.
NOTE: It is NOT RECOMMENDED to conduct a hard reset on the VR-N100U as it will cause a “dirty shutdown” and
cause the appliance to be temporarily disabled until the devices have completed a resynchronization.