


VR-N100U USERS MANUAL
Page 59 of 98 All Items Are Subject To Change Without Notice Feb. 2004 Rev 1.0
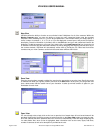
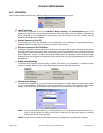
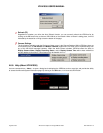
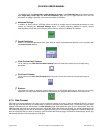
1. To add or delete a remote Zerver, select Edit Remote Zerver List from the Options menu.
2. Click on the Add button to add an entry to the list. You will be prompted to provide either the name of the
remote Zerver or its IP address, if it is a static IP address.
3. Once you have included all remote VR-N100Us, the next step is to add them into the active list. Click on the
Add to Active Zerver List button to add them to the Active Remote list.
4. You can also delete any of your entries by selecting and then clicking on the Delete button. You will be
prompted to reconfirm or cancel the deletion.
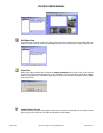
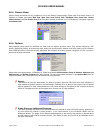
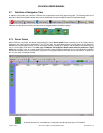
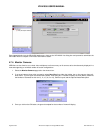
Communication Settings…
VDRView and VR-N100U offer secured and unsecured communication. If you choose to utilize the supported
SSL 128-bit encryption to securely transmit all data and video, you can setup the communication method. You
have the ability to set the Remote VDR Discovery Mode and Communication Mode to either Non-encrypted or
Encrypted from within this dialog box.
NOTE: When using ENCRYPTED, everything will be secured, however, it will cause additional load on your CPU as
the data and video is encrypted and then decrypted on-the-fly between your workstation and VR-N100U plus
its cameras.
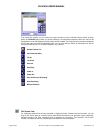
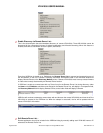
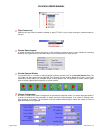
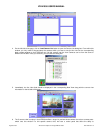
Refresh Settings
As you view the VDRView screen, you will see it refresh at specific intervals. The Discover function continues to
run in the background and searches the subnet segment or the domains defined previously, depending on
whether the Discover via Microsoft Browser and Discover via Remote Server List are toggled off or on. You
can enable or disable the Auto Refresh settings option and change the Refresh Check Interval parameter
between 10 to 60 seconds, and then press the OK button to save the new settings.