


Setting Up NetScout Manager Plus for FrameSaver Devices
8-4
9123-A2-GB20-10
July 2000
Adding FrameSaver FLEX Units to the NetScout Manager Plus Network
"
Procedure
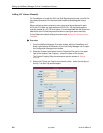
1. Bring up the NetScout Manager Plus main window.
2. Select the FrameRelay radio button from the agent type selection bar (on the
left side of the window).
A list of configured frame relay agents appear in the list box below the
Name and IP Address headings. If this is a new NetScout Manager Plus
installation, the list box below the selection bar is blank since no agents are
configured yet.
3. Select the Admin radio button from the application selection bar (to the far
right of the screen). Applicable configuration and administration icons appear
in the box below the application bar.
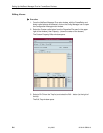
4. Click on the Config Manager icon to open the Configuration Manager main
window.
5. Select the Add... button (down the center of the screen).
6. Minimally, enter the following:
— Agent name
— IP address
— Enter 1 for the frame relay logical interface to be monitored.
— Properties File: Select paradyne.
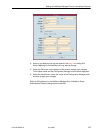
7. Select the OK button at the bottom of the screen to add the agent, discover
its DLCIs, and return to the Configuration Manager main window.
The frame relay agent just entered appears in the agent list box, with its
DLCIs in the DLCI list box at the bottom of the screen.
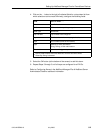
8. Select the Test button (fourth button down, center of the screen) to make sure
you can communicate with the agent.
Refer to
Adding Frame Relay Agents
in the
NetScout Manager/Plus & NetScout
Server Administrator Guide
for additional information.