


20
Initial installation
After successfully connecting your DVD recorder to the TV set and
other additional devices as described in the previous chapters, this
chapter will show you how to start the initial installation. The DVD
recorder automatically seeks and stores all available TV channels.
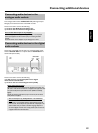
Switching on additional devices
If you have connected additional devices such as a satellite receiver to the
aerial cable, switch them on. The automatic channel search will recognise it
and save it. Please observe that you must switch on a "test signal" for some
additional devices.
No aerial connected
Even if you only want to use the DVD recorder to play back or have only
connected a satellite receiver, you must still complete the initial installation.
This is necessary so that the basic settings are stored correctly. Once initial
installation is complete you can use the DVD recorder as normal.
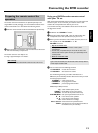
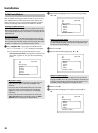
1 Press STANDBY-ON m on the front of the DVD-recorder
P 'PHILIPS' and then 'IS TV ON?' will appear on the display.
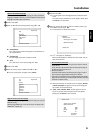
P If the connection was properly made and your TV was
automatically switched to the programme number for the
scart socket, e.g. 'EXT', '0', 'AV', you will see the following
picture:
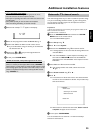
Virgin mode
Menu Language
English
Español
Français
Italiano
Deutsch
Press OK to continue
a My screen is empty.
b Depending on the initialisation procedure it can take some time
before the picture appears. Please press no button in the
meantime.
b If the TV set does not automatically switch to the scart socket
programme number, manually change to the corresponding
programme number on your TV set (see your TV's operating
instructions).
b Check that the scart cable is connected from the TV set to the
EXT1 TO TV-I/O socket on the DVD recorder. The EXT2
AUX-I/O socket is intended only for additional devices.
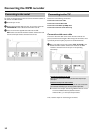
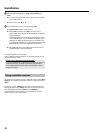
2 Select the desired language for the on-screen menu by pressing
B or A .
Virgin mode
Menu Language
English
Español
Français
Italiano
Deutsch
Press OK to continue
What is an on-screen menu?
The multi-language on-screen menu takes the mystery out of using your
new DVD recorder. All settings and/or functions are displayed on your
TV screen in the relevant language.
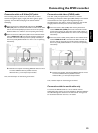
3 Confirm with OK .
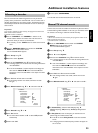
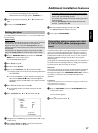
4 Select the desired audio language using B or A .
Virgin mode
Audio Language
English
Español
Français
English
Italiano
Press OK to continue
What is an audio language?
The DVD will play the sound in the language you select, provided this
language is available on the disc. If it is not available on the disc the first
language on the DVD will be used instead. The DVD Video Disc menu,
if available, will also be displayed in the language you select.
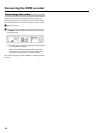
5 Confirm with OK .
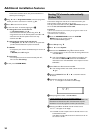
6 Select the desired language for the subtitles by pressing B or
A .
Virgin mode
Subtitle Language
English
Español
Français
English
Italiano
Press OK to continue
Installation