


27
To activate the new language you must switch the
DVD-Recorder off and on again (button STANDBY m ).
5 Select the appropriate setting using B or A and confirm with
OK .
6 To end, press SYSTEM MENU .
Setting the time
If the display shows an incorrect time or '--:--', the time and date must
be reset manually.
SMART CLOCK
'SMART CLOCK' automatically sets the time and date using the information
transmitted by the TV channel. Normally the TV channel stored at
programme number 'P01' is used. In the 'Clock preset' line you can
select the programme number (channel name) whose TV channel transmits
this information.
If the time/date is not displayed correctly you need to choose the 'Off'
setting in the 'Clock preset' line and set the date and time manually.
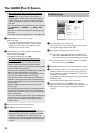
1 Press the BROWSER HDD button and then the SYSTEM
MENU button on the remote control.
P The 'SYSTEM MENU' appears.
2 Select 'Set up' using B .
3 Press C to select 'System'.
4 Select the line 'Installation' using B and confirm with C .
P A message appears on the screen that this setting will flush the
'Time Shift Buffer'.
O If the 'Time Shift Buffer ' contains important recordings, save
them with the REC/OTR n button first. Read additional
information to the 'Time Shift Buffer' in the chapter 'The Time
Shift Buffer'.
5 Select 'Yes' with D and confirm with OK .
O If the message window was closed, confirm the line with
C again.
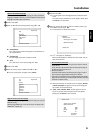
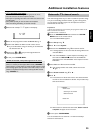
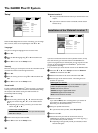
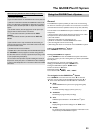
6 Select 'Time/Date' using B or A and confirm with C .
Installation
Time/Date
Time 20:00
Year 2003
Month 01
Date 01
Clock preset 01
To exit press
SYSTEM MENU
7 Change the time in 'Time' using the number buttons 0..9 on your
remote control.
8 Check 'Year', 'Month' and 'Date' in the same way. Select the
entry field with the B or A button.
a Time/date is displayed incorrectly despite manual setting
b With 'SMART CLOCK', time/date is transferred from the TV channel
saved on 'P01' and automatically corrected.
You can either enter another TV channel for transferring the data or
disable the function.
In the line 'Clock preset' select the relevant TV channel with
D or C . To disable, select 'Off'.
9 Check the displayed settings and confirm with OK .
P 'Stored' will appear briefly on the screen.
0 To end, press SYSTEM MENU .
Connection using a component video
(Y Pb Pr/YUV) cable (no progressive
scan)
Component video (Y Pb Pr) is the highest quality picture transmission
option. This is achieved by dividing the video signal into a luminance
signal (Y) and two colour difference signals - red minus luminance (V)
and blue minus luminance (U). As a rule, "Cr, Pr" or "R-Y" is used to
describe the red difference signal and "Cb, Pb" or "B-Y" the blue
difference signal.
These signals are transmitted through separate lines. The connectors of
this cable and the corresponding sockets are usually green (luminance,
Y), blue (U, Pb, Cb, B-Y), and red (V, Pr, Cr, R-Y).
Attention!
If you choose this type of connection, the DVD recorder must already
be connected and completely installed (initial installation complete).
Switching of the signal to the COMPONENT VIDEO OUT sockets is
carried out in a menu that is not yet available during the initial
installation.
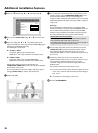
Preparation:
•) The TV set is switched on, and, if necessary, the programme number for the
DVD recorder has been selected.
•) the DVD recorder is switched on.
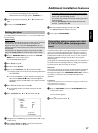
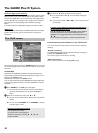
1 Press the DISC MENU and then the SYSTEM MENU button
on the remote control.
P The menu bar appears.
2 Select '
A
' symbol with D or C .
ENGLISH
Additional installation features