


41
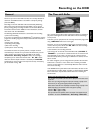
Recording from a video recorder/DVD
player
Please observe:
Most pre-recorded video cassettes or DVDs are copy-protected. If you
try to copy these, the message 'COPY PROT' will appear in the display
of the DVD recorder.
Preparation:
•) Switch on the TV set and, if necessary, select the programme number for the
DVD recorder.
•)Switch on the DVD recorder.
•) Select recording mode (button TUNER , button SYSTEM MENU ,
'Preferences', button C 'Record mode').
1 Connect the video recorder/DVD Player as described in the
chapter 'Connecting additional devices'.
2 Press TUNER to display the picture of the Video recorder/DVD
player on the screen.
3 Use CHANNEL r , CHANNEL q to select the programme
number of the input socket to which the Video recorder/DVD
player is connected. ('EXT1' for EXT1 TO TV-I/O ,'EXT2' for
EXT2 AUX-I/O )
Please observe that for recordings via the front sockets S-VIDEO
(CAM1) / VIDEO (CAM1) /'CAM1'or DV IN (CAM2) /'CAM2'
the recording mode must be selected under 'Camera mode'in
'Preferences' of the system menu.
4 Switch on the video recorder/DVD player.
O In case playback has started automatically, interrupt it with
STOP h or PAUSE 9 .
5 Start recording by pressing REC/OTR n on the DVD recorder
and playback by pressing PLAY G on the video recorder/DVD
player.
a When copying video cassettes, 'NO SIGNAL' appears in the
display of the DVD recorder
b Check whether the cable connectors are properly inserted.
b If the recording is made from a video recorder, change the 'tracking'
setting on the video recorder.
b In case of bad or non-standard video input signals, the DVD recorder
may be unable to detect the signal.
a When copying DVD video discs or pre-recorded video
cassettes, the picture is fuzzy and brightness varies
b This happens when you try to copy DVDs or video cassettes that are
copy-protected. Although the complete cassette/disc is recorded, only
parts without copy protected signal can be played back. This
interference is unavoidable with copy-protected DVDs or video
cassettes.
6 To stop the recording press and hold the red function button on
the remote control until the red light around the n button is
switched off.
Recording from a camera connected to
the front sockets
Using this function, you can store recordings via the front sockets
directly on the HDD. These titles will be automatically protected to
prevent them from being automatically deleted in case the HDD is full.
The symbol '
F' indicates such a protection.
You can edit these recordings on the HDD and transfer (archive) them
later on a DVD+RW/+R disc. How you archive recordings on a
DVD+RW/+R you will read in the chapter 'Recording on a
DVD+RW/+R' in the section 'Archiving (storing) titles on a
DVD+RW/+R'.
Please observe the following:
•) Any programmed recordings (TIMER) will not be carried out during
this operating mode.
•) If there are any recordings in the time shift buffer, they will be
deleted. Therefore, store important recordings on the HDD
( REC/OTR n ). For more information on the time shift buffer, read
the chapter 'The Time Shift Buffer'.
1 Connect the camera as described in the chapter ' Connecting
additonal devices/Connect camcorder to the front sockets'
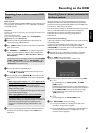
2 Press CAM on the remote control.
P The DVD recorder will switch to camera mode.
3 Select the socket to which the camera is connected using CAM .
O 'CAM1'
For recordings from the VIDEO (CAM1) , S-VIDEO
(CAM1) sockets.
Switching between the two sockets is done automatically. If a
signal is available at both sockets at the same time, the signal at
the S-VIDEO (CAM1) socket has priority. If you change
socket (unplug), you must re-select the socket using
CAM (press twice).
O 'CAM2'
For recordings from the DV IN (CAM2) socket.
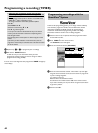
4 Press REC/OTR n to start the recording.
P If no signal is available, no recording will be made or the
recording in progress will be stopped.
P During the playback of a recorded 'copy protected' signal you
will see only that parts of the recording where no copy
protection can be recognised.
ENGLISH
Recording on the HDD