SCREEN SET MENU2
30 English
SETTINGS
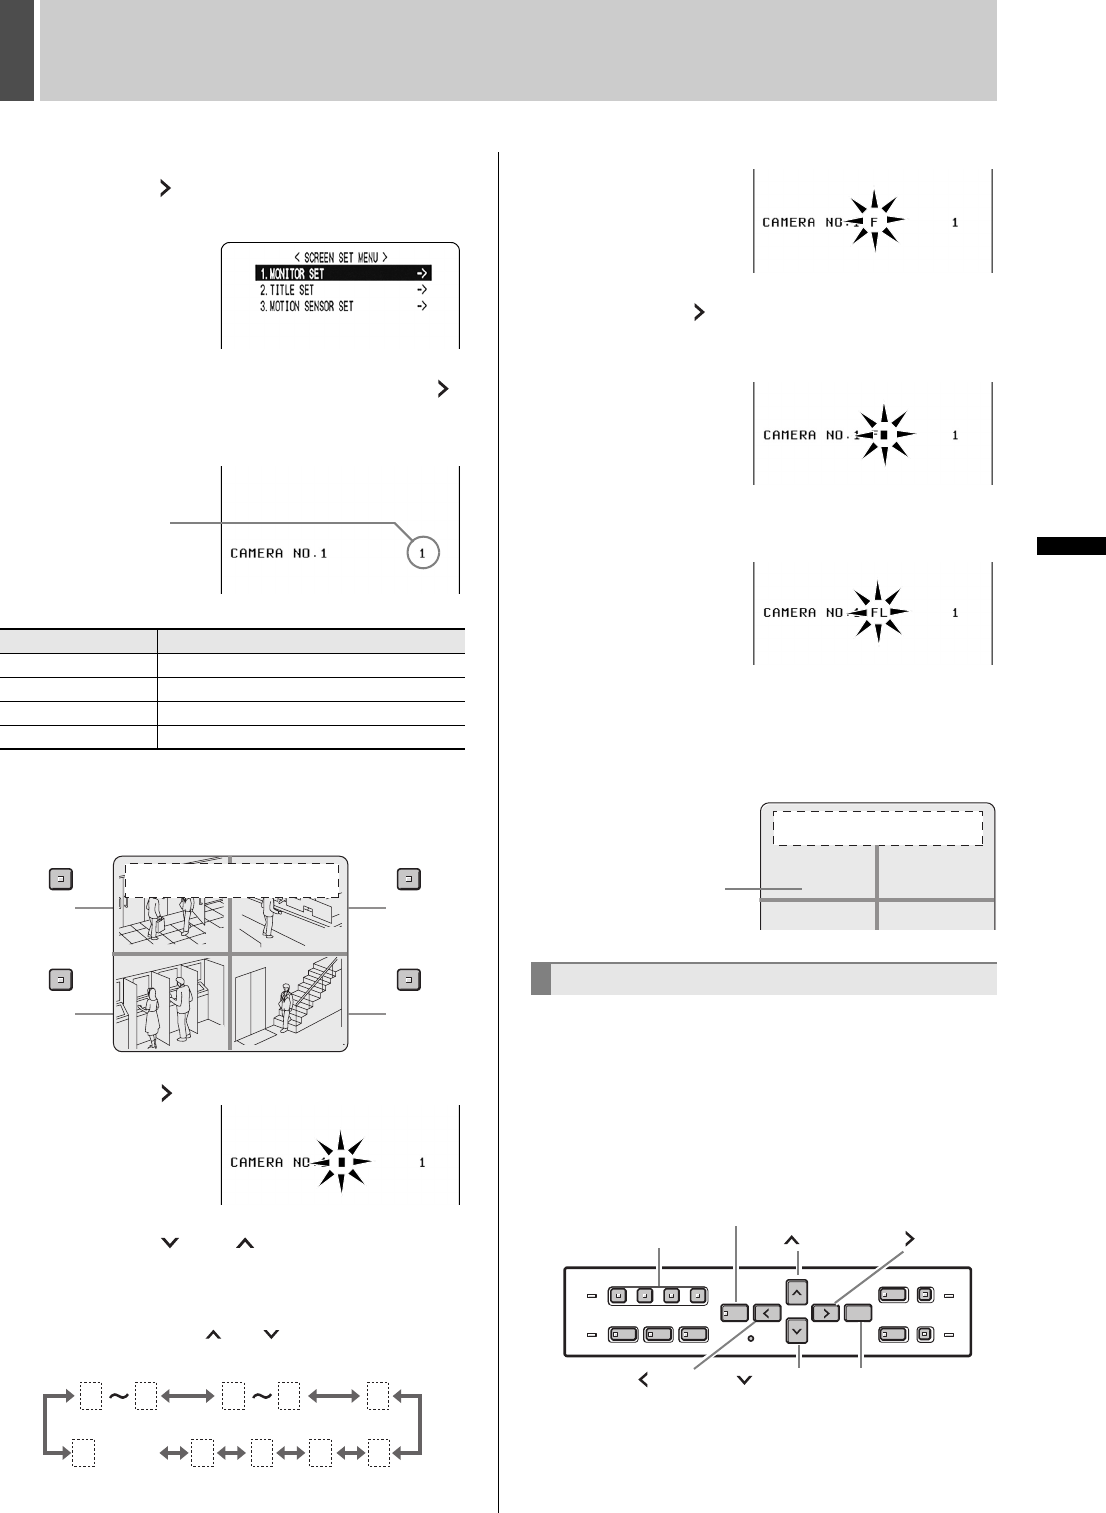
2 Select “2. SCREEN SET MENU”, and
press the [ ] button.
The <SCREEN SET MENU> screen is displayed.
3 Select “2. TITLE SET”, and press the [ ]
button.
The <CAMERA NO.1> screen is displayed.
The default values are shown below.
4 Press the desired [CHANNEL] button to
select the desired camera No.
5 Press the [ ] button to make “
” flash.
6 Press the [ ] or [ ] button to start
entering the camera title.
You can enter up to 10 characters/symbols.
Each time you press the [ ] or [ ] button, the display
toggles as follows:
Input example: “FLOOR 1”
7 Press the [ ] button.
The characters are entered, and the cursor moves to the
right.
8 Repeat procedures 6 to 7 to enter the
second and subsequent charactors.
9 When you have finished making the
settings, press the [EXIT/OSD] button.
The display returns to the normal screen.
The screen displays the set camera title.
By setting the motion sensor on the monitor, any
movement by the subject will automatically activate alarm
recording.
You can set the following items:
z Motion detection position on screen
z No. of camera for which to set motion sensor
z Motion sensor level (Default setting is OFF.)
1 Press the [MENU] button.
The [MENU] button lights, and the <MAIN MENU> screen
is displayed.
CAMERA No. Default value
CAMERA NO.1 1
CAMERA NO.2 2
CAMERA NO.3 3
CAMERA NO.4 4
Camera No.
No.2No.1
No.3 No.4
1
2
3
4
12
34
HI A
20-05-03 08:30:35 AL 00015
*
0
AZ
-
:
.
/
9
(space)
Setting the motion sensor
HI A
20-05-03 08 :30:35 AL 00015
Set camera title
FLOOR 1 2
[ ] button[CHANNEL] buttons [ ] button
[ ] button [EXIT/OSD] button
[MENU] button
[ ] button
e00_l8hbc_hd_6.book Page 30 Wednesday, July 30, 2003 2:34 PM
