English 45
7 RS-485/NETWORK SET
This section describes how to make the RS-485 terminal
connections/settings needed to connect to an external
device, and how to make the network connections needed
to connect to a PC.
You can make digital video recorder menu settings and
monitor images from a PC via a network (LAN). To do so,
connect an Ethernet cable to the LAN terminal on the
digital video recorder’s rear panel.
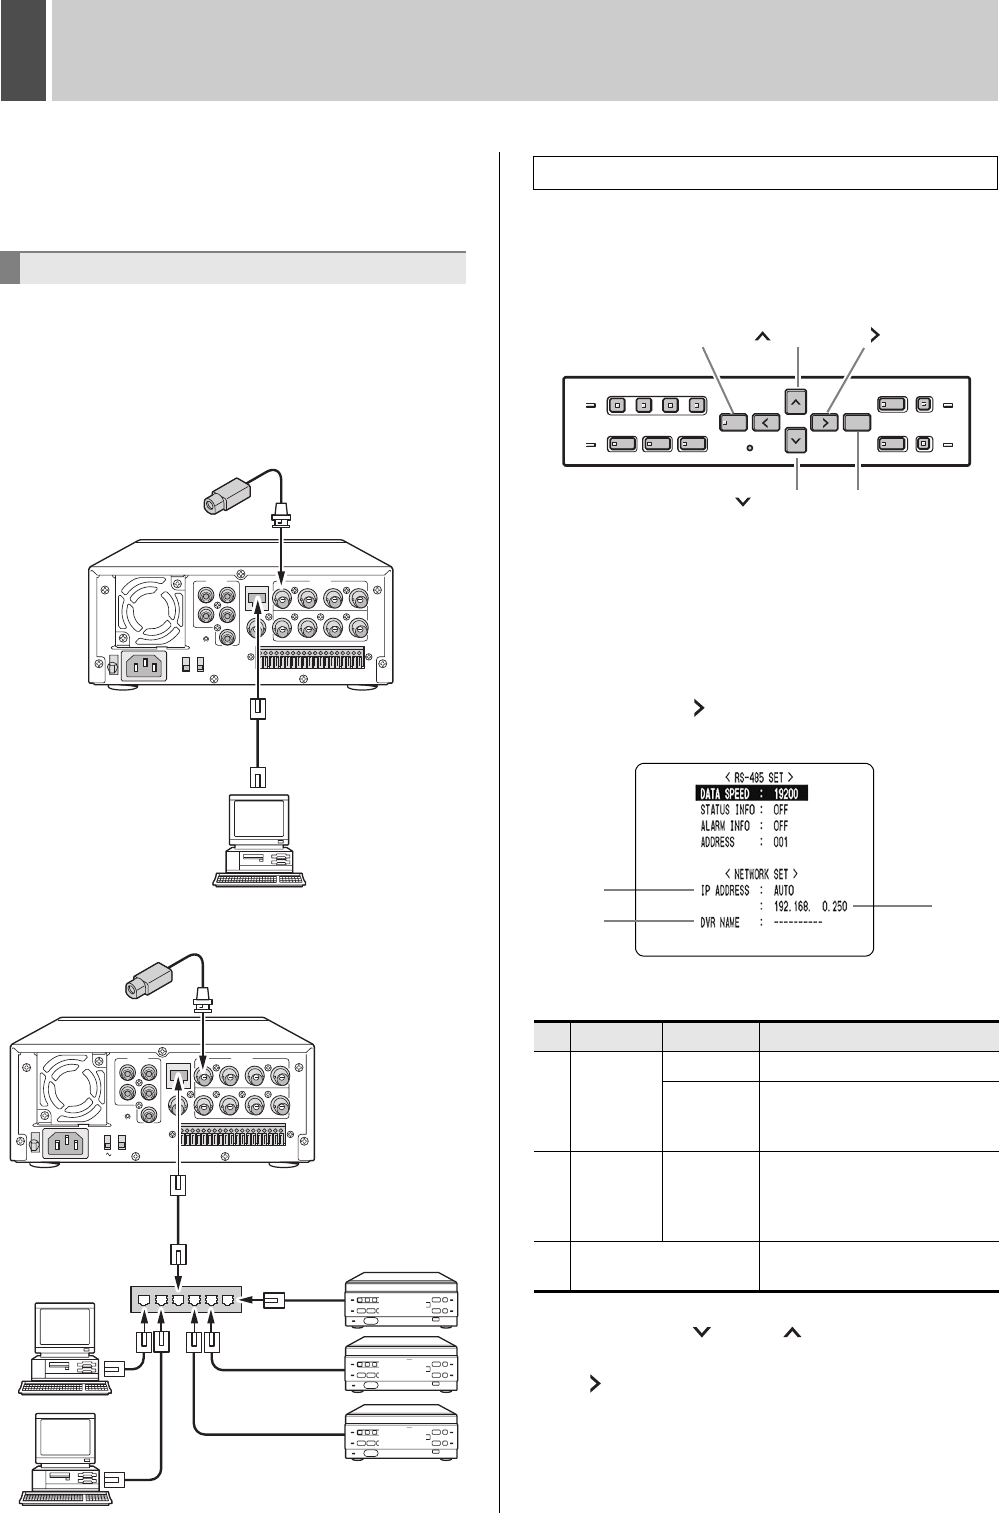
z To connect a PC directly
(Do not use an Ethernet hub.)
z To connect to an intranet
(Use an Ethernet hub.)
How to set the IP address
In the default setting, the IP address is set automatically by
the PC.
To set the IP address manually, follow the procedures
below.
1 Press the [MENU] button.
The [MENU] button lights, and the <MAIN MENU> screen
is displayed.
2 Select “7. RS-485/NETWORK SET”, and
press the [ ] button.
The <NETWORK SET> screen is displayed.
[Settings] ( indicates default setting.)
3 Press the [ ] and [ ] buttons to select
the “IP ADDRESS” item, then press the
[ ] button.
“AUTO” flashes.
Network connections and settings
CCTV Camera
Cross-cable
PC
CCTV Camera
Straight-cable
SWITCHING HUB
PC
DVR
PC
DVR
DVR
Settings for connecting to a PC or network
Item Setting Description
(1)
IP
ADDRESS
AUTO Automatically set by the PC.
MANUAL
You can set the last 3 digits
between 1 and 250 from the
unit.
(2) ADDRESS
001 to 250
(250)
In “AUTO,” the address set by
the PC is displayed.
In “MANUAL,” set the address
for each recorder connected.
(3)
DVR NAME
(Display only)
Set at the PC.
[ ] button[MENU] button [ ] button
[] button[EXIT/OSD] button
(3)
(1)
(2)
e00_l8hbc_hd_6.book Page 45 Wednesday, July 30, 2003 2:34 PM
