RECORDER MENU3
English 37
3 Select “4. TIMER REC SET”, and press
the [ ] button.
The <TIMER REC SET> screen is displayed.
4 With the <TIMER REC SET> screen
displayed, press the [MENU RESET]
button.
All the timer settings are erased.
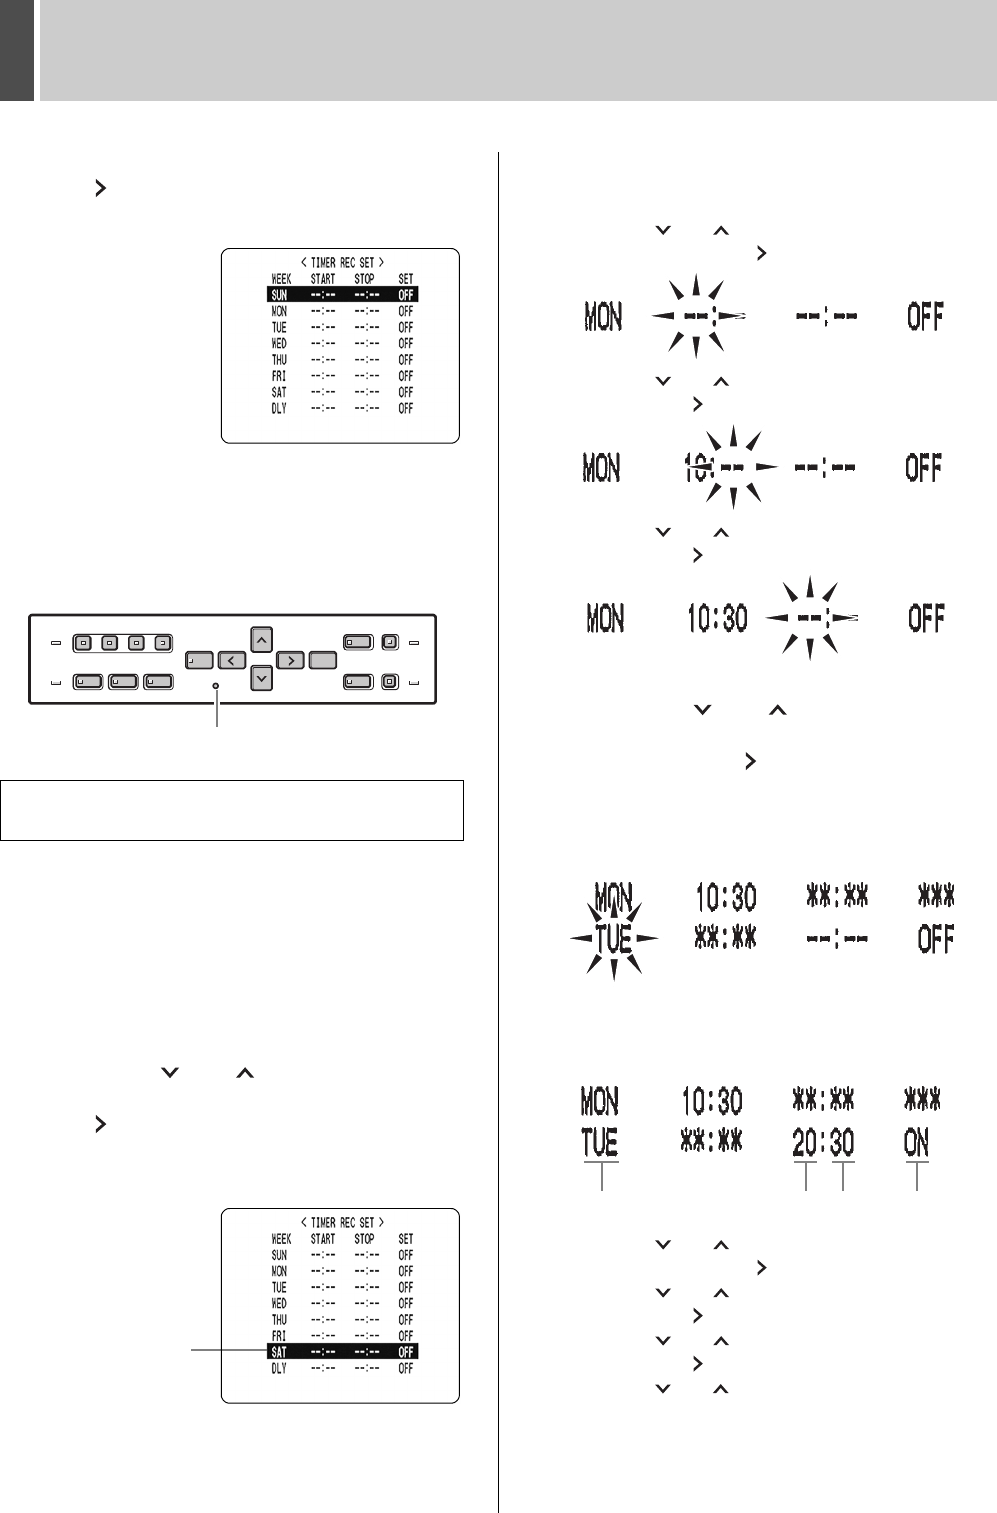
Follow the steps below to set timer recordings spanning
more than 24 hours. These settings are made using lines 7
(initially “SAT”) and 8 (initially “DLY”) of the <TIMER REC
SET> screen.
Example:
Timer recording from 10:30 Monday to 20:30
Wednesday
1 Press the [ ] or [ ] button to move
the cursor to the line 7 (SAT), then press
the [ ] button.
“SAT” in the “WEEK” column flashes.
You can change the setting of the flashing item.
2 Set the items in the “WEEK” and
“START” columns.
(1) Press the [ ] or [ ] button to change “SAT” to
“MON”, then press the [ ] button.
(2) Press the [ ] or [ ] button to change “--” to “10”,
then press the [ ] button.
(3) Press the [ ] or [ ] button to change “--” to “30”,
then press the [ ] button.
3 Press the [ ] or [ ] button to change
the “STOP” time from “--:--” to “**:**”,
then press the [ ] button.
The “DLY” item on the line 8 automatically changes to
“TUE” (8 days after “MON” on line 7), and flashes. Items
that don't need to be set are displayed as asterisks (*).
4 Set the end “WEEK” and “STOP” time.
Switch “SET” to “ON”.
(1) Press the [ ] or [ ] button to change “TUE” to
“WED”, then press the [ ] button.
(2) Press the [ ] or [ ] button to change “--” to “20”,
then press the [ ] button.
(3) Press the [ ] or [ ] button to change “--” to “30”,
then press the [ ] button.
(4) Press the [ ] or [ ] button to change “OFF” to “ON”.
5 Press the [EXIT/OSD] button.
The display returns to the normal screen.
Setting timer reservations spanning more than
24 hours
[MENU RESET] button
Line 7
(1) (2) (3) (4)
e00_l8hbc_hd_6.book Page 37 Wednesday, July 30, 2003 2:34 PM
