18
100
EDIT
OPEN/
CLOSE
POWER
SKIP
SEARCH
AUDIO
TIMER
ON/OFF
TITLE
MENU
ANGLE
SETUP/
FUNCTION
DNR
RETURN
REV FWD
SET/
ENTER
VCR PLUS
+
TIMER PROG.
REC MODE
PROGRAM
AM/PM ERASE
STILL/PAUSE
REC
PLAY
STOP
SLOW
SKIP
F.ADV
ORIGINAL/
PLAY LIST
DISC
TIMER
CH
DISPLAY
ON
SCREEN
POWER
INPUT
VOL
TV CONTROL
CH
ZOOM
INPUT
Operating a TV Using the
Remote Control
(
Universal Remote Control
)
The Universal Remote Control may operate the
basic functions of 21 different types of TVs.
To enter the Manufacturer’s Code for your TV,
follow the instructions below.
There is no guarantee that the universal
remote control will function with your TV.
Setting the
Manufacturer’s Code
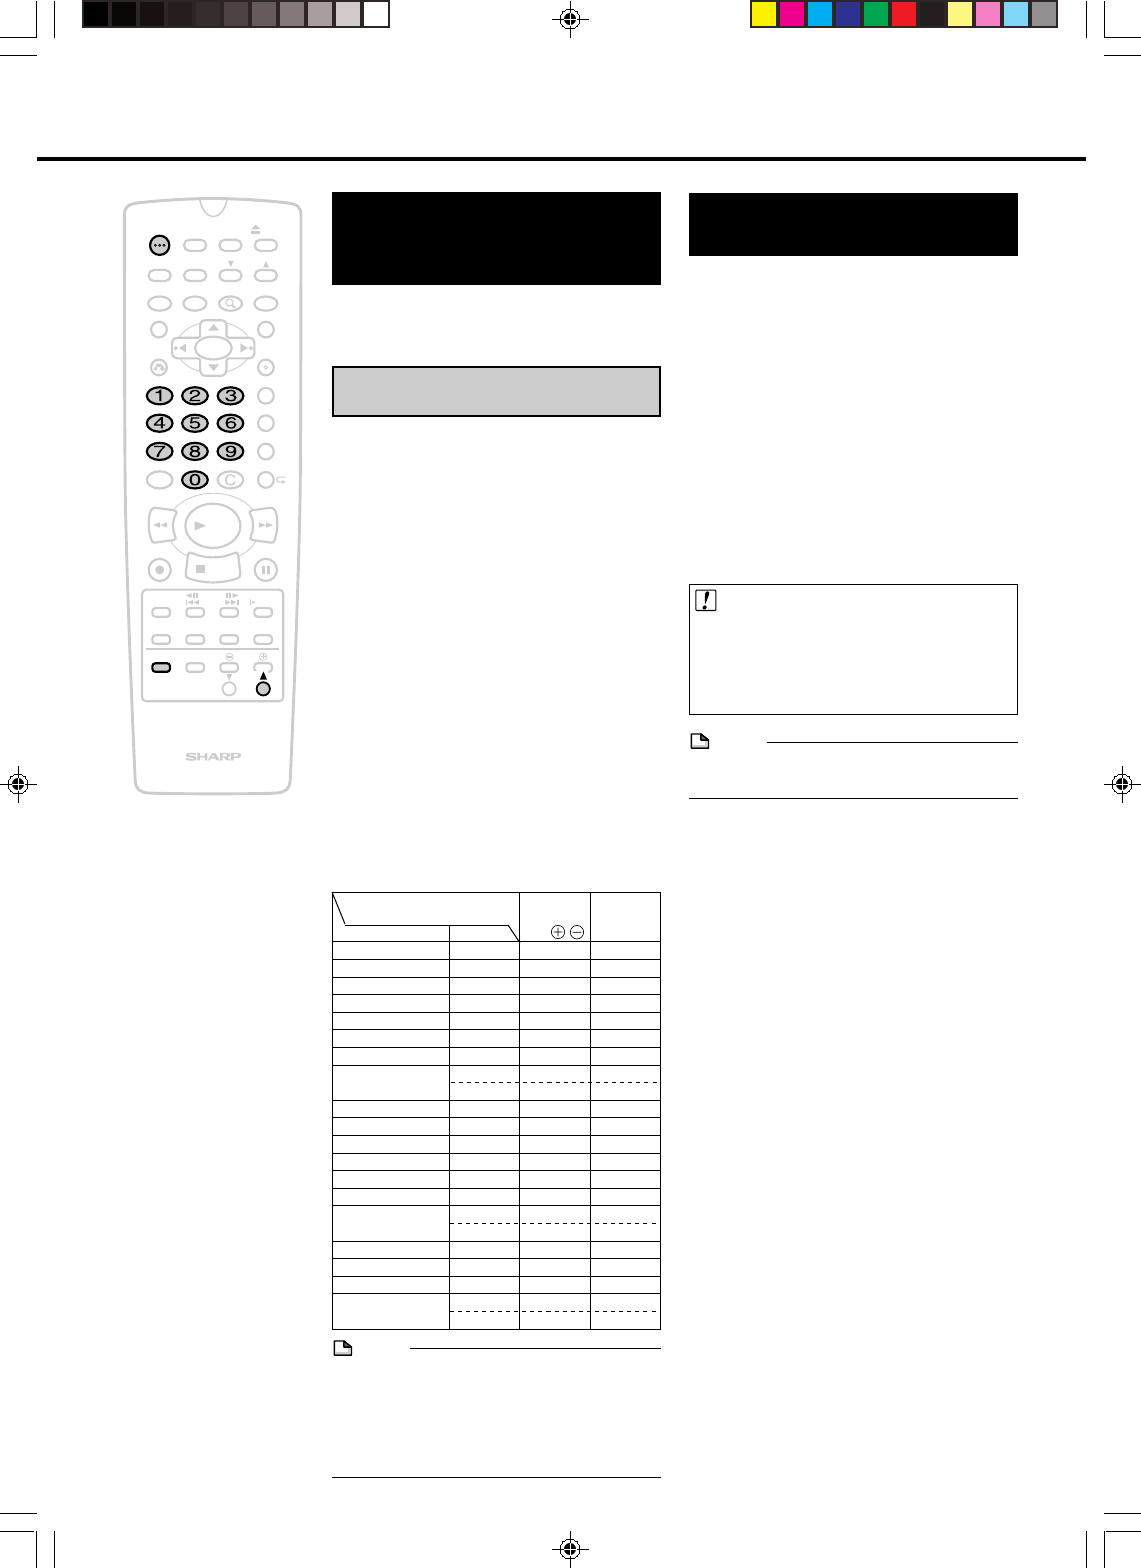
1
Press POWER and CH ' of TV
CONTROL simultaneously.
2
Enter the 2-digit Manufacturer’s
Code with the number buttons
(Ex. 02-“0”, “2”) within 10
seconds after releasing POWER
and CH ' of TV CONTROL.
3
Point the remote control unit
towards the TV and then press
POWER of TV CONTROL.
• If the TV turns on/off, setup was
successful. If not, repeat the proce-
dure using another code.
Refer to the list below for the Manufacturer’s Code
and the buttons which work with each brand.
Major Components
Setting the Remote
Control Code
• There are two types of codes (remote
control codes) for operating this recorder
with the remote control (RC1 and RC2). If
you operate this recorder with the remote
control while using with another SHARP
DVD recorder or DVD player placed next to
it and both units end up being operated
simultaneously, switching the remote control
code (for both the recorder and the remote
control) to one of the two signals (RC1 or
RC2) will let you operate only the recorder.
• Make sure to set the recorder and remote
control to the same remote control code.
You will not be able to operate the recorder
with the remote control if different remote
control codes are used.
Important!
If the remote control codes of the recorder
and remote control are different, the remote
control code will flash on the display of the
recorder. Reset the remote control number
to the code flashing on the display.
Note
• The remote control code of the remote become
“RC 1” when you change the batteries.
Setting the Remote
Control Code of the
Recorder
1
Press POWER to turn off the
recorder.
2
Press and hold CHANNEL" and
' on the recorder together for
more than 5 seconds.
• Each time the button is pressed, the
code of the recorder toggles between
“RC-1” and “RC-2”.
• At this point, the recorder can no
longer be operated with the remote
control. Next, set the remote control
code for the remote control.
Setting the Remote
Control Code of the
Remote
Example: Setting the “RC2”.
1
Press and hold POWER and 2
together for more than 5 seconds.
• When you set the code to “RC1”, press
and hold POWER and 1 together.
2
The recorder is turned on.
Brand
EMERSON
FISHER
FUNAI
GE
GOLDSTAR
HITACHI
JVC
MAGNAVOX
MITSUBISHI
PANASONIC
PIONEER
RCA
SAMSUNG
SANYO
SHARP
SONY
TECHNOL ACE
TOSHIBA
ZENITH
Code
19
17
06
07, 09
18
15
16
09
11
14
13, 21
03
07, 09
20
17
01
02
10
04
12
05
08
POWER
CH
''
''
'/
""
""
"
VOL /
×
×
×
×
×
×
×
×
×
×
×
×
×
×
×
×
×
×
×
×
×
×
INPUT
×
×
×
—
—
×
×
—
×
×
×
×
—
×
×
×
×
×
×
×
×
—
Buttons on the Remote
NOTE
• If the batteries in the remote control unit are
changed, the code settings must be re-entered.
• Some brands have more than one code
listed above, due to changes in the codes.
In such cases, try another code to find the
code that operates your TV.
DV_RW2U#p12-18.p65 03.1.14, 9:17 AM18


