


Contents Index
Contents
14
Index
14
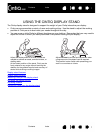
STEP 1: HARDWARE INSTALLATION
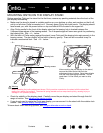
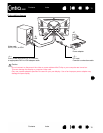
In this step, connect the video, USB, and power cables.
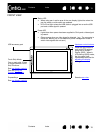
If you have not already done so, mount Cintiq on the display stand
.
Important: Never connect or disconnect the video or power cables while your computer or pen
display are powered on. This can damage the display or video card.
1. Turn off your computer.
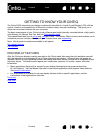
2. Determine if your computer has a digital (DVI) or analog (VGA) port. If your computer has only one
video port, unplug your previous monitor or add a second video card. For best results, connect Cintiq
to a DVI-D or DVI-I card.
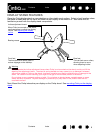
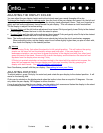
3. Follow the below instructions for your video port. Make sure to tighten any connector thumbscrews.
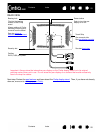
See – A – in the connection diagram
.
4. Plug the USB connector into an available USB port on your computer or USB hub attached to your
computer. See – B – in the connection diagram
.
5. Connect the power adapter to Cintiq. See – C – in the connection diagram
.
6. Connect the adapter power cable and plug into an AC outlet. See – D – in the connection diagram
.
7. Turn on the pen display. The power LED will glow orange.
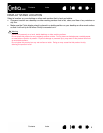
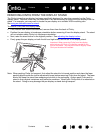
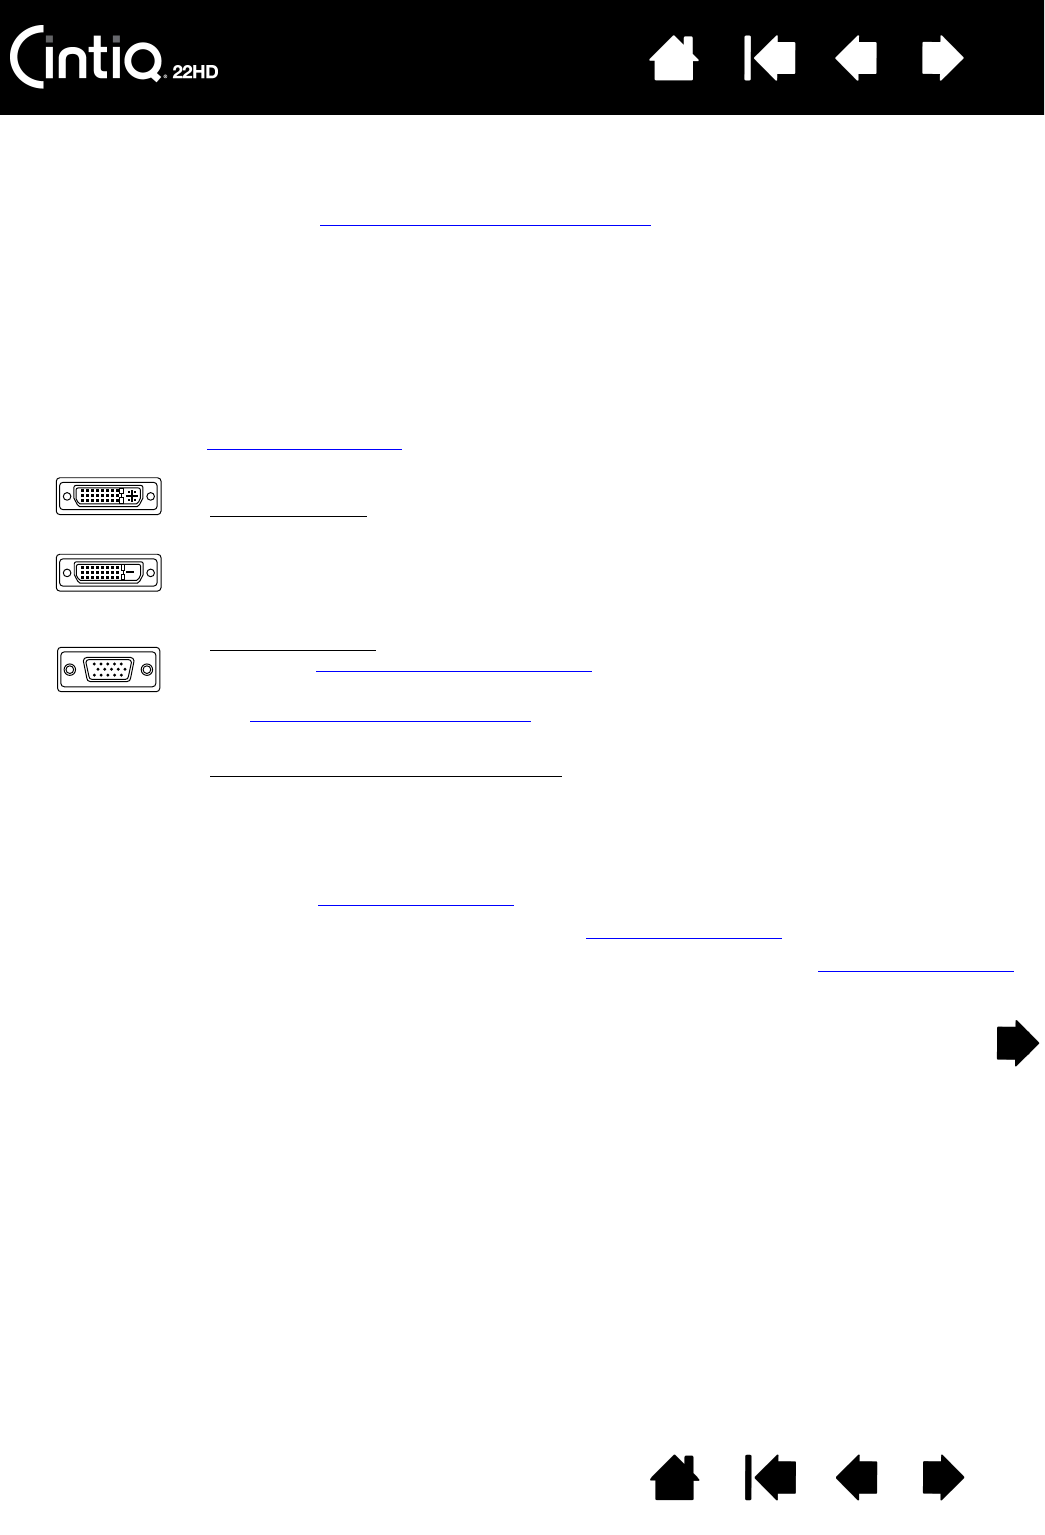
For DVI operation, connect the Cintiq video cable to the DVI port located on your
computer video card.
The Cintiq video cable has a DVI-D connector. Cintiq can be connected to either a DVI-D
or a DVI-I card.
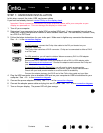
For VGA operation
, you will need to obtain a Wacom accessory DVI-I to VGA adapter
cable. See ordering parts and accessories
.
Remove the DVI-D cable from Cintiq and replace it with a DVI-I to VGA adapter cable.
See cable removal and replacement
. Connect the adapter cable between the Cintiq and
your video card.
If connecting to a Mac Mini DisplayPort
, you will need to obtain an appropriate
active adapter cable, such as those offered by Kanex, Apple, or other manufacturers.
Check with your local product retailer or an online outlet for availability.
Connect the adapter between the DVI-D end of the Cintiq video cable and your Mac.
DVI-I
DVI-D
VGA