


78-8130-6150-0 Rev G 33
4. Press Aux [SK Toggle] until the desired frequency is displayed in the softkey
command [9] (“Aux” 512, 560, 333 Hz, or user defined frequencies).
5. Press Locate/OK [5] to return to Locate mode.
10. Locating in Directional Peak Mode
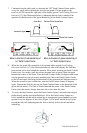
The following are instructions for locating a buried pipe or cable using the direct connect
method and the directional peak (Dir Pk) mode. Other methods of connection and
tracing modes/features are explained in previous sections.
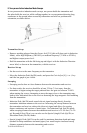
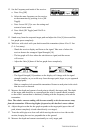
1. Insert the ground rod into the ground, perpendicular to the suspected target path.
2. Remove the grounding from the near-end of the target cable/pipe.
Note: Never connect or disconnect the transmitter when the unit is on.
3. Connect the red lead of the transmitter to the shield, neutral, or deenergized target
conductor.
4. Connect the black lead of the transmitter to the ground rod.
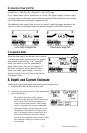
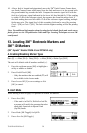
5. Perform a battery check by pressing and holding off [T-1].
6. Power on the transmitter by pressing Ohms [T-2] once for Ohm-meter mode. An
indicator flag will be displayed above the ohms symbol (Ω) in the Digital Display
[T-4].
a. A solid tone from the transmitter indicates a complete circuit with a good
ground.
b. A beeping tone from the transmitter indicates a usable ground. An attempt
should be made to improve the ground.
c. No tone from the transmitter indicates a poor, or no ground. The transmitter will
display ‘OL’ in this instance. An attempt should be made to improve the ground.
Verify that the far end is grounded.
7. Press Trace [T-3] to set the transmitter to Trace mode.
8. Select a frequency on the transmitter by pressing Trace [T-3]. The unit will cycle
through the available frequencies (577, 8K, 33K, 200K, and ALL).
9. Press On/Off (Power) [1] to power on the receiver.
10. Press Locate/OK [5].
11. Press Cable/Pipe [SK].