


Page 92
Chapter 4
Installation Instructions
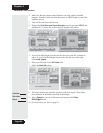
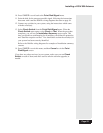
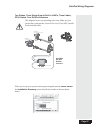
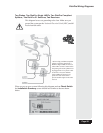
2. Make sure the check m ark is next to the sa tellite your dish w ill be pointed
toward.
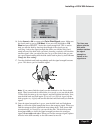
3. If your
Point Dish/Signal screen looks like the one on the left, continue to
step 4. If your
Point Dish/Signal scree n looks like the one on the right,
select
Peak Angles and the Dish 300 option.
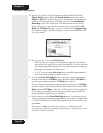
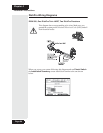
4. Select
Peak Angles.
5. Use the num ber buttons on the r emote to enter your ZIP code to get the
necessary azimuth and ele vation. Write these numbers down in the spaces
provided in the margin.
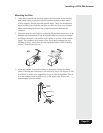
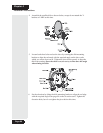
6. Mount the dish antenna f ollowing the mounting instructions that came with
it.
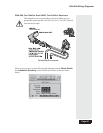
7. Connect an RG-6 cable from the DishPro S
AT IN connection on the receiver
directly to the DishPro LNBF on the Dish 300.
Make sure there a re no
multi-dish switches between the LNBF and the DishPro receiver.
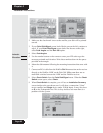
8. Select
Check Swi tch from the Point Dish/Signal menu. When the Check
Switch
screen opens, selec t Che ck.
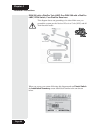
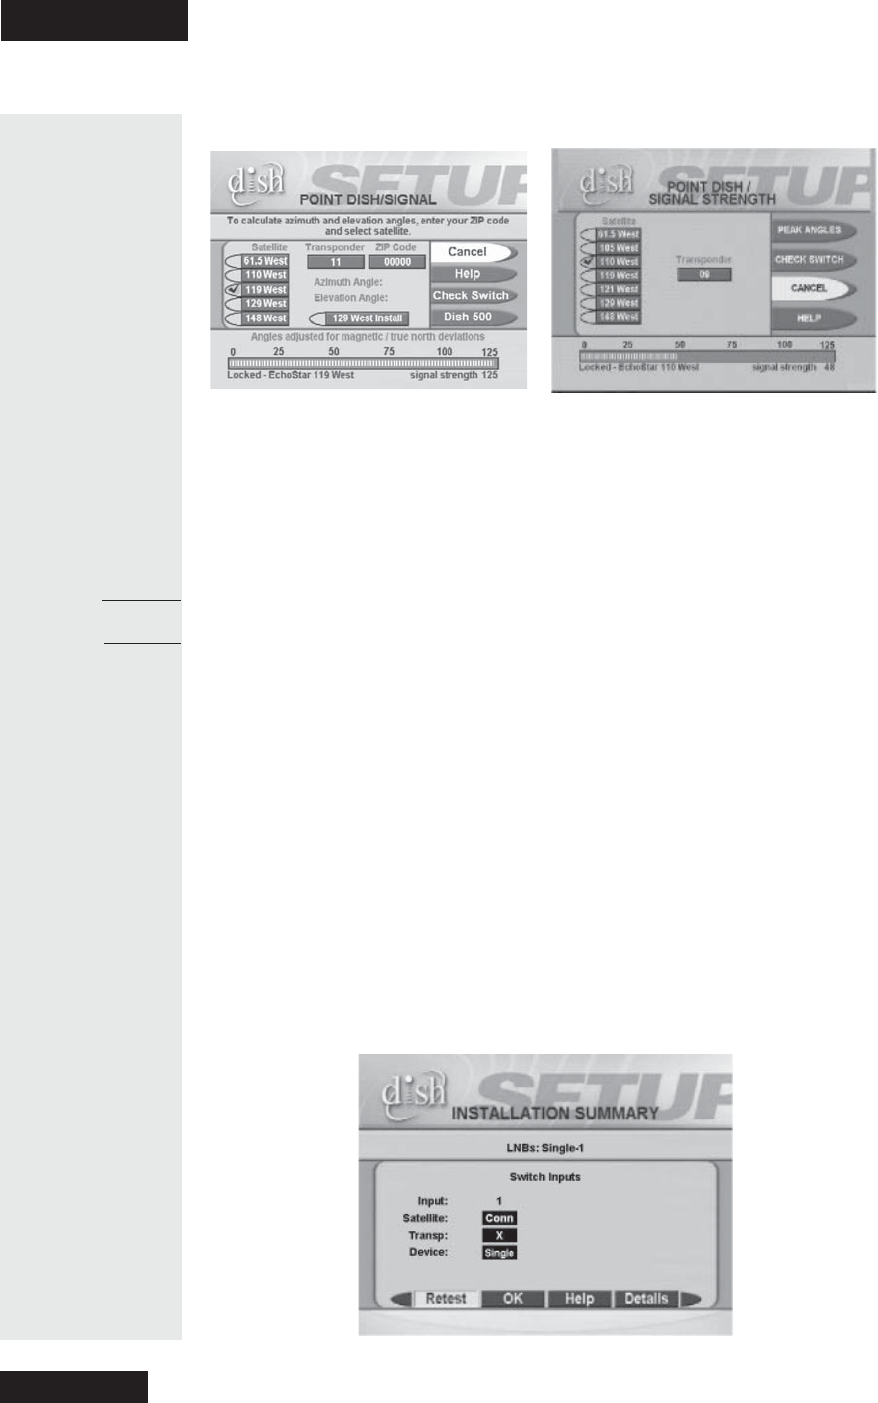
9. When
Check Switch is c omplete, you will see an Instal la tio n Summary
screen similar to the one shown next. It will show a connection (“Conn”
next to satellite) and
Single device under 1 (Dish Input). It may also show
an X on the Transponder line. This is okay and does not mea n there is a
problem with the system.
Azimuth:
Elevation: