User’s Manual
22
When the DVR is in the Time & Event mode, the DVR will follow the Time settings and the icon displays.
The DVR follows the Event settings and the
icon displays.
Highlighting the box beside Record Schedule and pressing the button allows you to change the time
range that the scheduled recording will take place.
Highlighting the box beside Time Record ips and pressing the button allows you to set the images per
second for Time recording. You can select from 0.10 to 30.0 (25.0 PAL) images per second.
Highlighting the box beside Time Record Quality and pressing the button allows you to set the recorded
image quality for Time recording. You can select from: Very High, High, Standard and Low.
Highlighting the box beside Event Record ips and pressing the button allows you to set the images per
second for Event recording. You can select from 0.10 to 30.0 (25.0 PAL) images per second.
Highlighting the box beside Event Record Quality and pressing the button allows you to set the recorded
image quality for Event recording. You can select from: Very High, High, Standard and Low.
Highlighting the box beside Event Record Dwell and pressing the button allows you to set the length
of time you would like to record for the associated event.
Highlighting the box beside Pre-Event Record Dwell and pressing the button allows you to set the length
of time you would like to record prior to the associated event. Selecting None will disable the pre-event
recording function.
Setting up the Advanced Schedule…
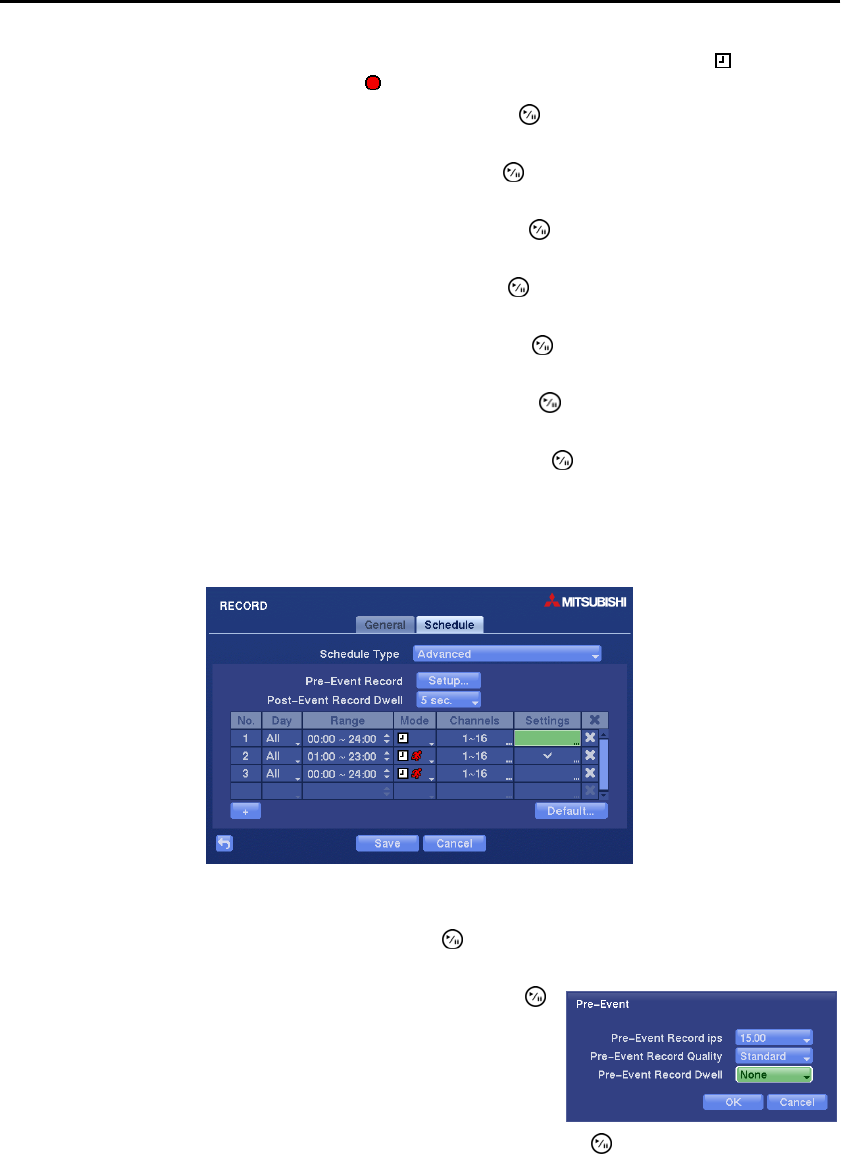
Figure 13 ─ Schedule (Advanced) setup screen.
Highlight the box beside Schedule Type and press the
button. Selecting Advanced allows you to set
up the Advanced recording schedule.
Highlighting Setup… beside Pre-Event Record and pressing the
button allows you to set up the pre-event recording. Set up the ips,
Quality and Dwell for pre-event recording. Selecting None will disable
the pre-event recording function.
Highlighting the box beside Post-Event Record Dwell and pressing the button allows you to set the
length of time you would like to record for the associated event.
