34 Pelco Manual C1995M-A (10/01)
CAMERA SETUP (CAMERA BUTTON)
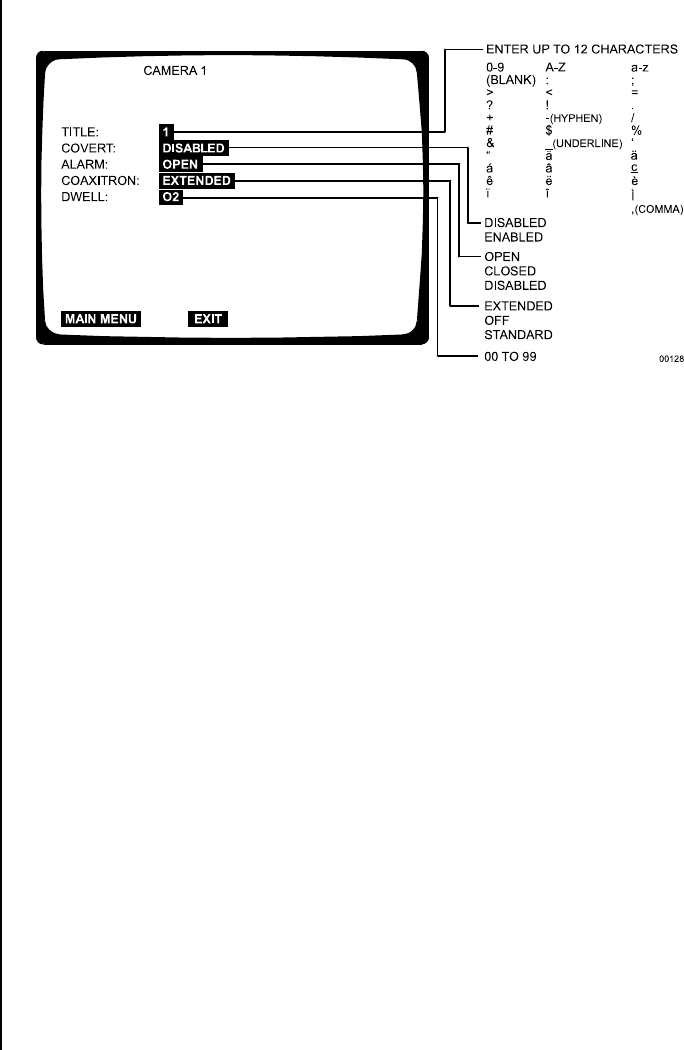
Figure 24. Camera Menu
Each of the four cameras has its own setup screen. To program a camera input:
1. Select CAMERA (1-4) SETUP on the Main Selection menu or press the desired
CAMERA button for about three seconds until the Camera menu appears. Type the
password, if requested. The currently selected menu item blinks.
2. Use the arrow buttons to move between items on the screen.
3. When the menu option you desire is highlighted (blinking), press the +/- button to
cycle through the options to select the one you want. Use the right arrow button to
advance to the next character position when titling a camera.
Title
Enter a title for this particular camera.
Covert
DISABLED – Use when you want the camera view to appear on the monitor. This is
the default.
ENABLED – Use when you want to record a camera view but do not want the picture
to appear on the monitor. The monitor will show only the camera number on a black
background; however, the videotape will record what the camera sees. (You might use
this if you do not want the operator or visitors to see the picture but want it recorded.)
You can set each camera individually.
(If you play back the tape on the same equipment, any covert picture will still appear
blanked. Change the setting to DISABLED to see the picture.)
Alarm
Refer to the
System Setup
section for an explanation of normally closed and normally
open operation. You can also disable the alarm function.
